MTS is one of the best satellite TV providers. Further in the review, we will talk about the specifics of MTS television, as well as how to install and configure a satellite dish yourself at home.
- Features of satellite television from MTS
- Devices and equipment for installation and connection of satellite MTS antenna
- Antenna
- Converter
- Cam-module or prefix
- Installation and configuration of the satellite MTS antenna
- Antenna assembly
- Choosing a place to install an MTS satellite dish
- Mounting satellite MTS dish
- Set-top box HD
- Signal Check
- Setting the dish to receive channels
- Setting up the cam module
- Setting up the MTS set-top box
- Possible problems and solutions
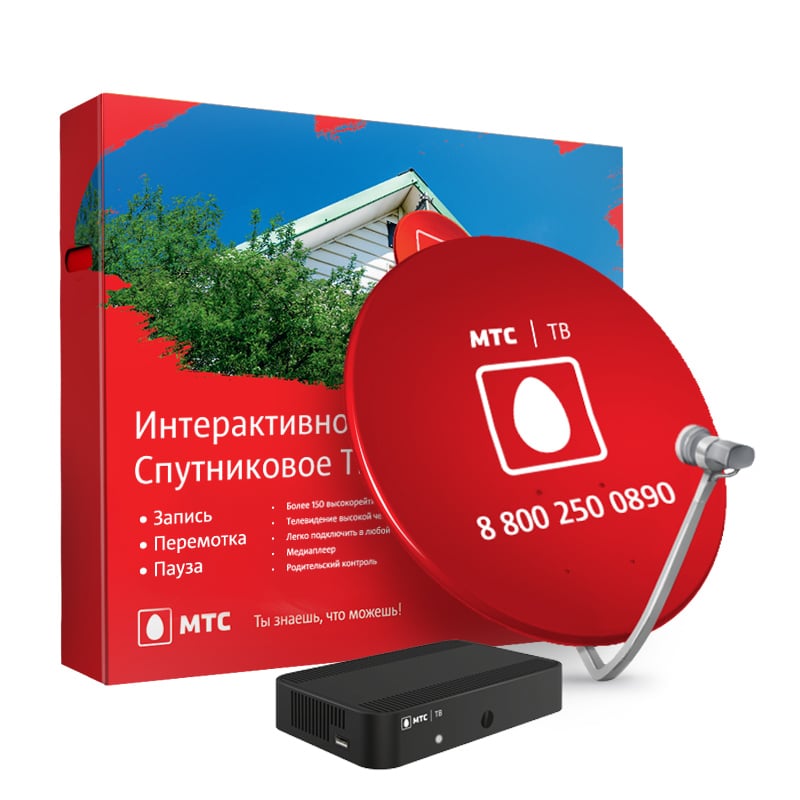
Features of satellite television from MTS
MTS entered the satellite television market relatively recently. But thanks to the high quality of broadcasting, a large selection of TV channels and the moderate cost of MTS TV services, it is actively gaining popularity. The price of installation equipment varies from 3600 to 4490 rubles, the monthly subscription fee is 250. The main package includes 232 channels in excellent quality, 40 of them in HD format. All TV channels are presented in 12 categories. And in this abundance, everyone can find content to their liking. MTS also provides a number of additional services – these are interactive services, a TV guide, TV replay, parental control, a media player. It is possible to record TV broadcasts on external media. At any convenient time, you can watch movie premieres.
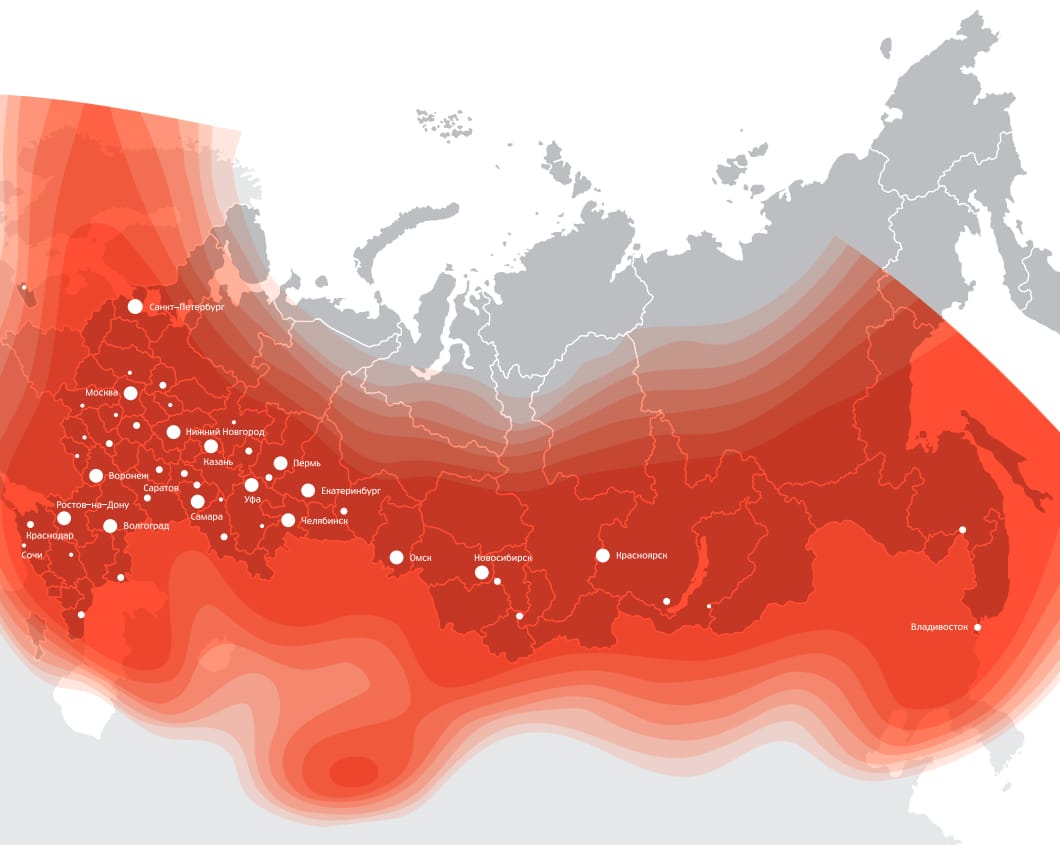
Important! The coverage area of MTS satellite television covers the entire territory of Russia. The exceptions are the Kamchatka Territory and the Chukotka Autonomous Okrug.
Devices and equipment for installation and connection of satellite MTS antenna
Note! When choosing equipment, it is important to consider the region of residence and the characteristics of the TV.
Antenna
When choosing an antenna, pay attention to the diameter. For most regions, the optimal diameter of a satellite dish is 0.6 meters. Antennas with a diameter of 0.9 meters are recommended to be installed in regions with a weaker signal, for example, in the Kaliningrad region, Primorsky Krai, the Republic of Sakha, Yakutia and Karelia. You can also leave the antenna from the previous provider. When setting it up, it is enough to redirect it to another satellite, and change the converter to a linear one.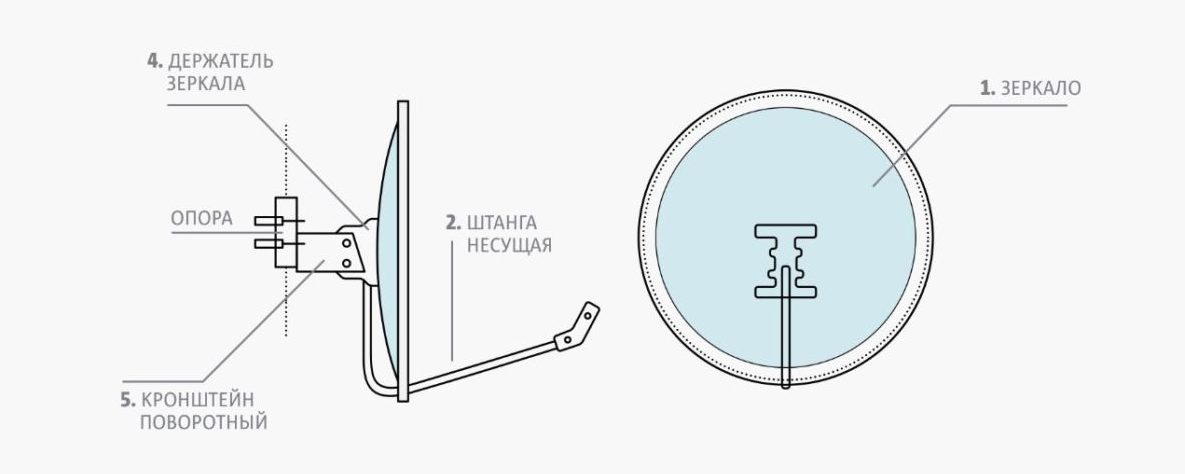
Converter
The converter is attached to the antenna. Responsible for signal reception, its further transformation, and transmission via cable to TV. The number of inputs on the converter must match the number of connected TVs. The device is included in the standard equipment package from MTS.
Cam-module or prefix
Here we pay attention to the characteristics of the existing TV. A kit with a cam module is suitable for TVs that have a built-in DVB-S2 receiver and support the HEVC format. For other TVs, we purchase a TV set-top box from MTS. The number of cam modules or set-top boxes must match the number of TVs. You will also need a bracket, a coaxial cable for connection, 2 ° F connectors and other little things. All this is included in the company’s basic package of installation equipment.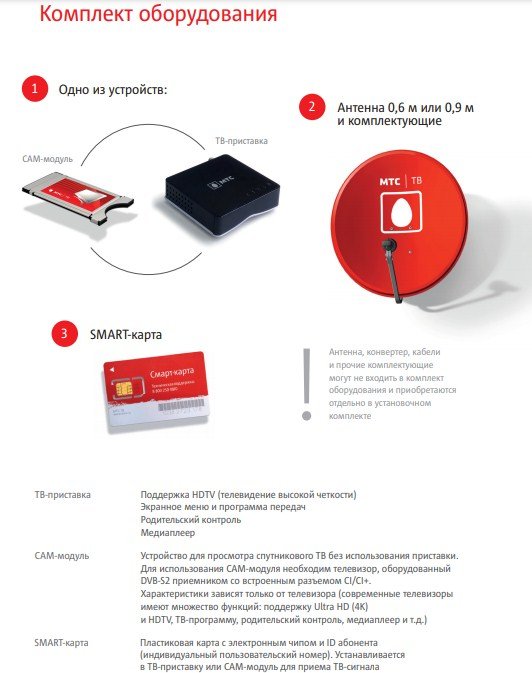
Installation and configuration of the satellite MTS antenna
Note! On the territory of the whole of Russia, with the exception of the Moscow and Leningrad regions, the offer “Installation as a gift” is valid. Under the terms of the promotion, in case of purchasing an annual subscription “Advanced Plus”, MTS gives a 100% discount on the installation of equipment. The subscription price is 4 thousand rubles.
You can install and configure the plate yourself.
Antenna assembly
After acquiring the necessary equipment, we proceed to the assembly of the antenna. The corresponding instructions are attached:
- All nuts, except for those that are responsible for fastening to the holder, carefully tighten.
- We connect the converter to the plate.
- We assemble the bracket separately. Until we attach.
Choosing a place to install an MTS satellite dish
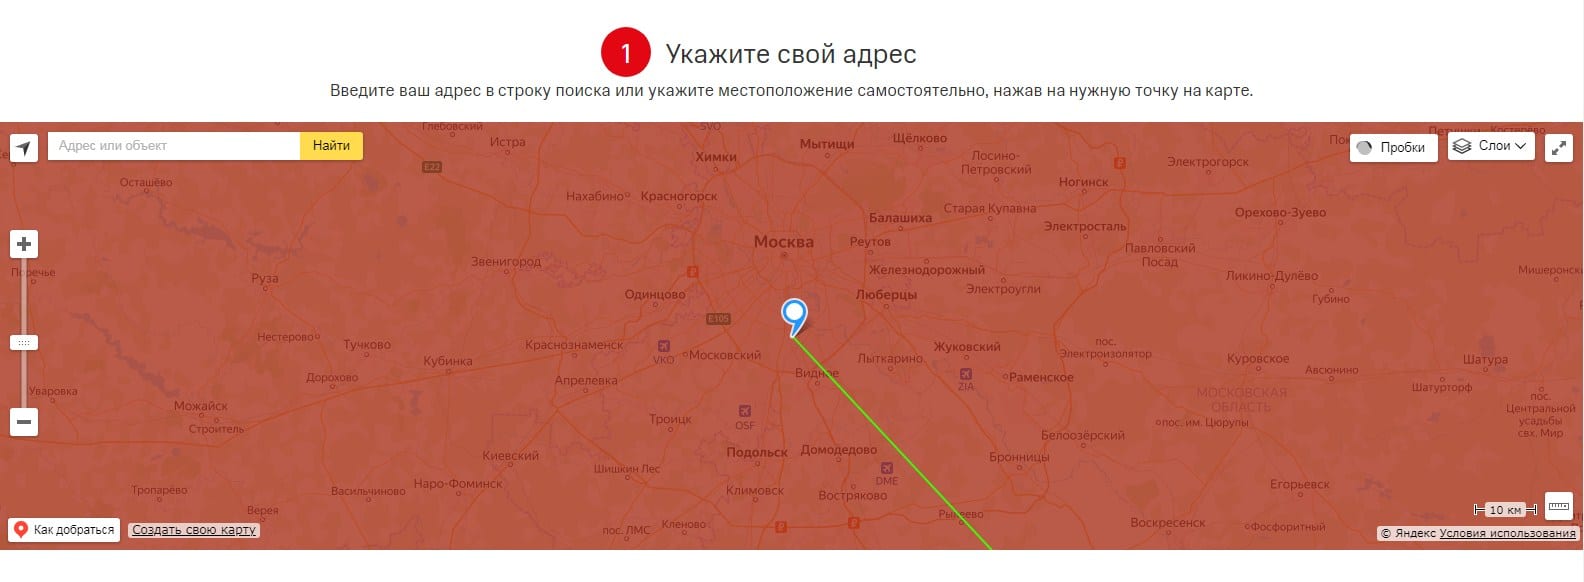
The MTS antenna picks up a signal from the ABS-2A satellite. Accordingly, it should be directed towards him. Determine the location of the satellites, choose the optimal direction and place for the antenna in several ways. The first option is to use the service of the official website of the company:
- We go to the MTS website and select the appropriate tab (https://moskva.mts.ru/personal/podderzhka/sputnikovoe-tv/ya-uzhe-vash-klient/nastroyki/samostoyatelnaya-nastroyka-oborudovaniya).
- Enter your home address in the empty field.
- Further, information about the desired direction will appear on the site – it will be shown by an arrow.
- The beacon can be moved manually and around the house. This will help determine the most suitable place for the plate.
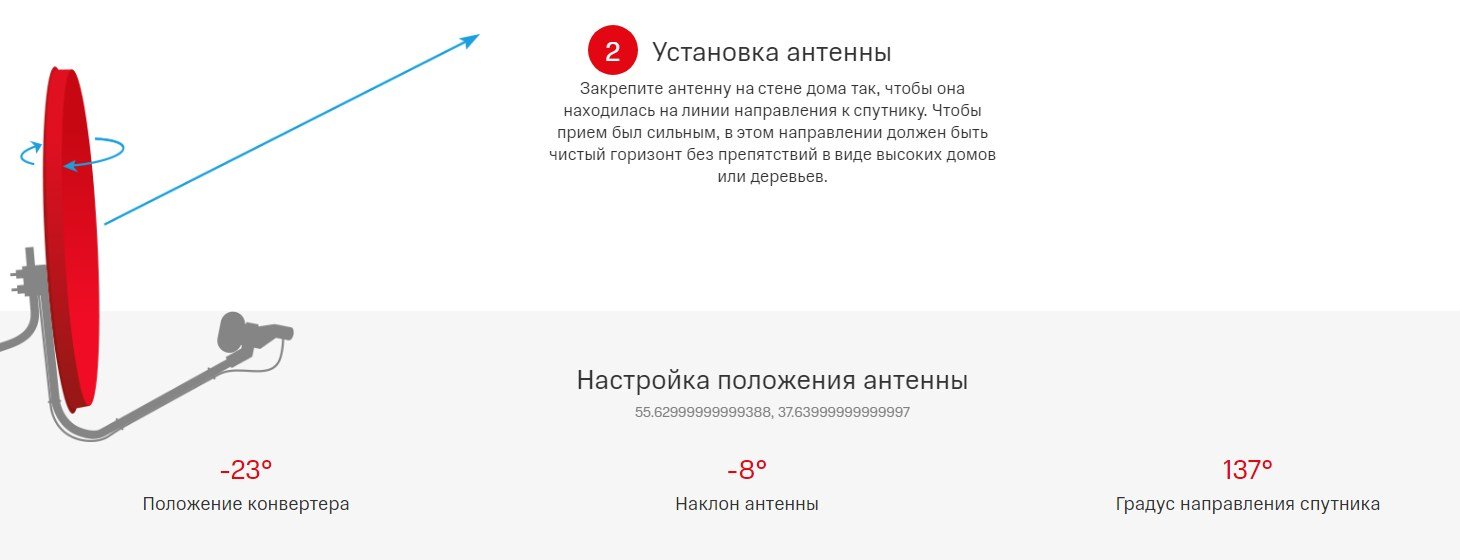
- MTS will also calculate the optimal angle of inclination of the antenna and the rotation of the converter.
- Download and install the application.
- From the proposed list, select the desired satellite – ABS-2A.
- We click on the magnifying glass.
- We bring the phone to the intended place for installing a satellite dish.
- We get all the necessary information.
 In order to select the location of the plate, you can use other applications. Satellite Director, Dishpointer Pro or Multifeed will be useful. The third option is to use a special device. In this case, the Satfinder dvs-sf 500 device is suitable. The necessary information is entered into it. After that, all the necessary data will also be determined.
Trees, other houses or power poles blocking the antenna will degrade the signal quality. Therefore, a satellite dish is installed only where there are no visible obstacles.
Self-installation and subsequent configuration of a satellite dish from MTS: https://youtu.be/jzM5EAMh14I
Mounting satellite MTS dish
After choosing the optimal location, we proceed to the installation of the device.
- We make holes and fasten the support of the holder.
- According to the instructions, we attach the bracket and the converter rod to the plate.
- We install the assembled structure on the support. We take into account the recommended rotation and angle of inclination.
- We insert the converter into the rod. We unfold the front side to the antenna.
- Next, attach the F-connector to the cable.
- We stretch the antenna cable into the room, and fasten it to the console. Cable length must be kept to a minimum. The connector used is LNB IN.
- Using an HDMI cable, connect the set-top box to the TV.
- If a cam module is used, we connect the antenna cable to the TV through the connector:
Set-top box HD
- Without connecting the set-top box to the network, we insert the MTS smart card.
- Next, plug into the outlet.
- Using HDMI or AV wire, connect the device to the TV.
- If after connecting the green button does not light up, turn on the set-top box with the remote control.
- We turn on the TV and proceed to the signal setting, which is described below.
Signal Check
After all the actions done, we proceed to setting up the signal:
- Go to the TV menu.
- Here we indicate the source of the signal. Depending on the TV model and connection type, select the video input, analog or HDMI.
- We are waiting for the launch of the system and the appearance of the MTS satellite television settings menu.
- Using the remote control of the set-top box, go to the Device Settings.
- We return to the plate, and slightly loosen the holder fixing bolts.
- Slightly change the position of the antenna, wait 5 seconds, and check the signal level.
- Determine the position of the dish for the best signal.
- Securely fix the antenna.
 At this stage, we complete the signal setup, and proceed to the channel setup.
Setting the dish to receive channels
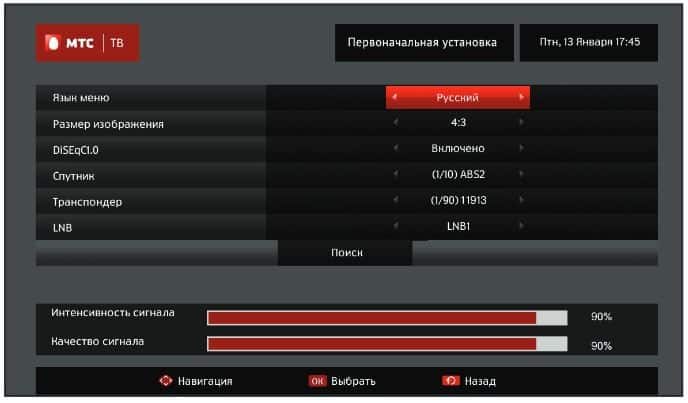
To configure channels, you need to expand the settings menu of satellite MTS television again:
- Go to the Search section.
- Next is Channel Setup.
- Here it is recommended to select Auto search for channels. You can also select manually.
- We are waiting for the search to complete.
- On the remote control from the set-top box, press the OK button. This will complete all settings.
Next, the equipment must be activated. You can do this in several ways:
- Use the hotline;
- Send an SMS message to a special number;
- On the official website of the dealer;
- Through a personal account, if the setup is handled by the master.
After successful activation, you can start watching your favorite TV shows or movies.
Setting up the cam module
For those who use not a prefix, but a cam module, the instructions are as follows:
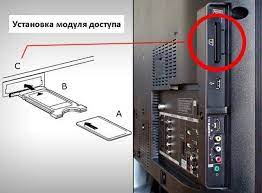
- After connecting the antenna wire to the TV, install the module in the CI port of the TV.
- We install a smart card in the module. In this case, we direct the side with the chip to the TV image.
- We connect the TV to the network. If everything was done correctly earlier, the screen will display data on the presence of a cam-module.
- We expand the TV settings, and activate the DVB-S signal reception mode
- Further, according to the instructions from the TV, we enter the requested data.
We complete the settings and proceed to the activation of the equipment, which is described above.
Setting up the MTS set-top box
- Before connecting to the network, insert a SIM card into the set-top box.
- Next, turn on the device. In case of setting unauthorized equipment, search for 3G signal. We are waiting for the end of initialization.
- We proceed to the authorization of the MTS set-top box.
- We create a user profile. Here you can set a password or age restrictions.
- Let’s move on to scanning possible channels.
https://youtu.be/mESbtOCQojw We complete the setup process.
Possible problems and solutions
During self-configuration of satellite dishes and television from MTS, some users encounter problems or errors. Consider the most common:
- “No signal” . This error can occur if the cable is defective or poorly connected. It can also be the result of bad weather conditions and technical work on the part of the providers. To solve this problem, you need to eliminate all possible causes of the problem.
- “No Channels” . If the user encounters such a problem when connecting for the first time, then it is worth checking that the smart card is installed correctly. Another possible reason is the end of a subscription to services.
- Problem with code E. In this case, to decipher the error, you should contact the provider’s hotline or find information on the official website. The appearance of another letter may indicate a problem with the TV.
- Resonance of picture and sound . Resetting all device settings to factory settings will help here.
- Not showing all channels . It is recommended to open the settings and update the channel list. You can use auto search.
Installing and configuring a satellite dish is a time-consuming process. But if you follow all the recommendations and instructions, it is quite possible to cope with the task on your own.