For those who need a universal media center that combines a home theater, TV, game center in one bottle – the Kodi player will appeal to you.
- Description and purpose
- Kodi functionality
- Instructions for installing and configuring the interface
- Installation on iOS
- Installation on Linux
- Interface
- Installing Russian localization
- Setting up IPTV
- Where can I find playlists?
- How to install the program on Smart TV?
- Other questions about using Kodi
- Installing extensions from third-party sources
- What are repositories and how to install them?
- How to install and watch Youtube in Kodi?
Description and purpose
Kodi is a free media player available for all platforms from Windows to iOS and Raspberry Pi. It allows you to play multimedia files of various types (video, music, podcasts) both from media and from the Internet.![]()
Kodi functionality
This media player can do a lot. Here is a list of just the main features that Kodi does an excellent job of:
- Playback of music of various formats (MP3, FLAC, APE, WMA and a number of others). Support for tags and playlists will help organize the user’s music collection.
- Watching films. Kodi supports many video formats, including video streaming. Easily imports the entire movie collection. You can also watch recorded TV shows and series, and sorting episodes by season makes the process more convenient.
- View and import photos to the library (slide show).
- PVR technology allows you to watch live TV broadcasts and record broadcasts. Support for NextPVR, TvHeadEnd and other utilities is provided.
- Additional utilities available in a special catalog help to expand the functionality of the player. So, the DOSBox emulator allows you to run games and programs adapted for MS-DOS. There are also emulators of various consoles, with which you can enjoy the old games, as in childhood.
Instructions for installing and configuring the interface
The Kodi player is available for free download on the official website (https://kodi.tv/download), and for Android smartphones – on Google Play or Huawei AppGallery. Installation on Windows, Mac, Android will not cause any particular difficulties. In the case of other OS, questions may arise.
Installation on iOS
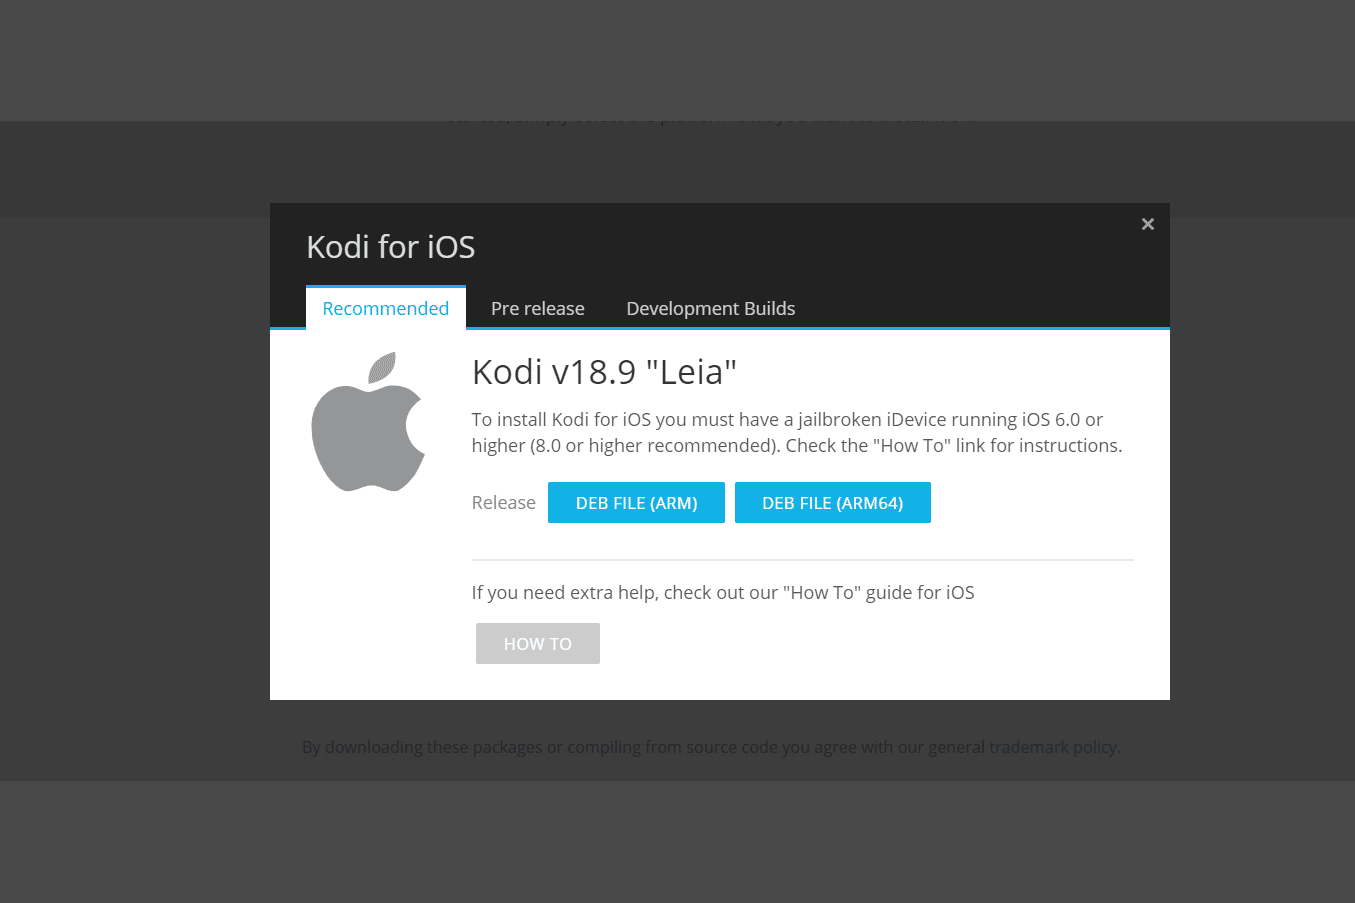
There is no Kodi app for iPad/iPhone in the App Store. The link to the special package is available only on the player’s website. System requirements:
- Any iOS device (iPhone, iPad, iPod Touch) with or without pre-jailbreak;
- system version – from 6.0 (recommended from 8.0 and higher).
- iPhone 1st generation to 5C, iPad 1st – 4th generation, iPad Mini 1st generation, and iPod Touch 1st – 5th generation require 32-bit software. All other devices support the 64-bit version.
- The latest working release of Kodi on a pre-8.4.1 system is v17.6 Krypton. Newer devices will run the latest version of Kodi – v18.9 Leia.
Jailbreak iOS workflow (requires Cydia):
- Find the iFile or Filza file browser in Cydia and install it.
- Download the .deb package with the latest version of the Kodi player using Safari or any other browser. Important: mobile browsers do not show the download process, so you should wait a bit.
- In the dialog menu that appears, click the “Open in…” button and select iFile or Filza.
- Select the downloaded file and click Install. Ready!
If the device has not yet been jailbroken, installation will require a Mac OS computer and Xcode and iOS App Signer programs. Action algorithm:
- Download the .deb package with the latest version of the player.
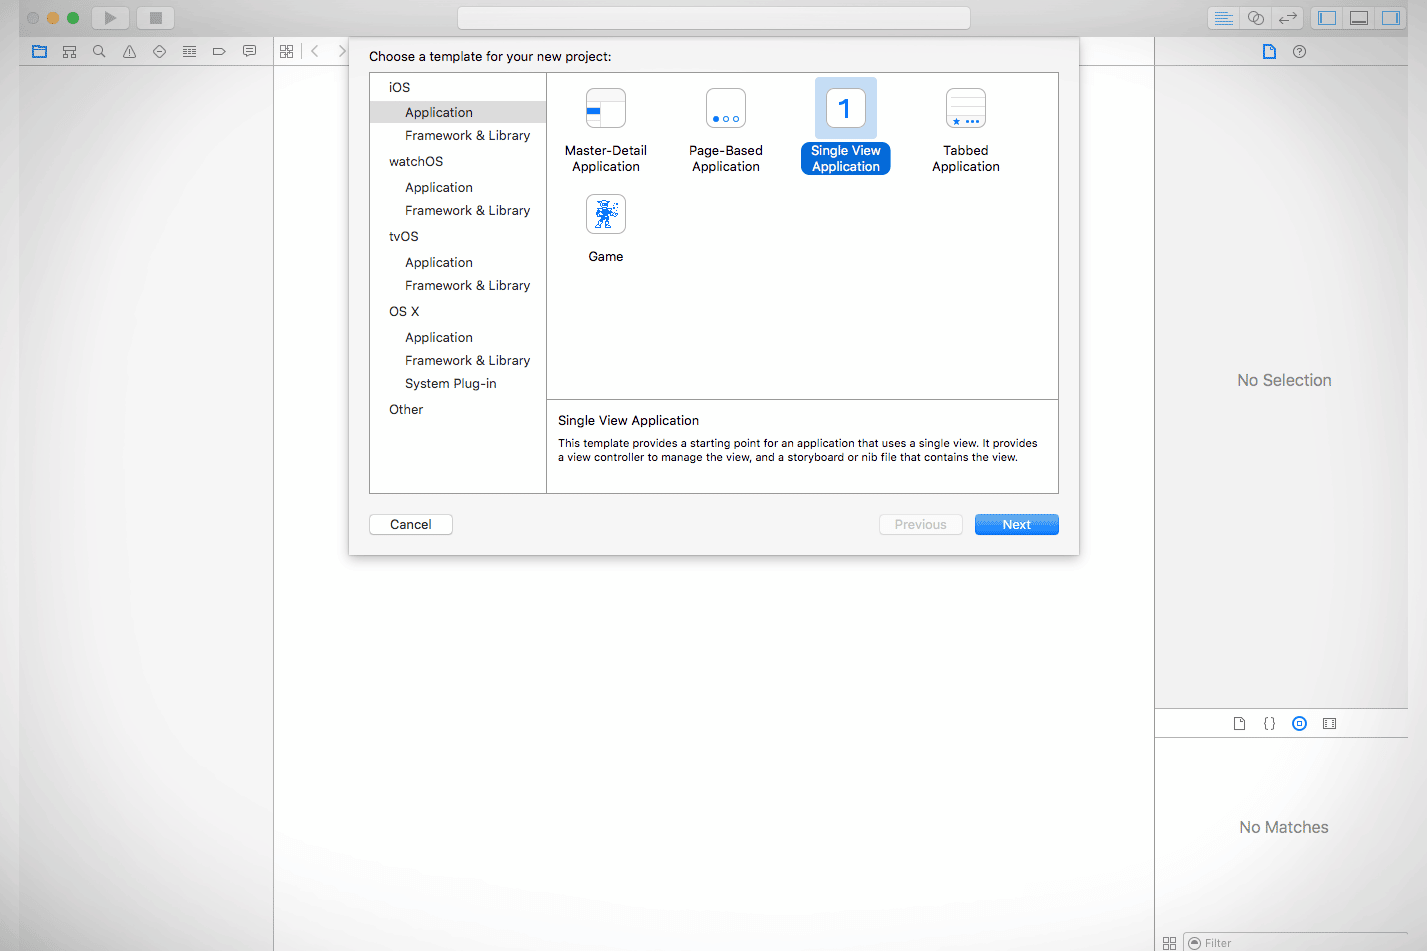
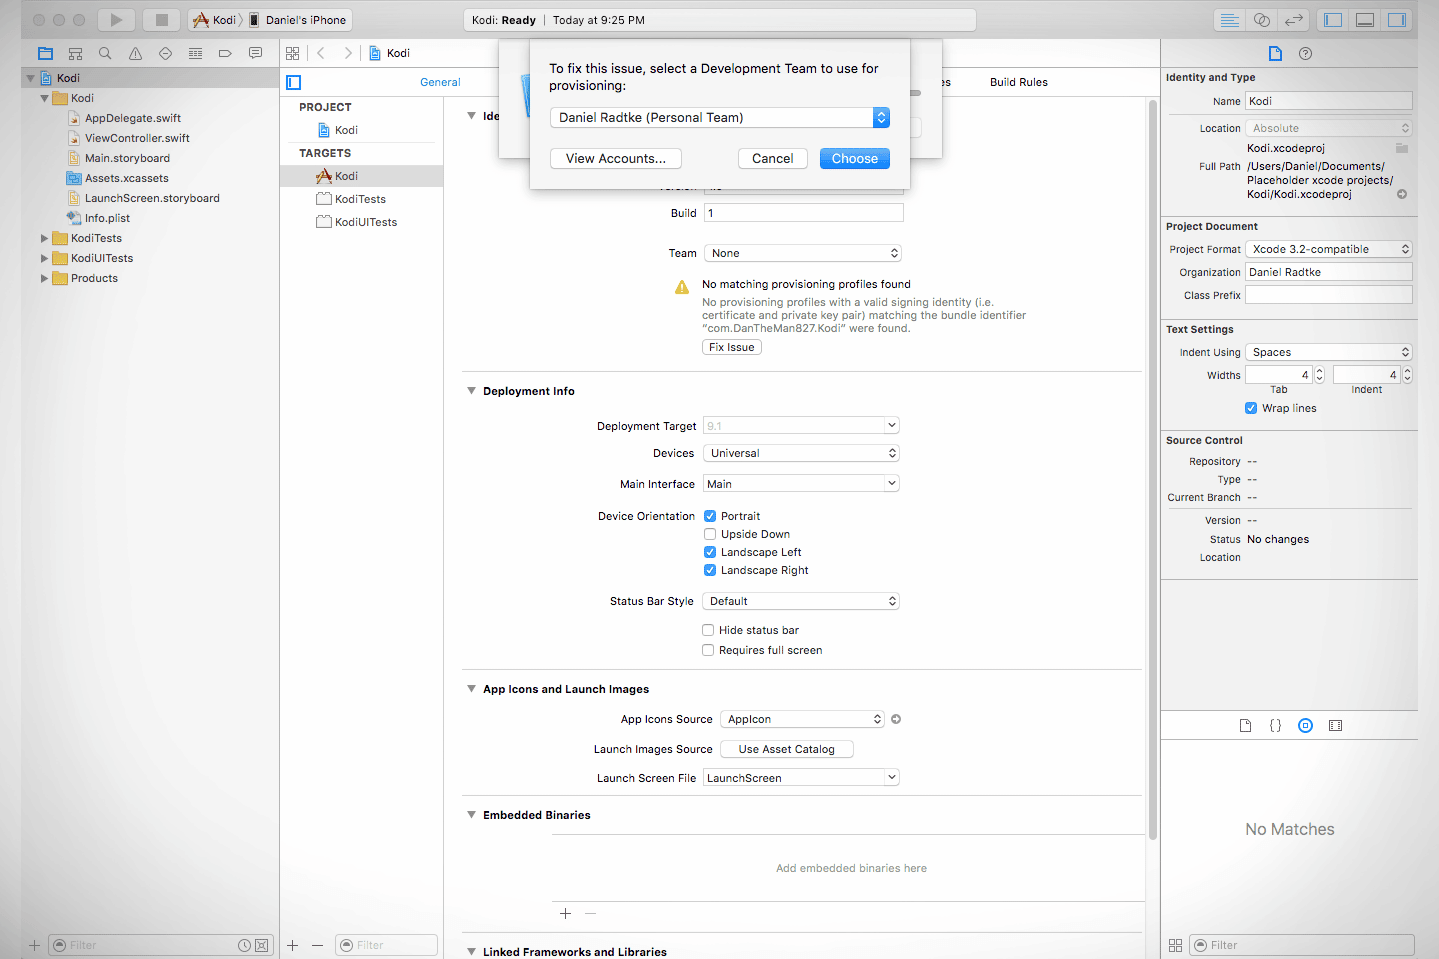
- Open Xcode and create a new project.
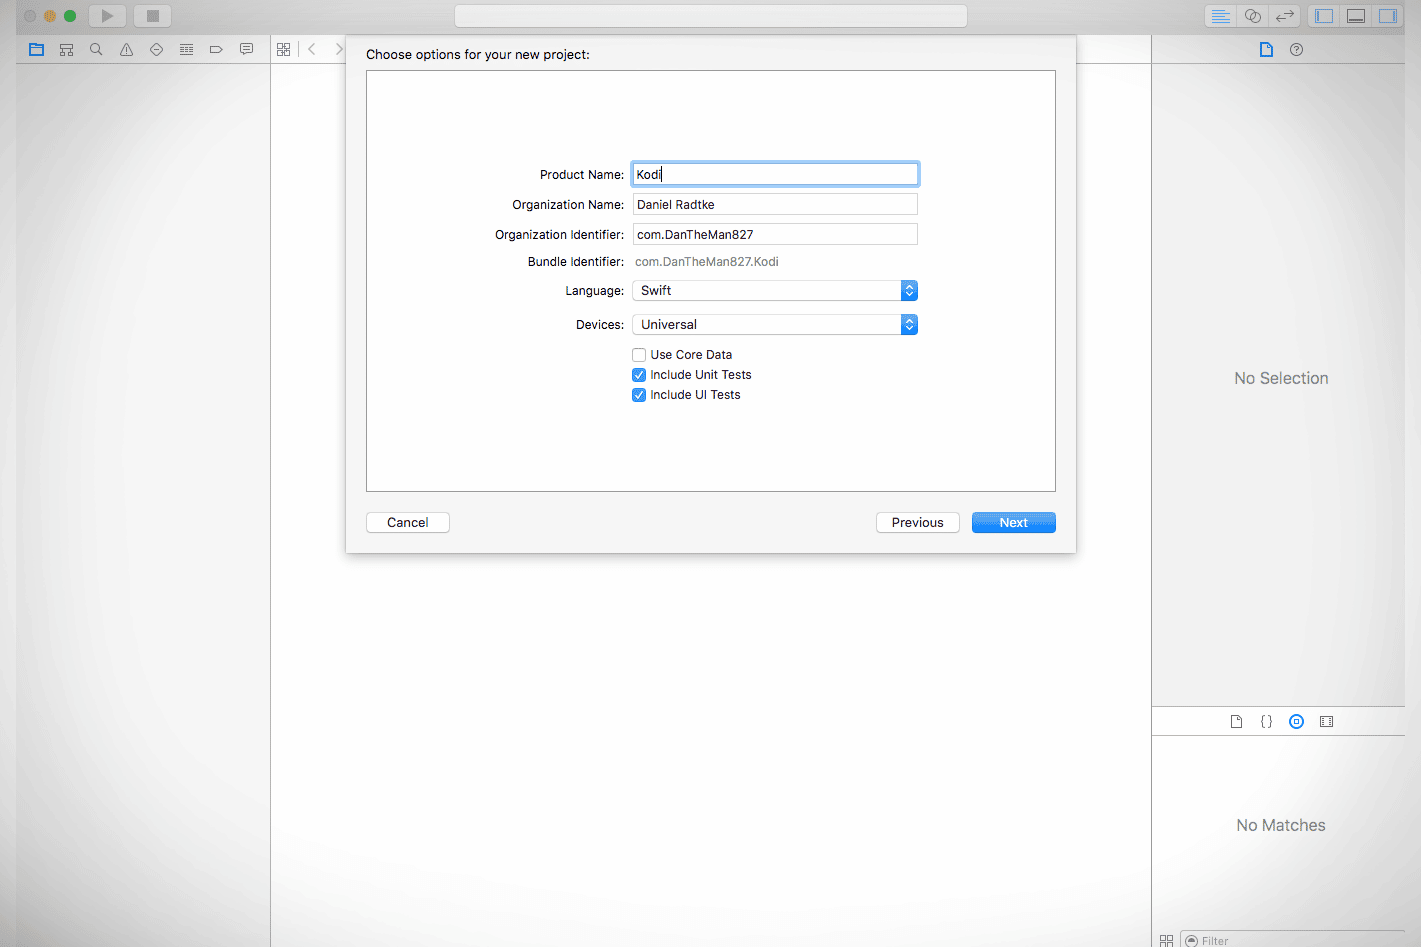
- Enter the project name and ID.
- Be sure to click Fix issue so that later there are no problems when compiling and opening the program.
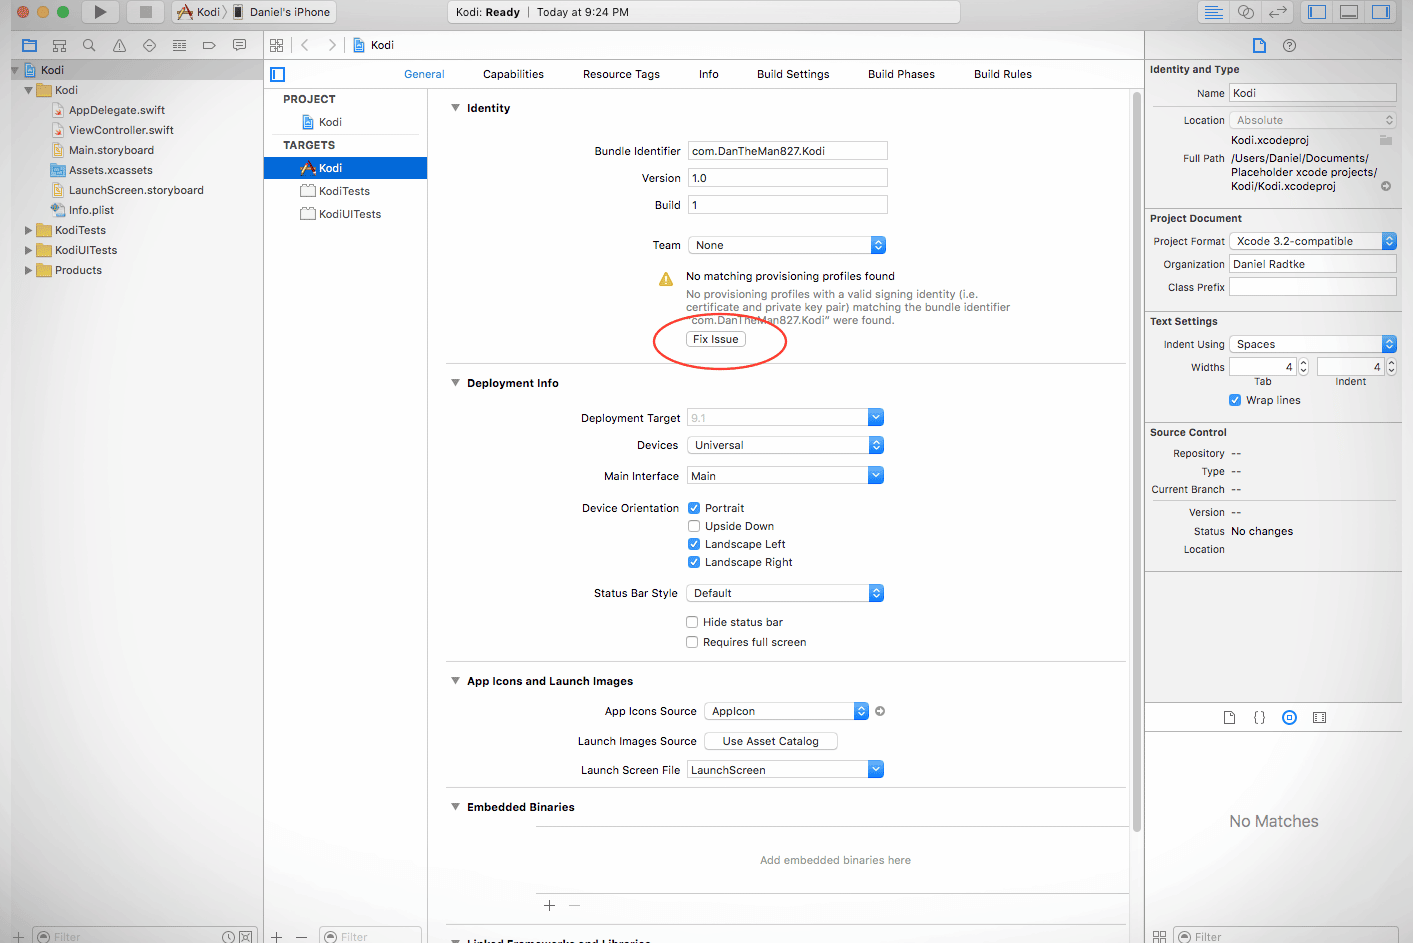
- Select a Development Team.
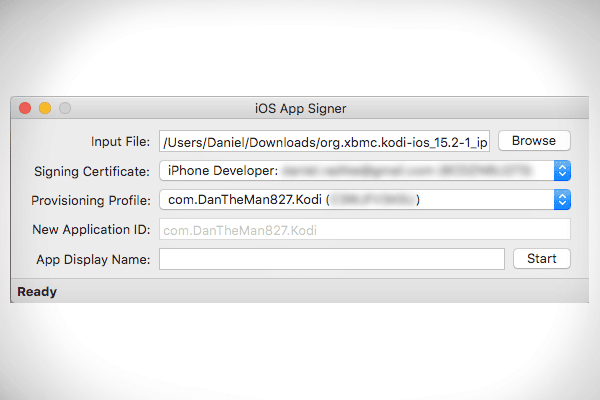
- Open iOS App Signer, select the Signing Certificate and Provisioning Profile options. Select the folder where the program will be saved and click Start.
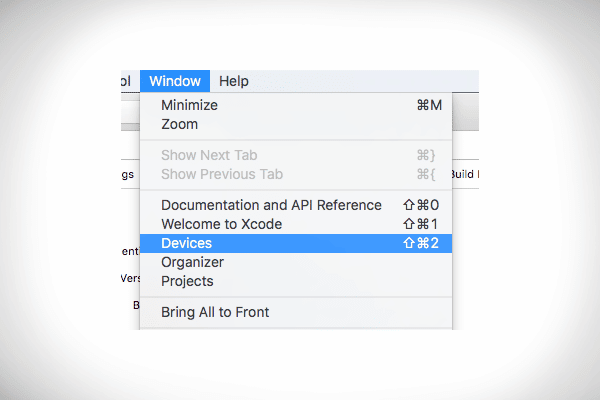
- Open the Window menu and click on Devices. After making sure your device is connected, proceed to the next step.
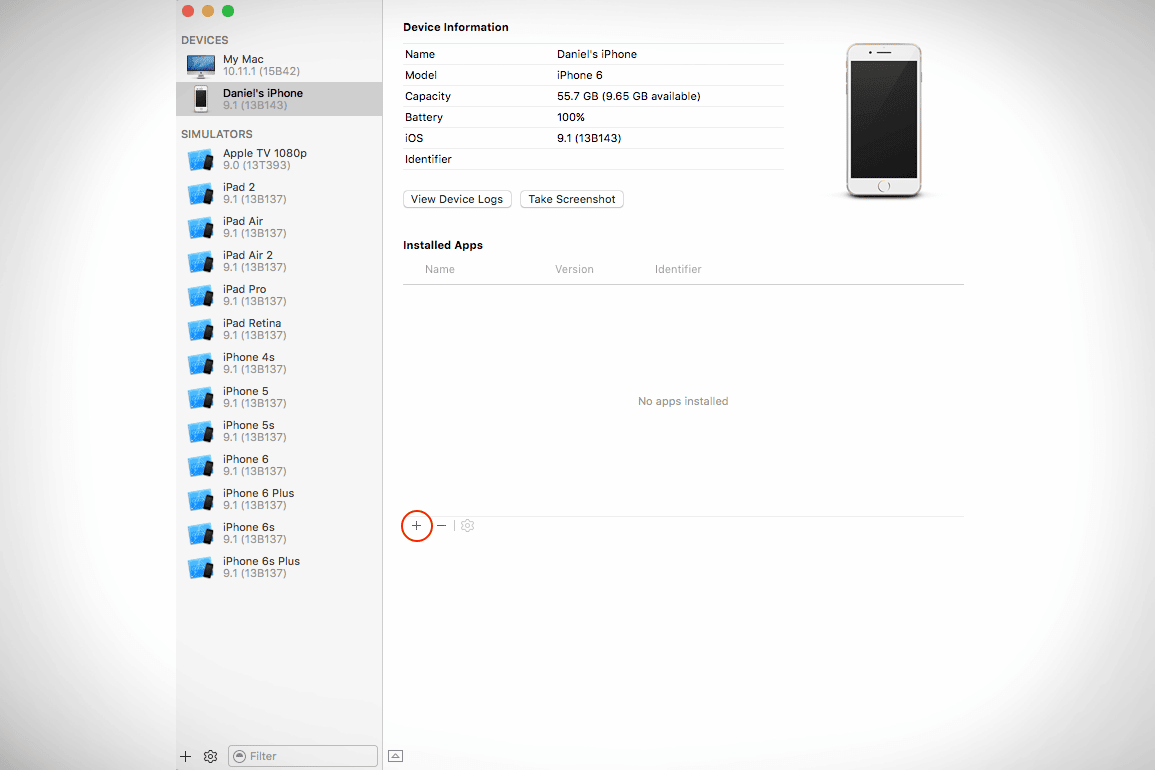
- Go to the device, press + and add the generated program.


Installation on Linux
The Kodi Wiki encyclopedia gives several ways to install the player on Linux. A more recent version is downloaded with several commands in the terminal:
- sudo apt-get install software-properties-common
- sudo add-apt-repository ppa:team-xbmc/ppa
- sudo apt-get update
- sudo apt-get install kodi
Interface
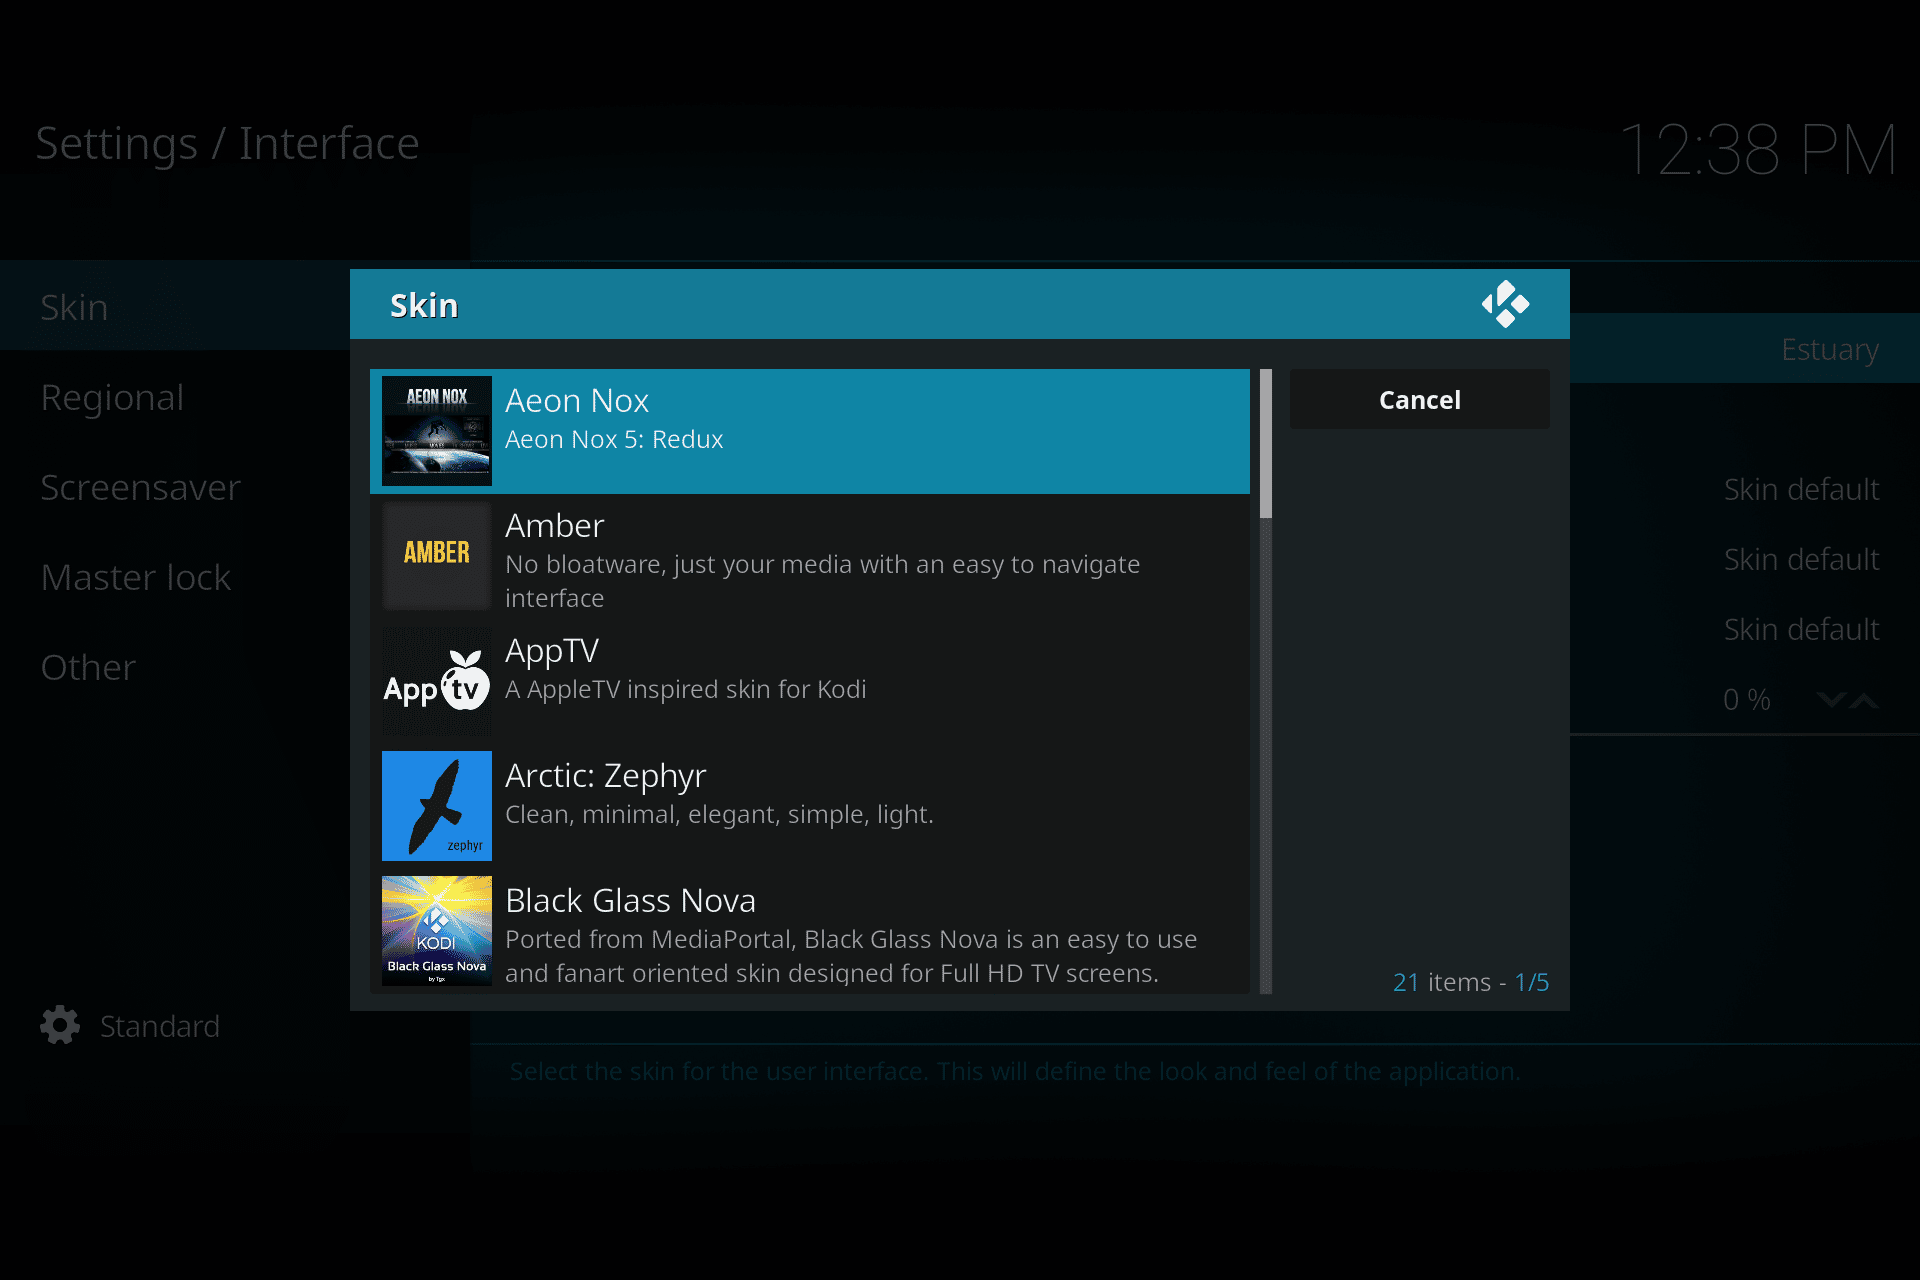
There are many skins available on the official resource that will completely change the player’s interface. They are easy to install in a few steps:
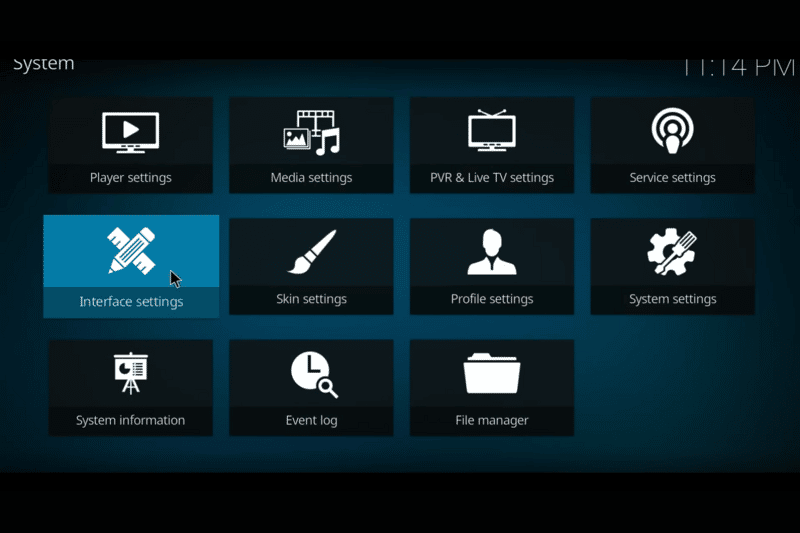
- Open the Interface Settings menu, then select the Look and Feel category and Skin.

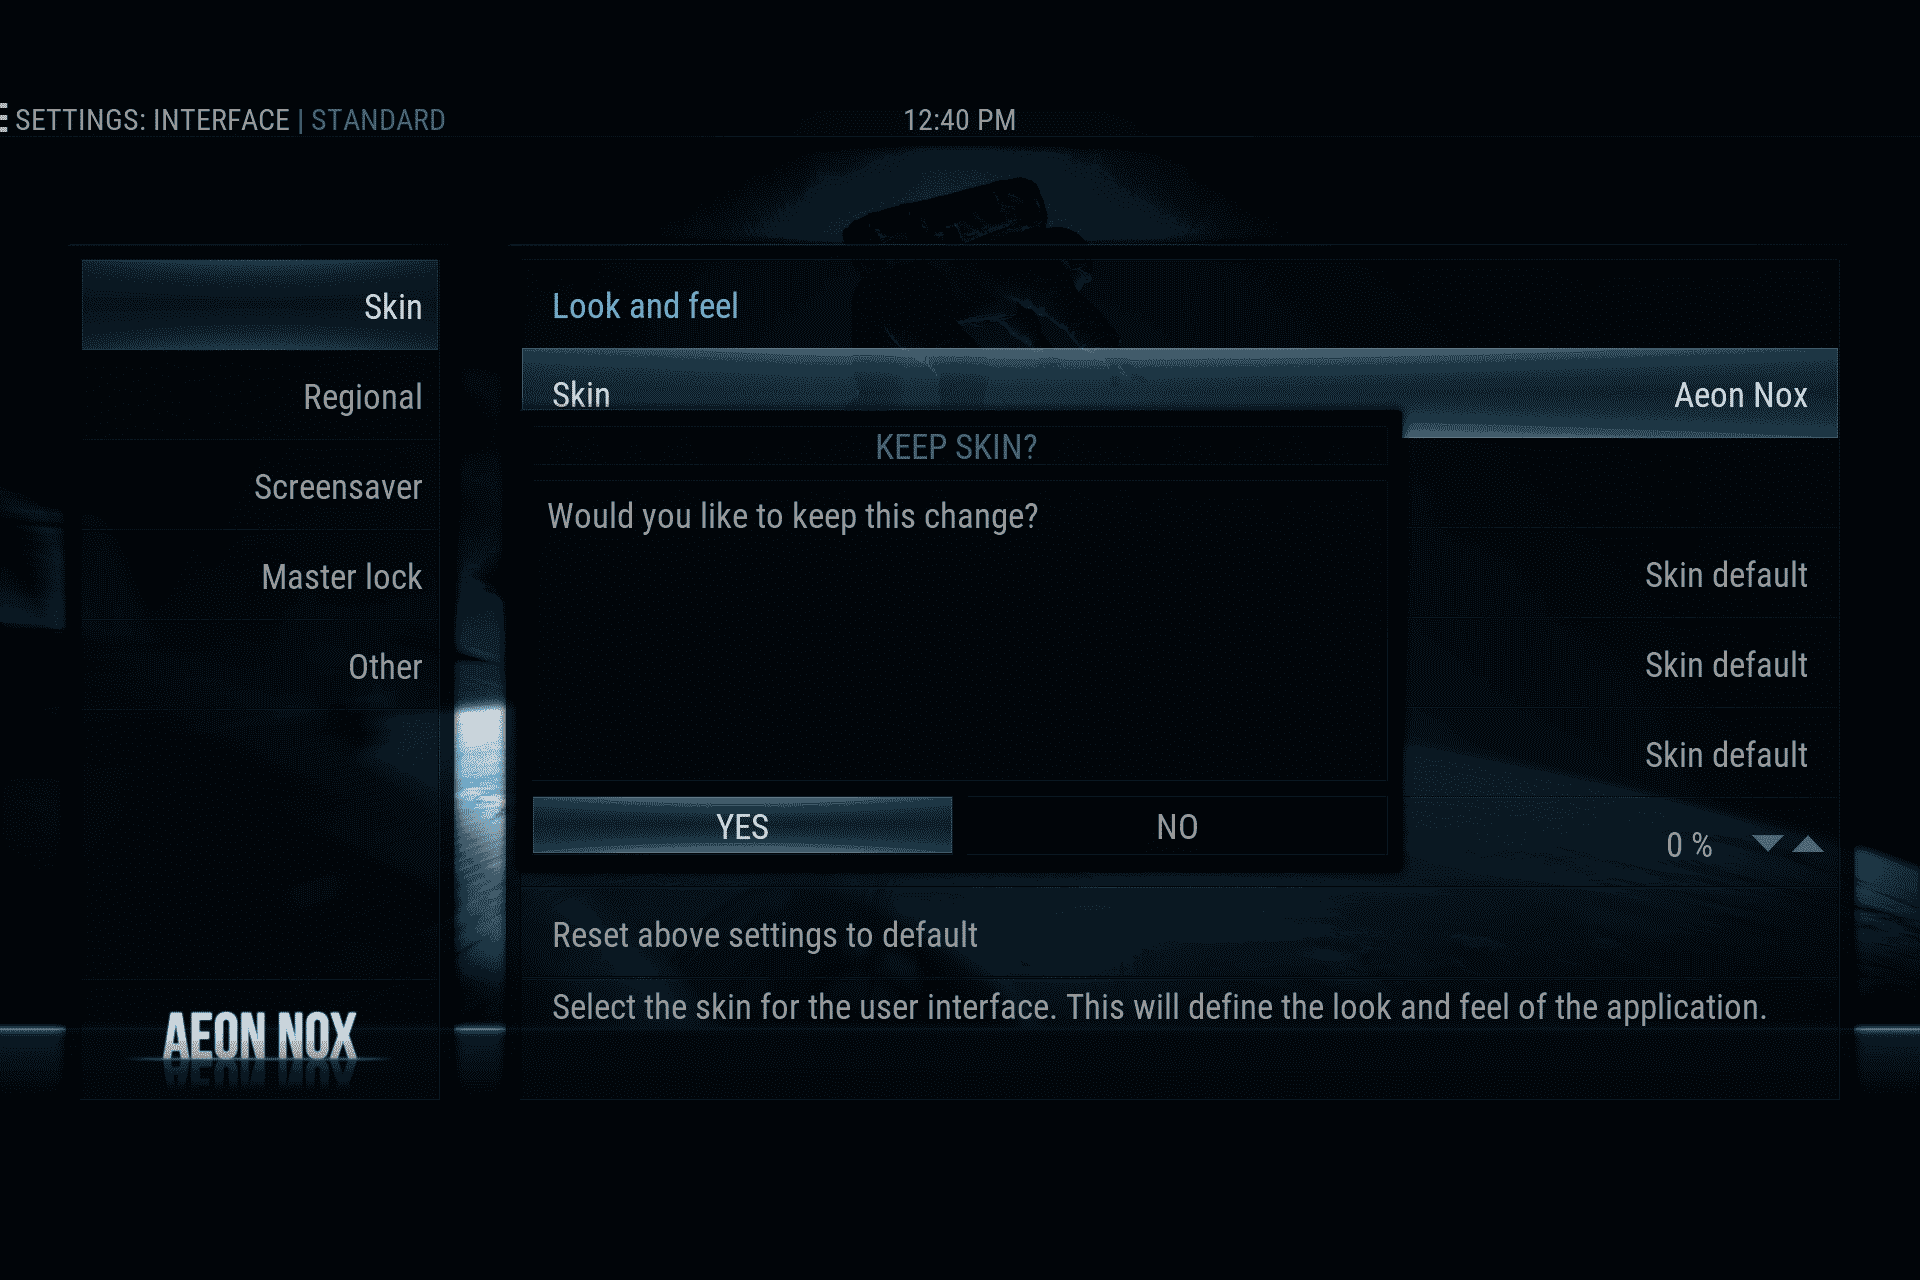
- Choose any skin you like.
- Next, you need to return to the Interface section and the Skin item by selecting any of the downloaded covers.


Installing Russian localization
For version 17.6:
- Click on the gear and go to Interface Settings.
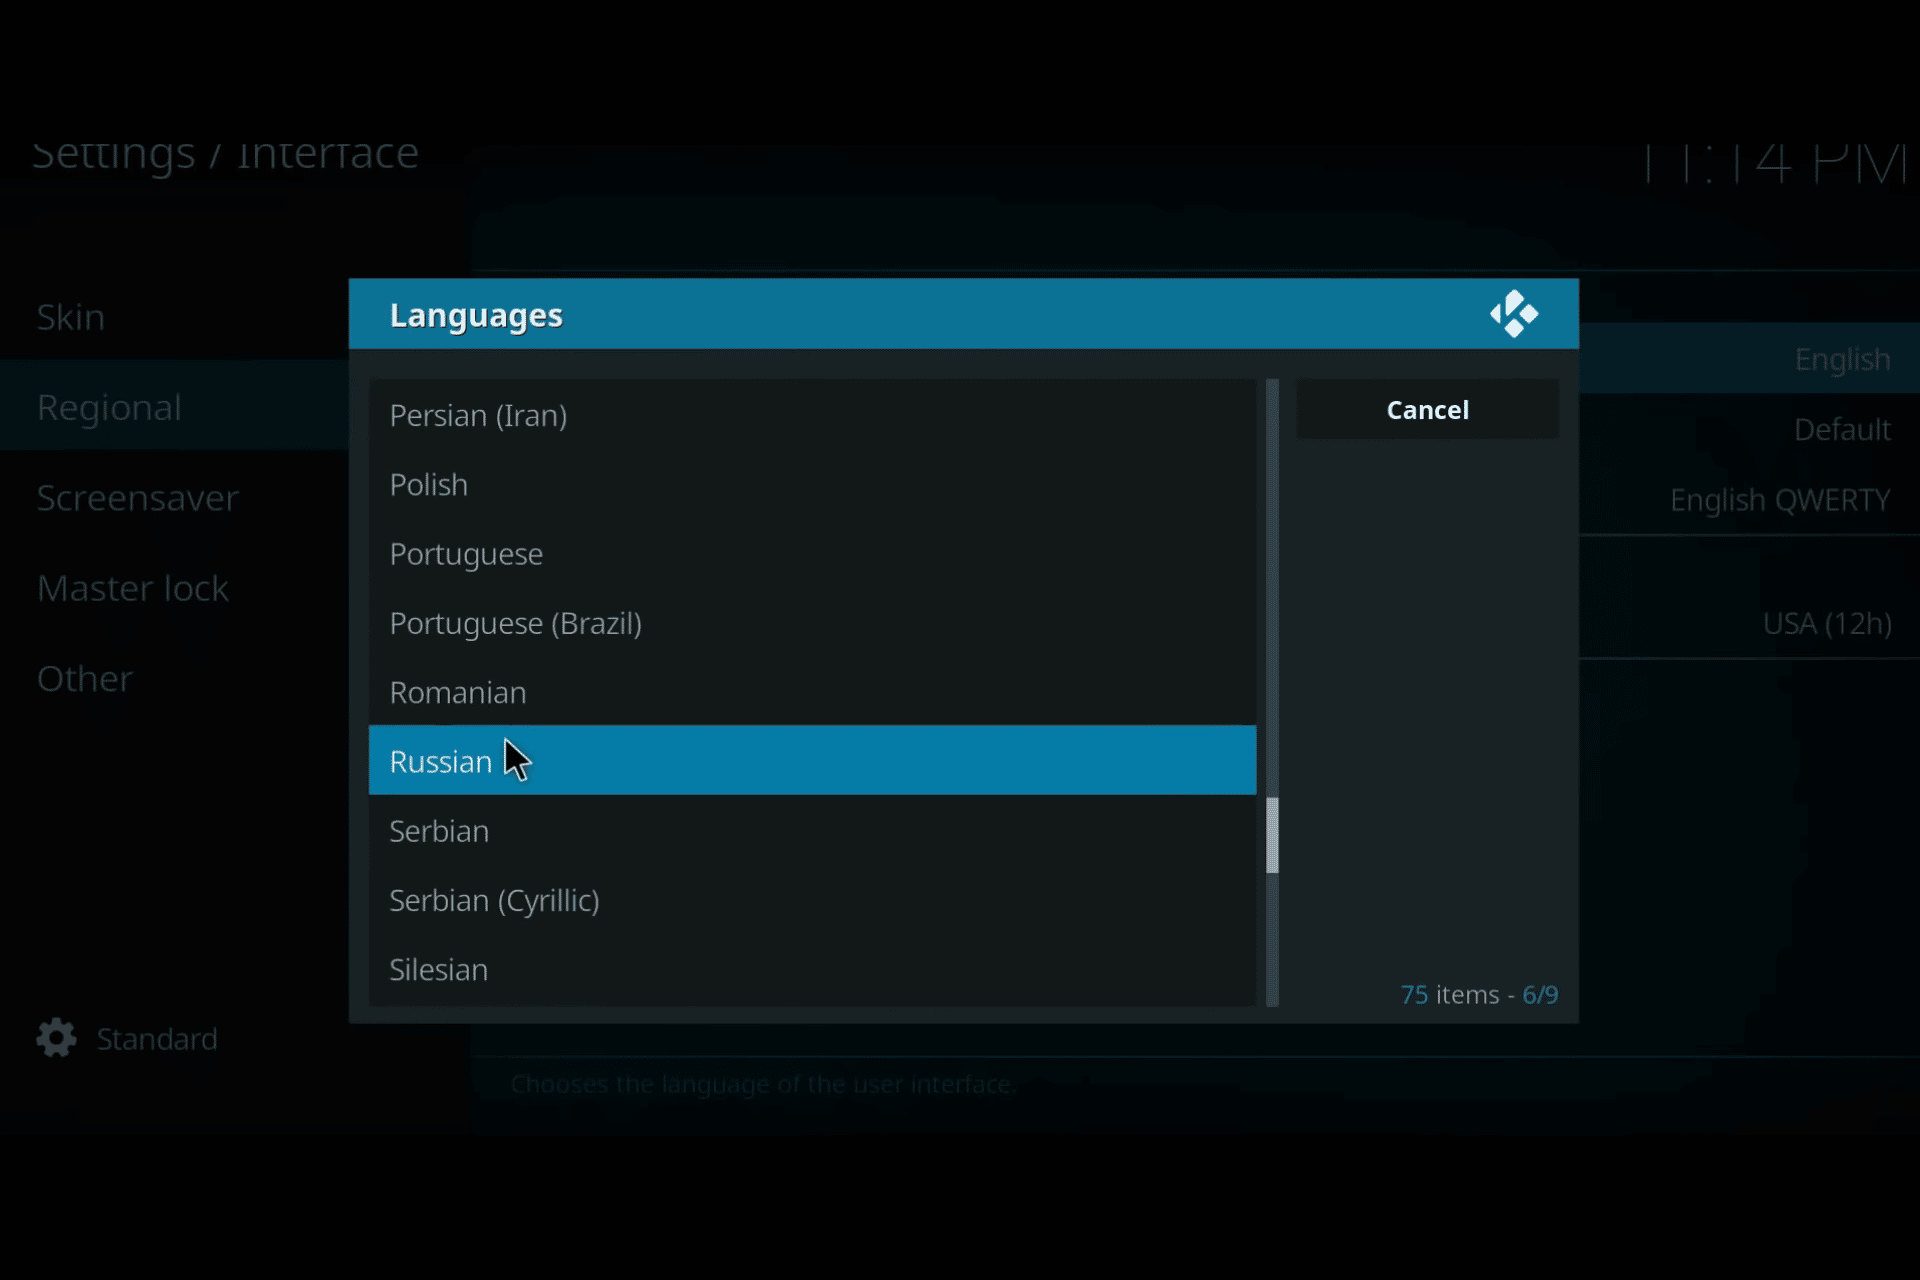
- In the Regional tab, go to Language.
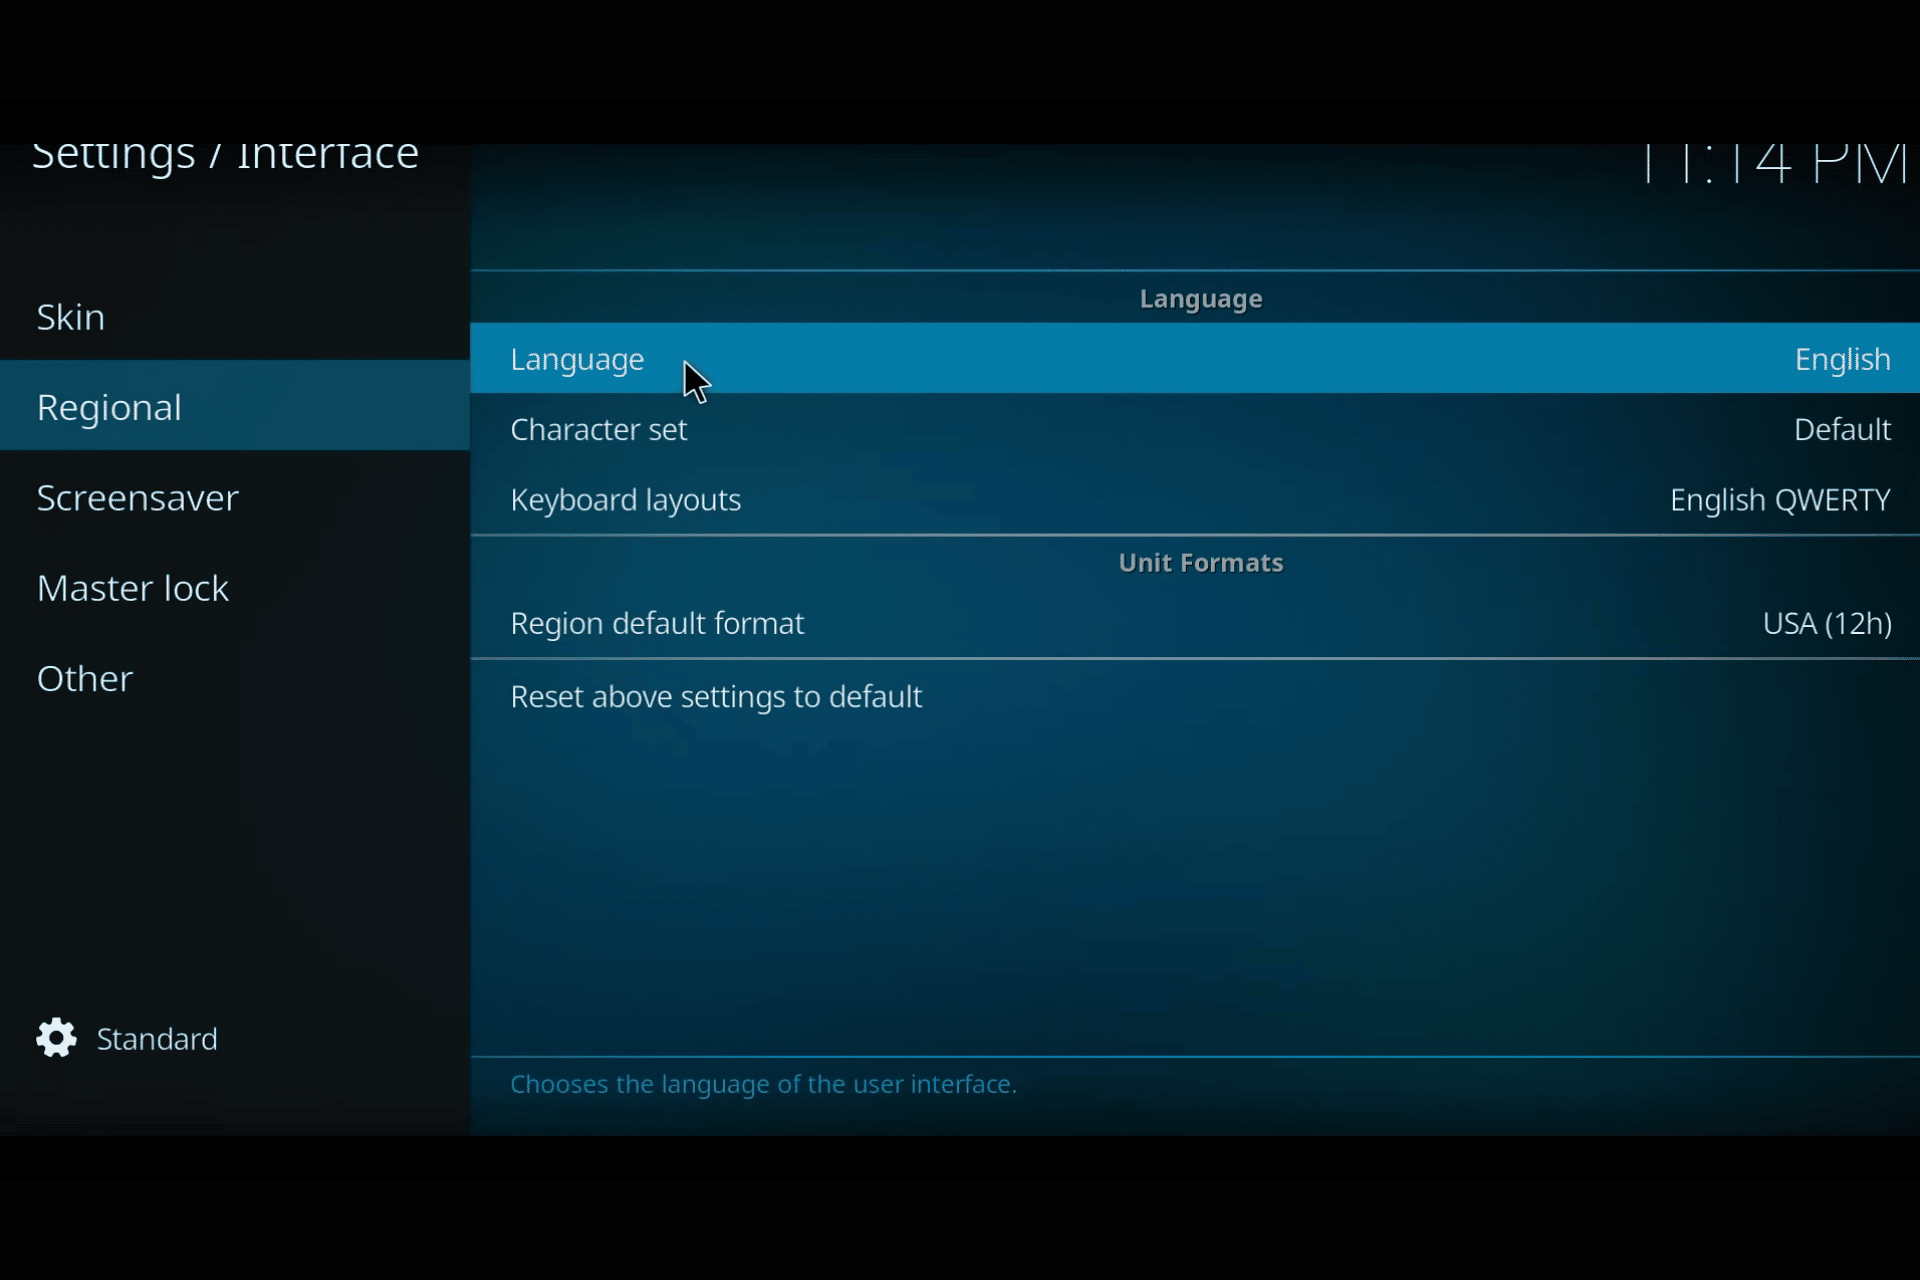
- Select Russian (Russian) and wait for the language pack to download.


For a more recent version:
- Open the add-ons menu.
- Click Install from repository.
- Go to Look and Feel and look for the Languages option.
- In the window that opens, select Russian.
Setting up IPTV
To watch TV channels, you need to select a PVR client. Instruction:
- Open Library Settings.
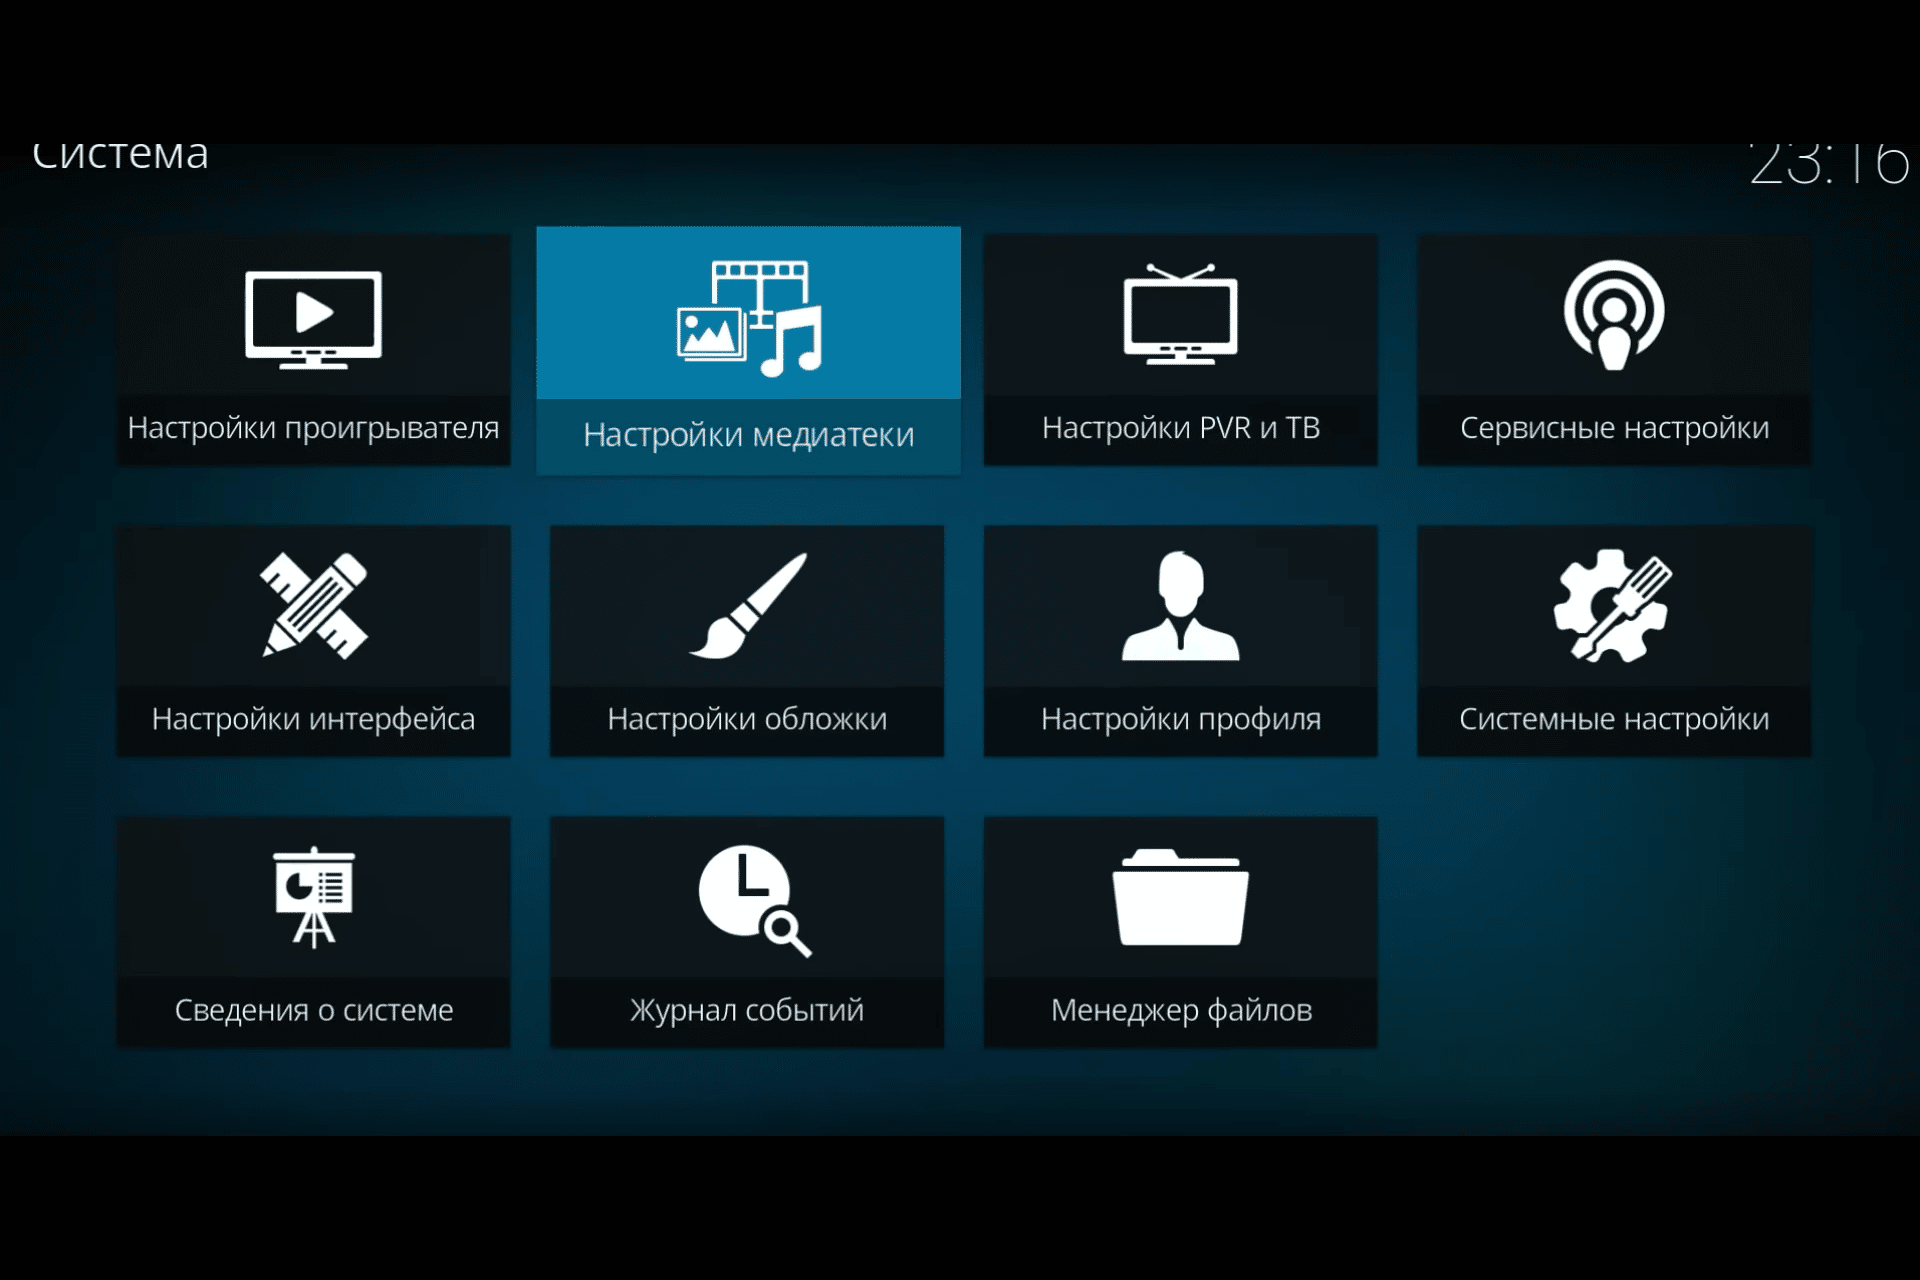
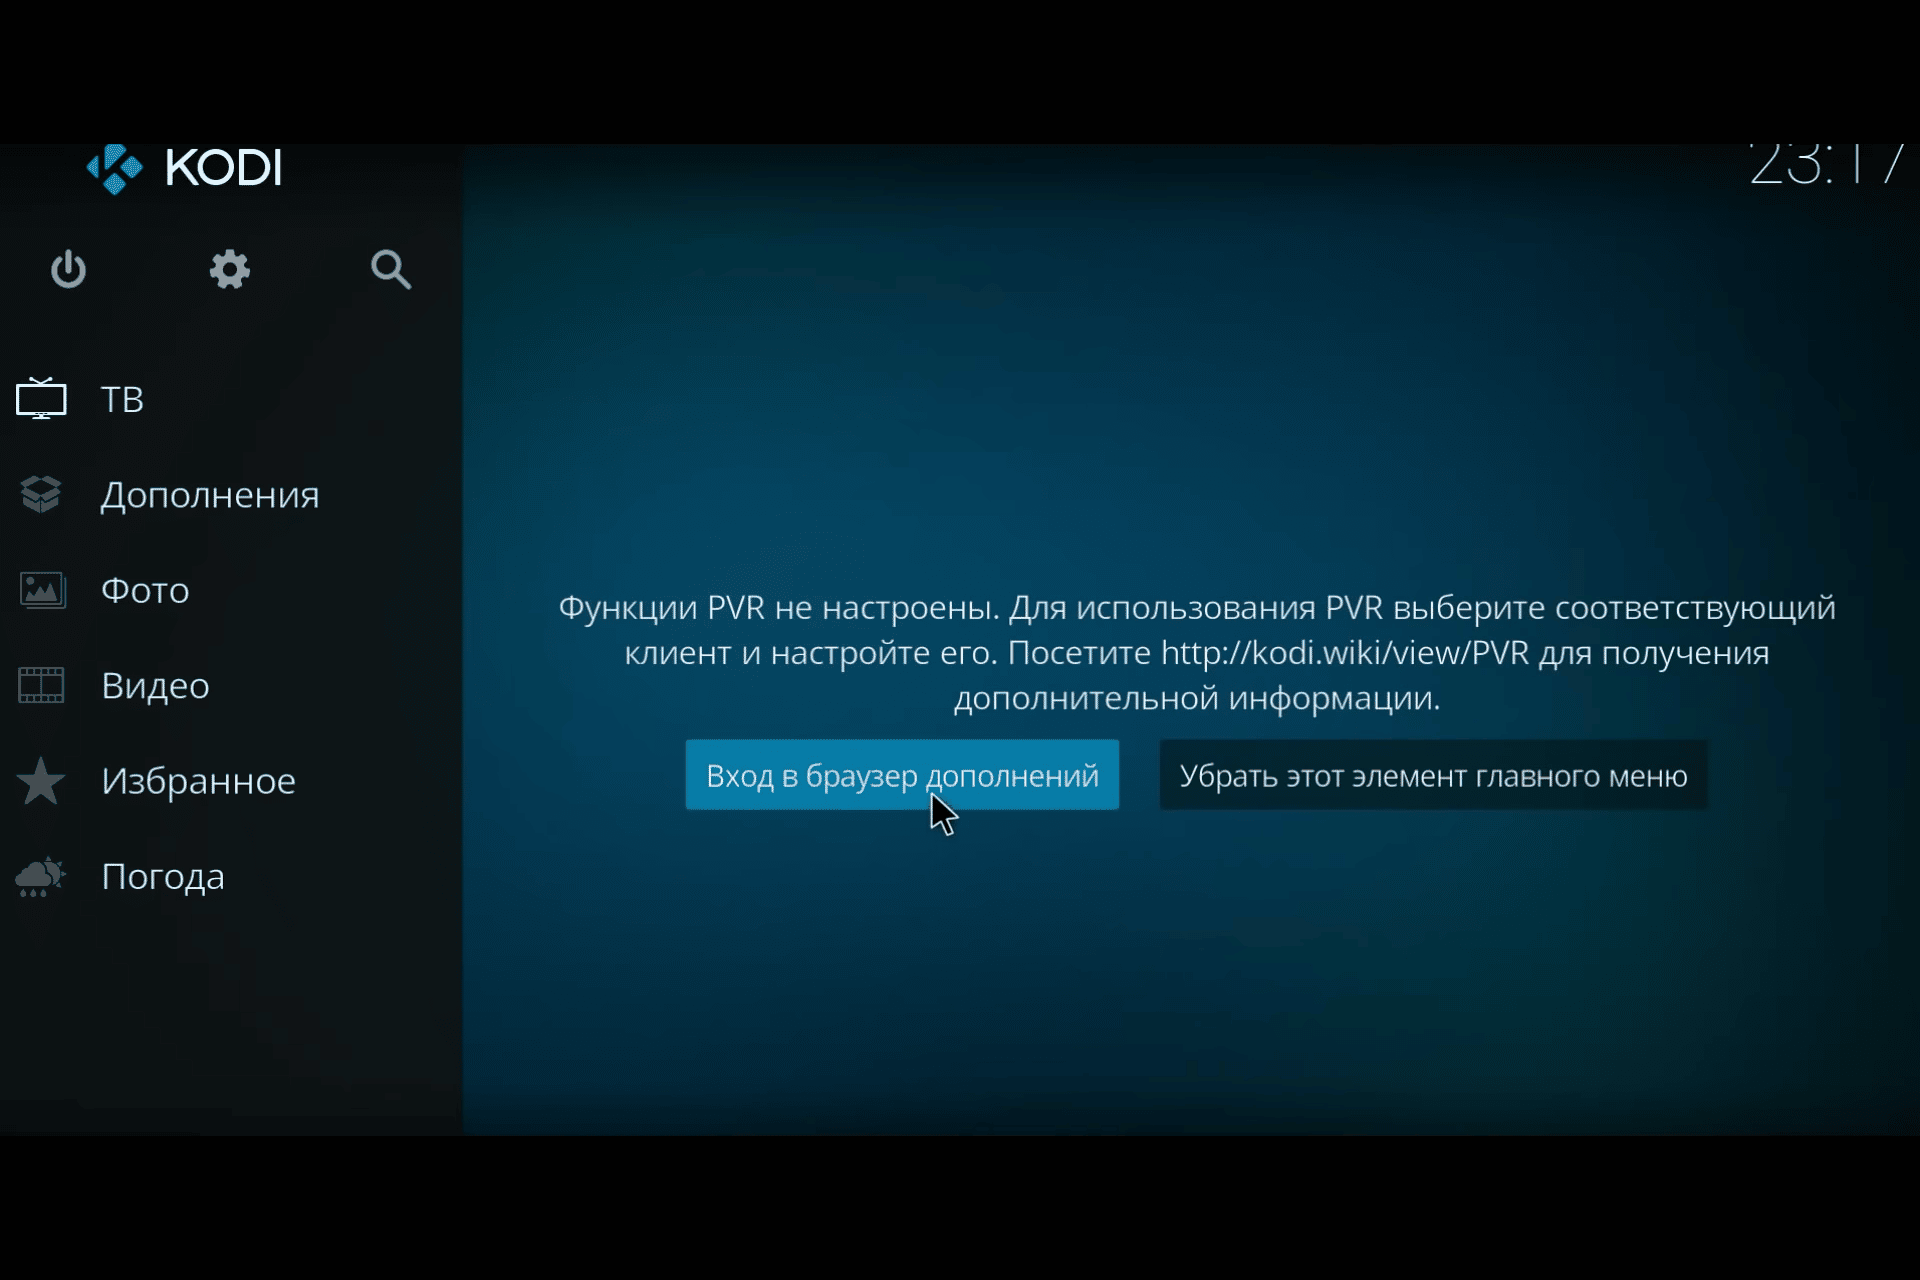
- Go to “TV” and click “Enter Add-ons Browser”.
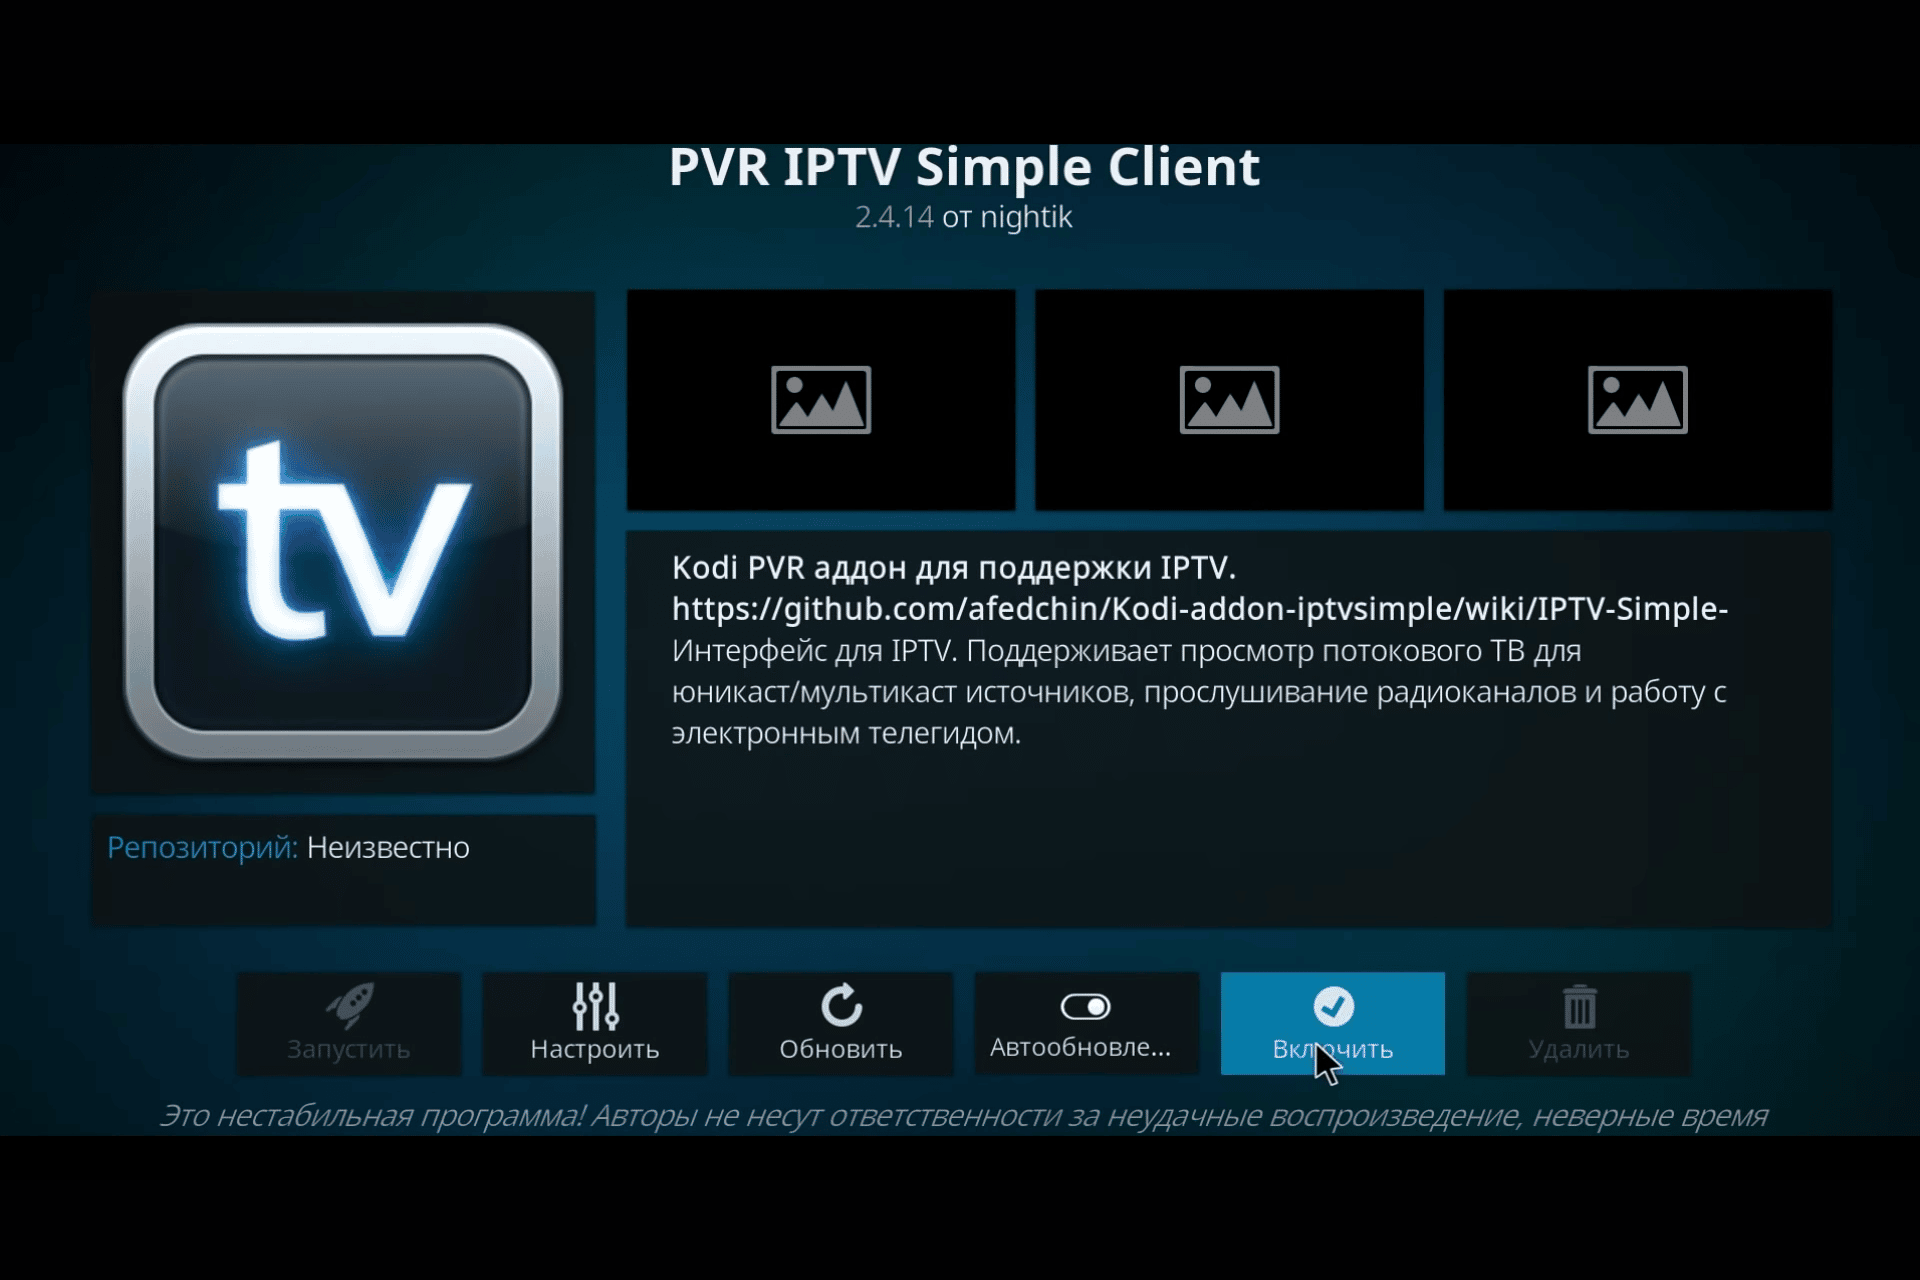
- Once you find PVR IPTV Simple Client, navigate to it and click “Enable” → “Configure”.
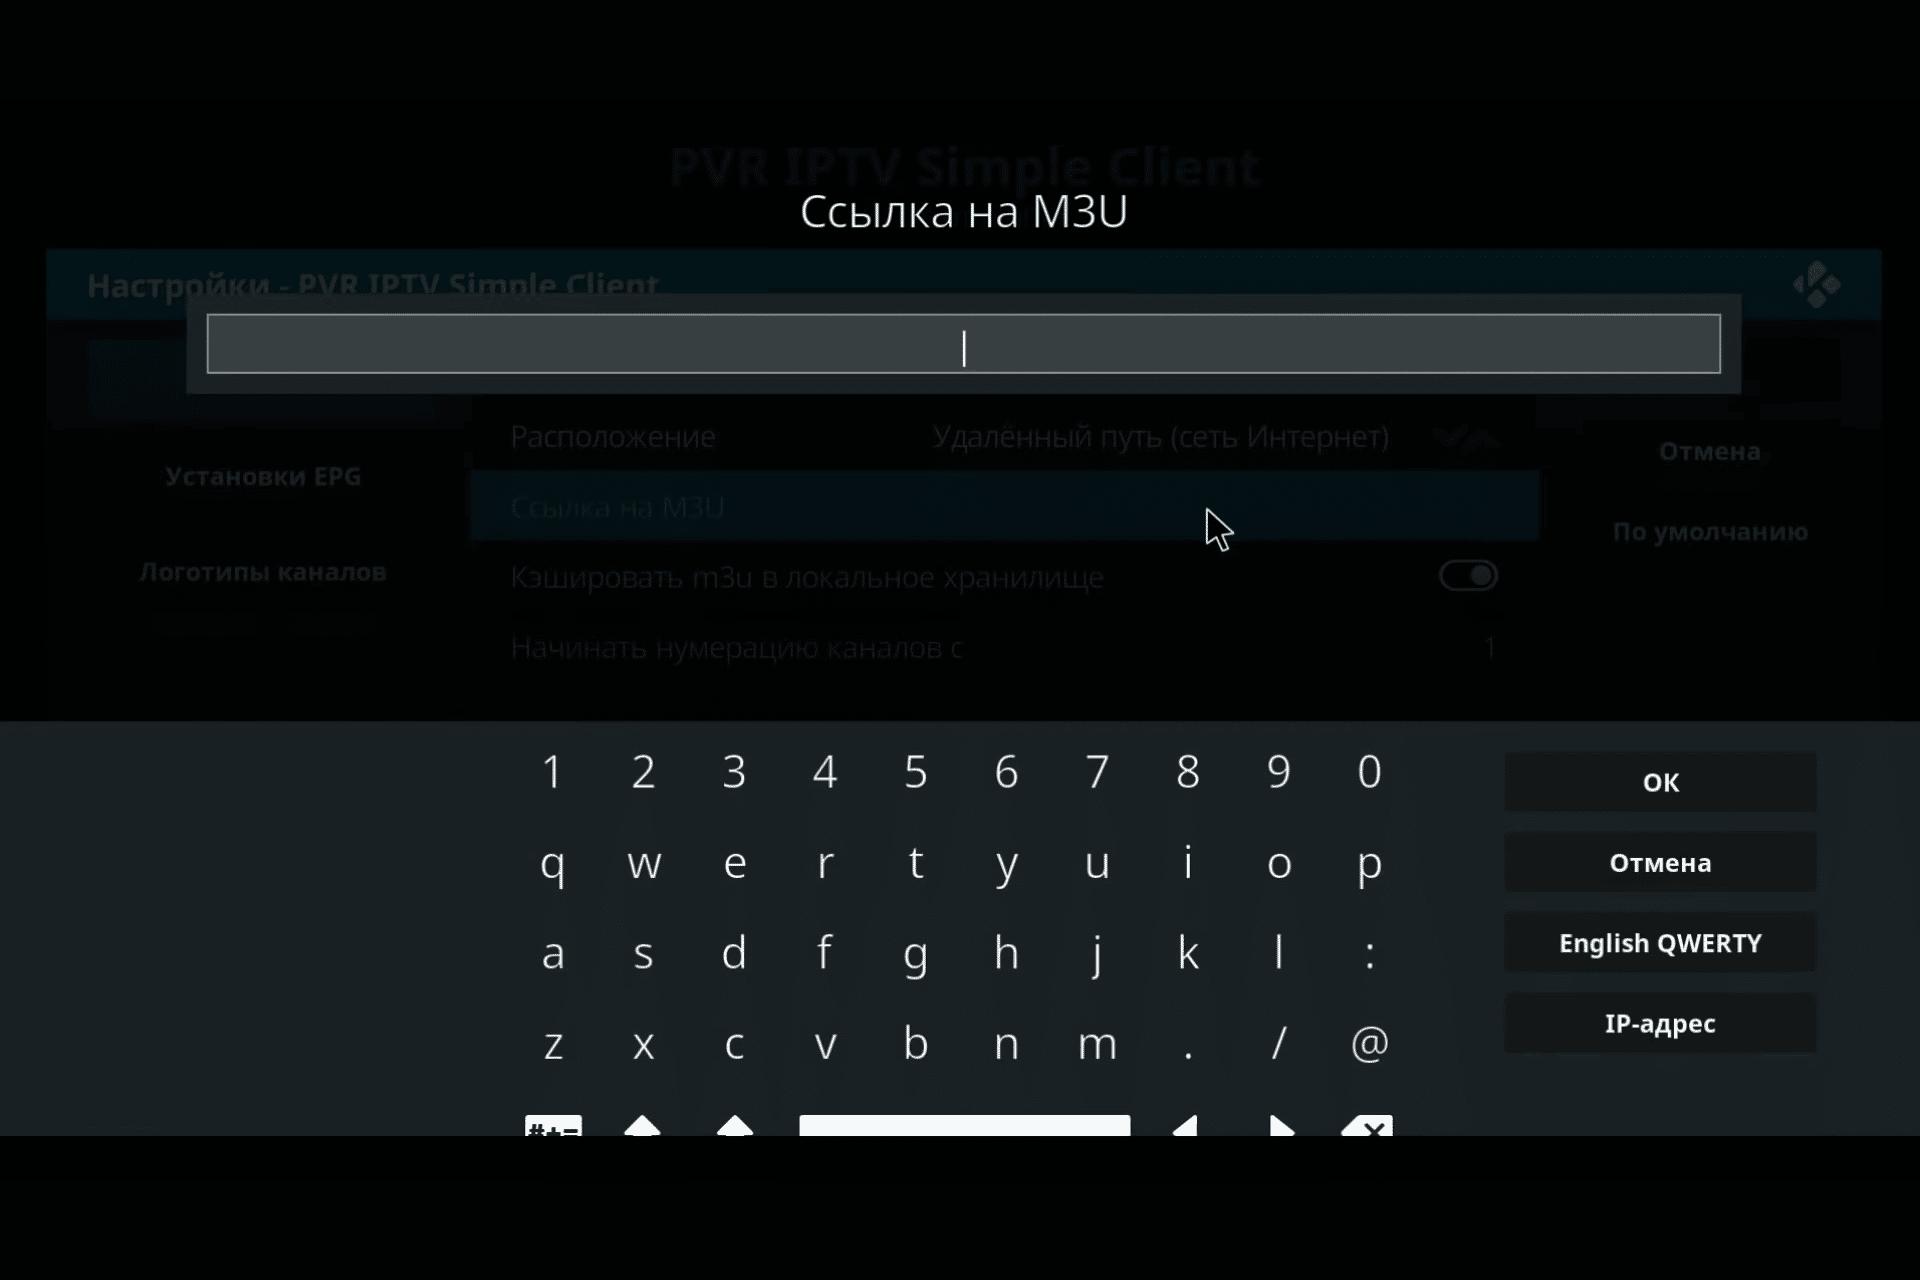
- When you select the “Link to M3U” item, a special column will open, where you need to enter the link to the playlist with TV channels accordingly.
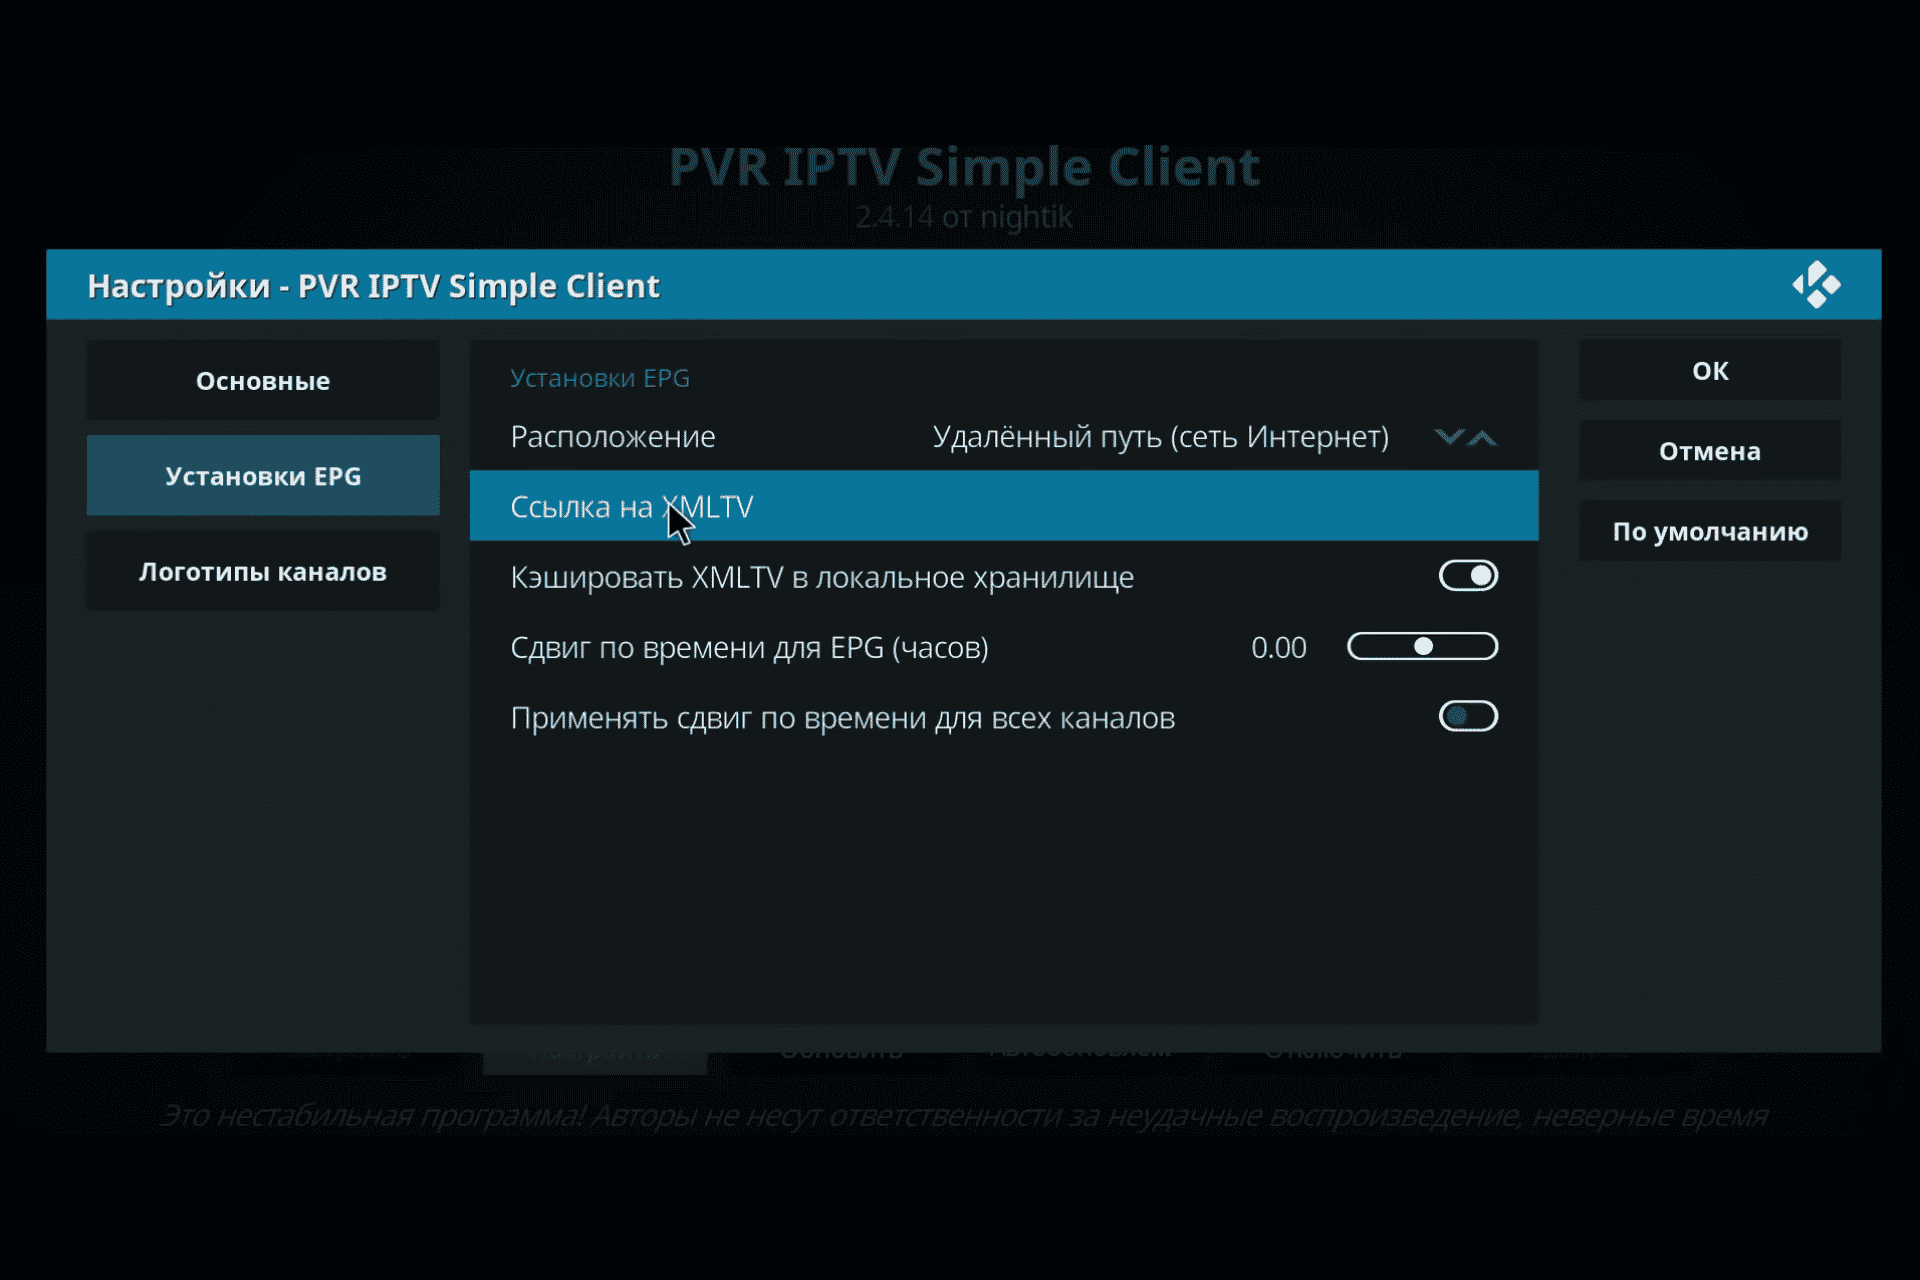
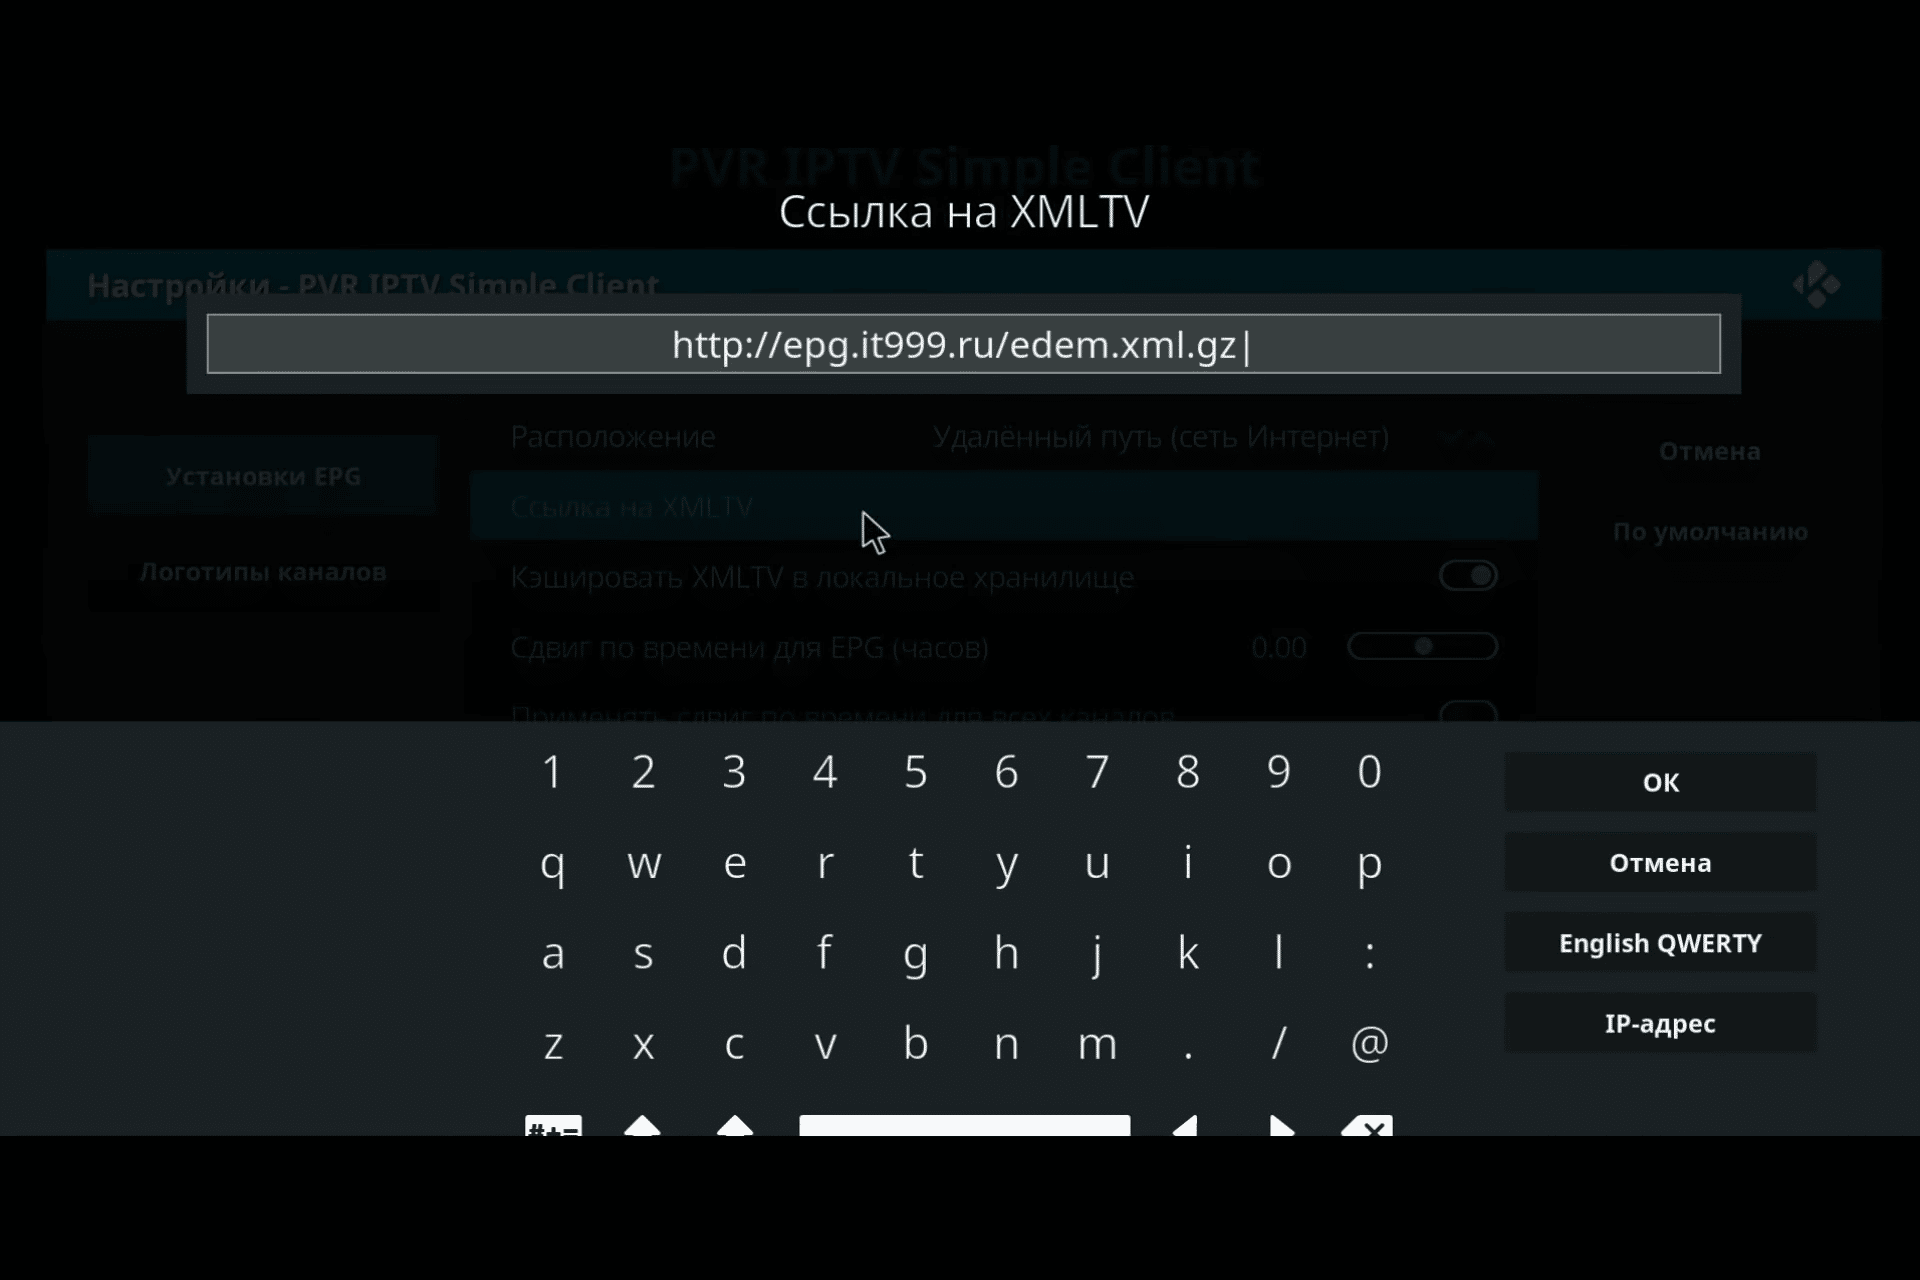
- It is better to use EPG in addition – the program guide database. Take a link to the guide in the form of an XML document, open “EPG Settings” in the client settings and make changes to the “XMLTV Link” parameter.
- In the field that appears, paste the previously copied link to the TV guide.
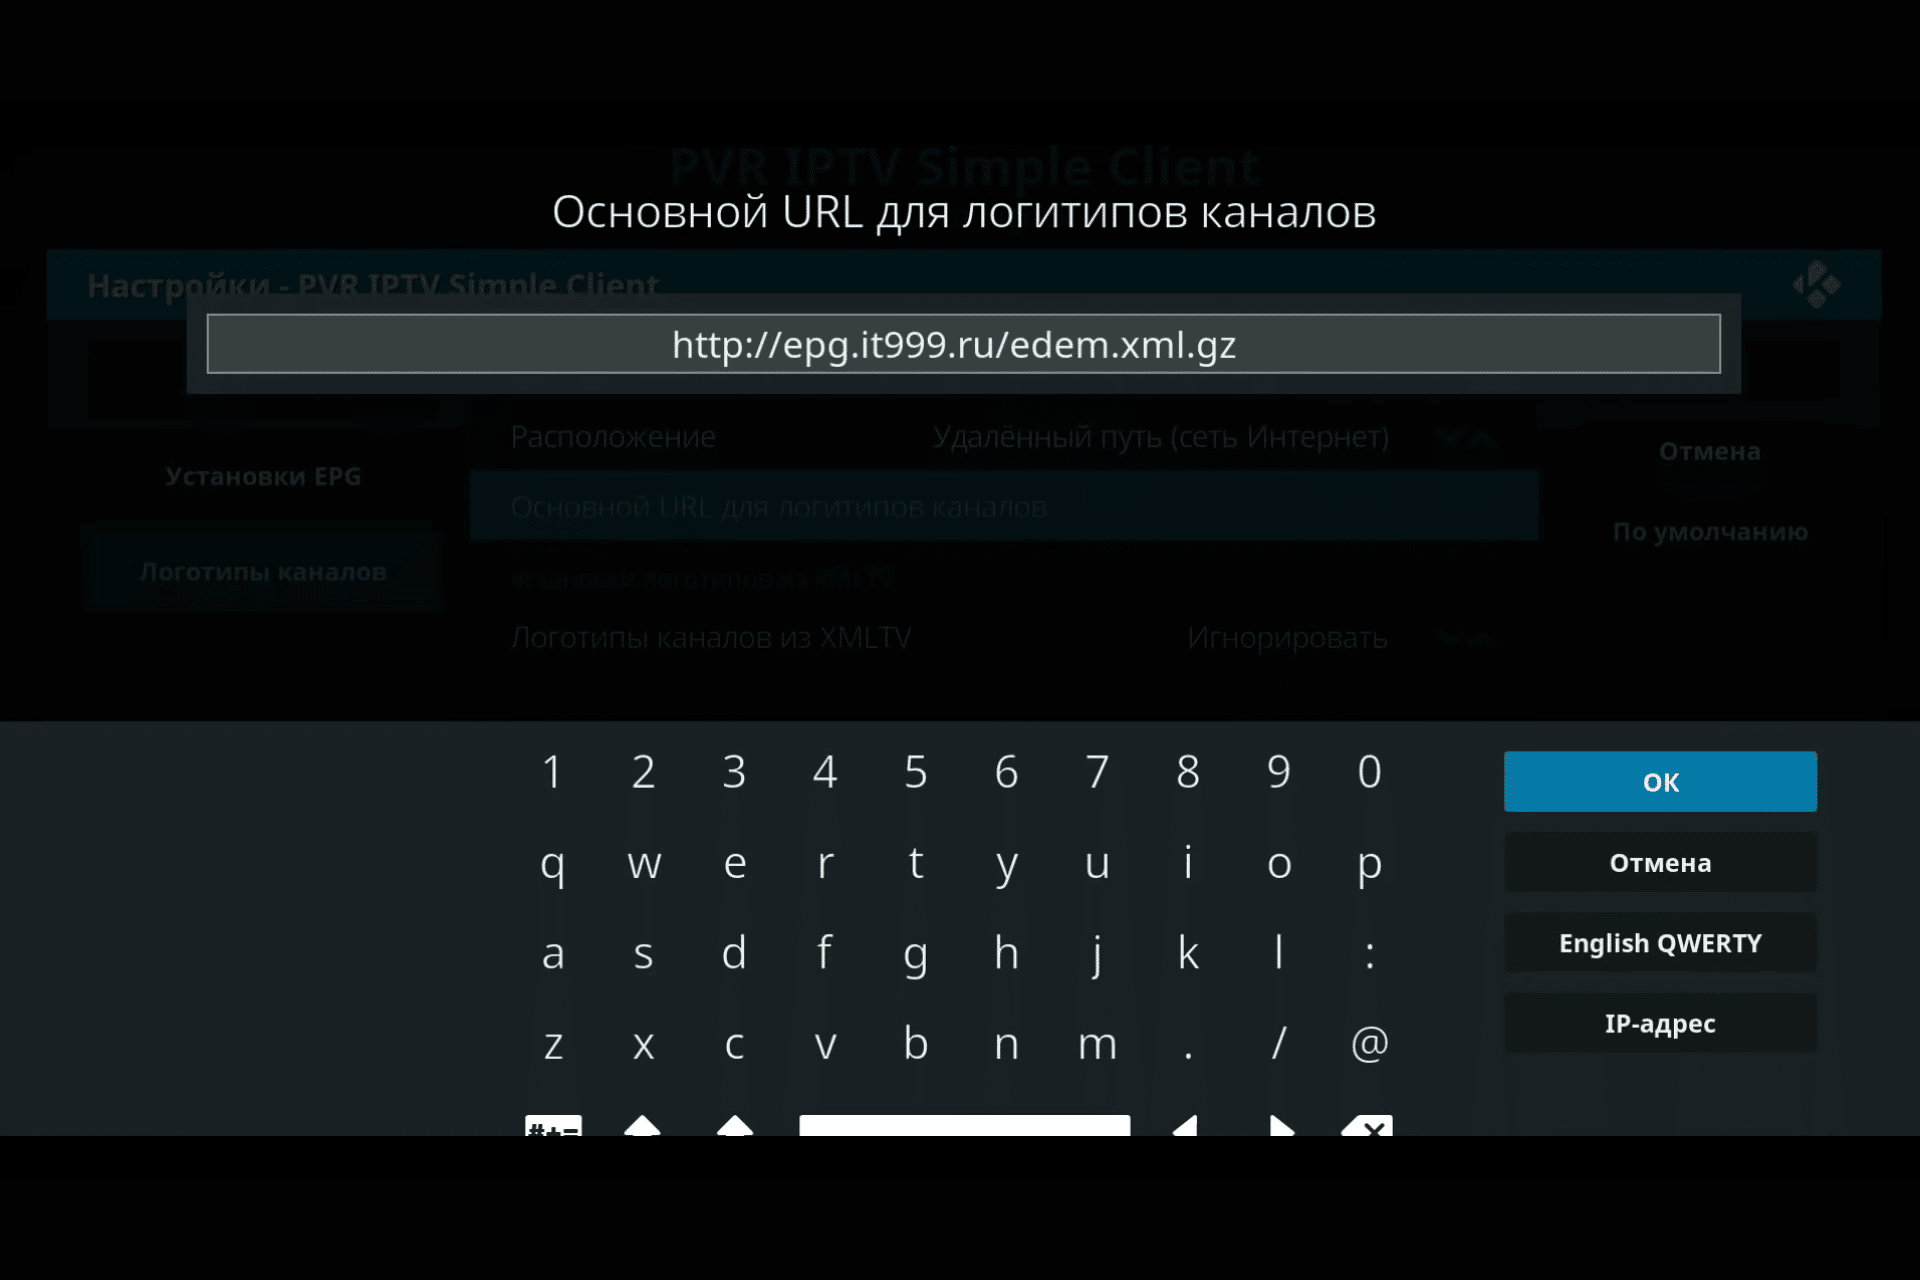
- If the guide contains channel logos, open the corresponding section. By clicking “Main URL for channel logos”, paste the desired link in the box that appears.
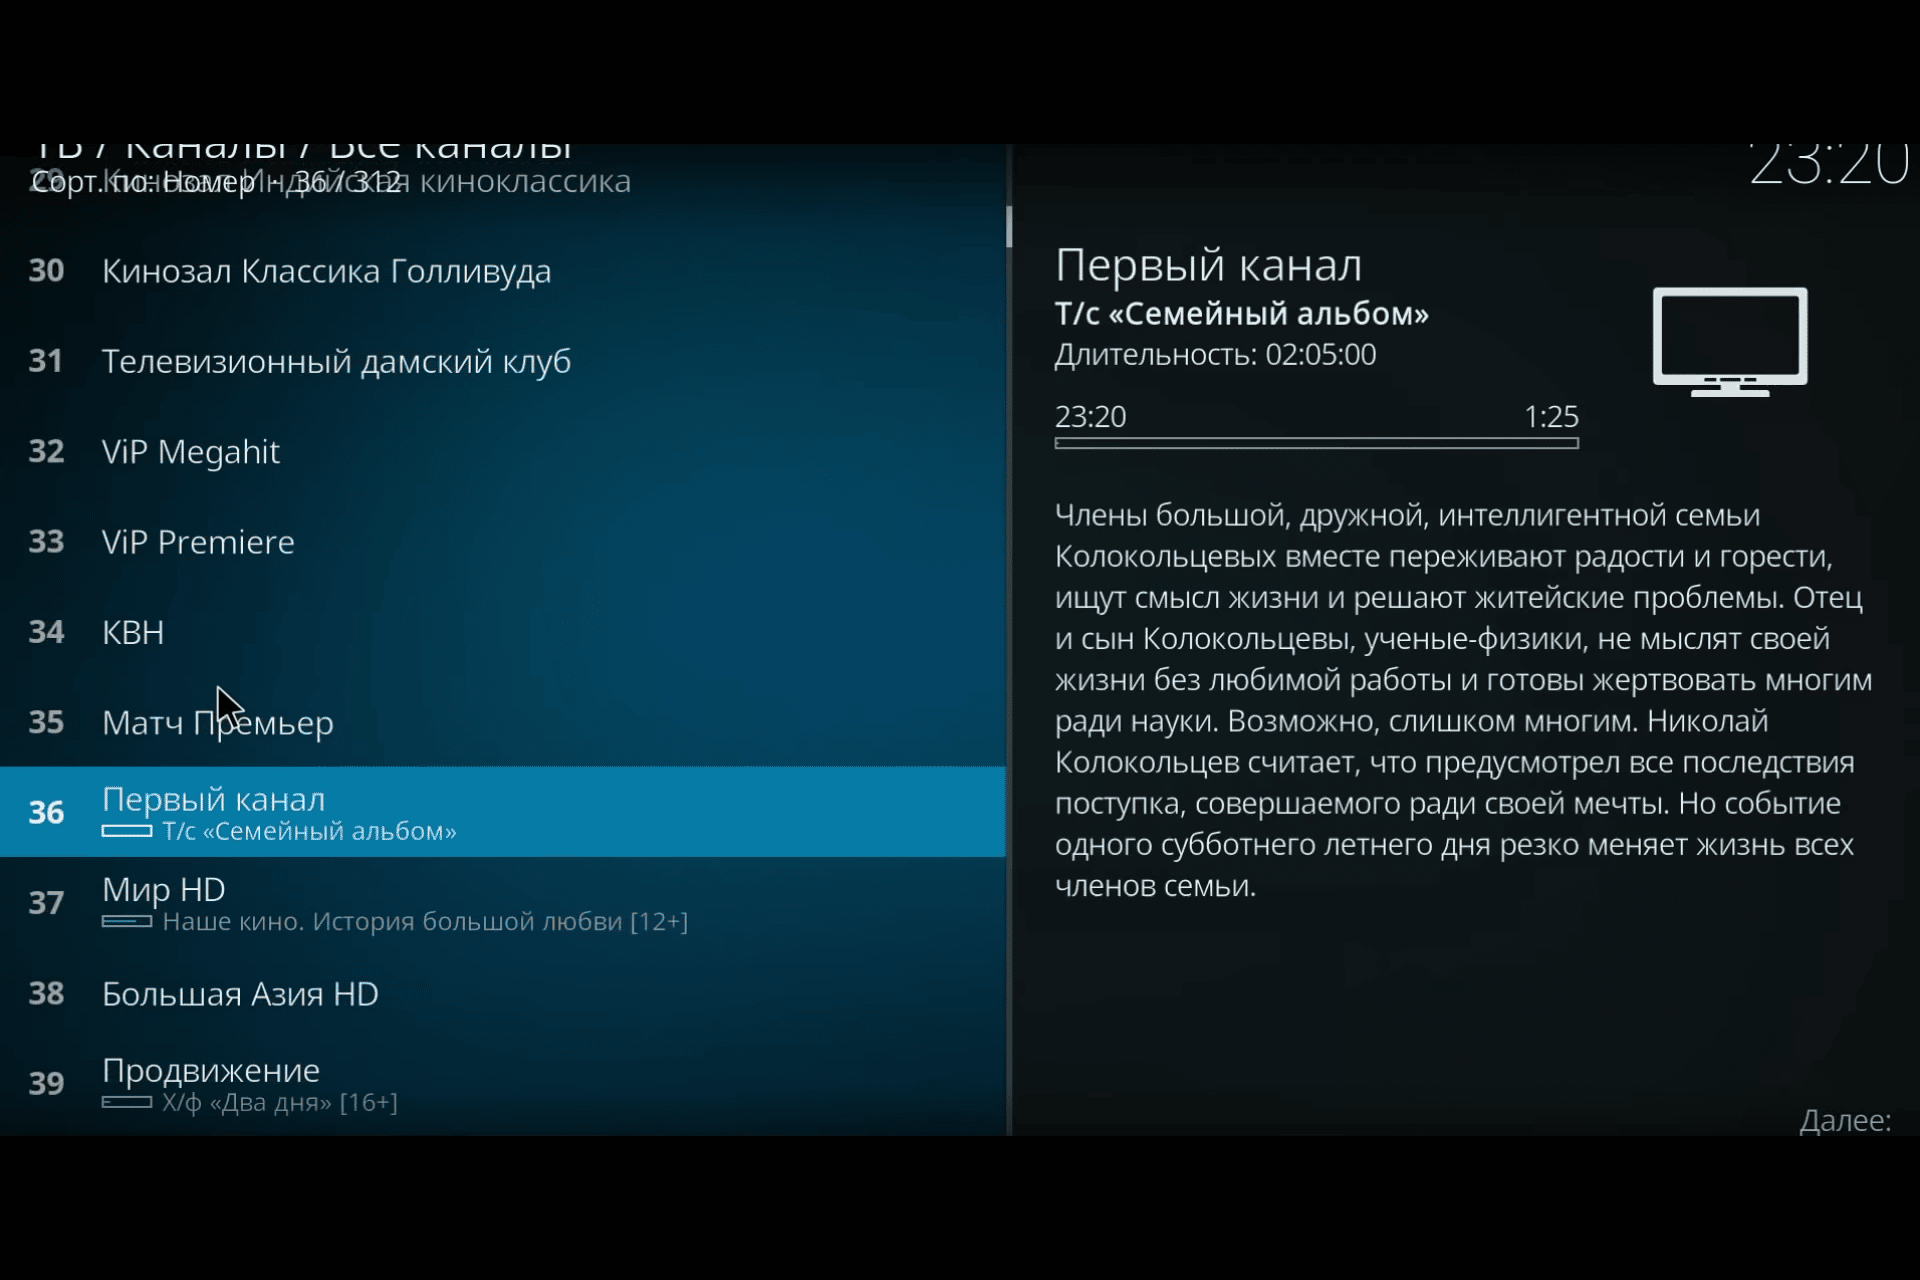
- For the changed settings to take effect, you need to restart the player. When you restart, you will already see a complete list of channels and information about what is currently on a particular channel.


Where can I find playlists?
There are many free IPTV playlists on the web, such as IPTV Forever. This is a self-updating list available at https://iptvm3u.ru/list.m3u. Paid packages give you access to more HD channels. Thus, the EDEM TV service is ready to provide customers with over 1,000 TV channels with a fresh program guide for only $1 (75 rubles) per month.
How to install the program on Smart TV?
LG-branded smart TVs run on the webOS operating system, while Kodi is originally designed for Android devices and is not available in the LG Store. However, users have found several ways to circumvent this limitation:
- connection to Android TV Box;
- watching videos through third-party apps like Chromecast.
The second option will require two applications: Google Chromecast and Google Home. After downloading them to your smartphone, do the following:
- Open your Chromecast and connect to your TV.
- Go to Google Home and select “Cast screen/audio”.
Other questions about using Kodi
This paragraph lists answers to the most popular questions that arise when using a multimedia player.
Installing extensions from third-party sources
Third party repositories give users access to more extensions than are in the official repository. To allow installation from third-party sources, you need to open “Add-ons” and activate the “Unknown sources” switch.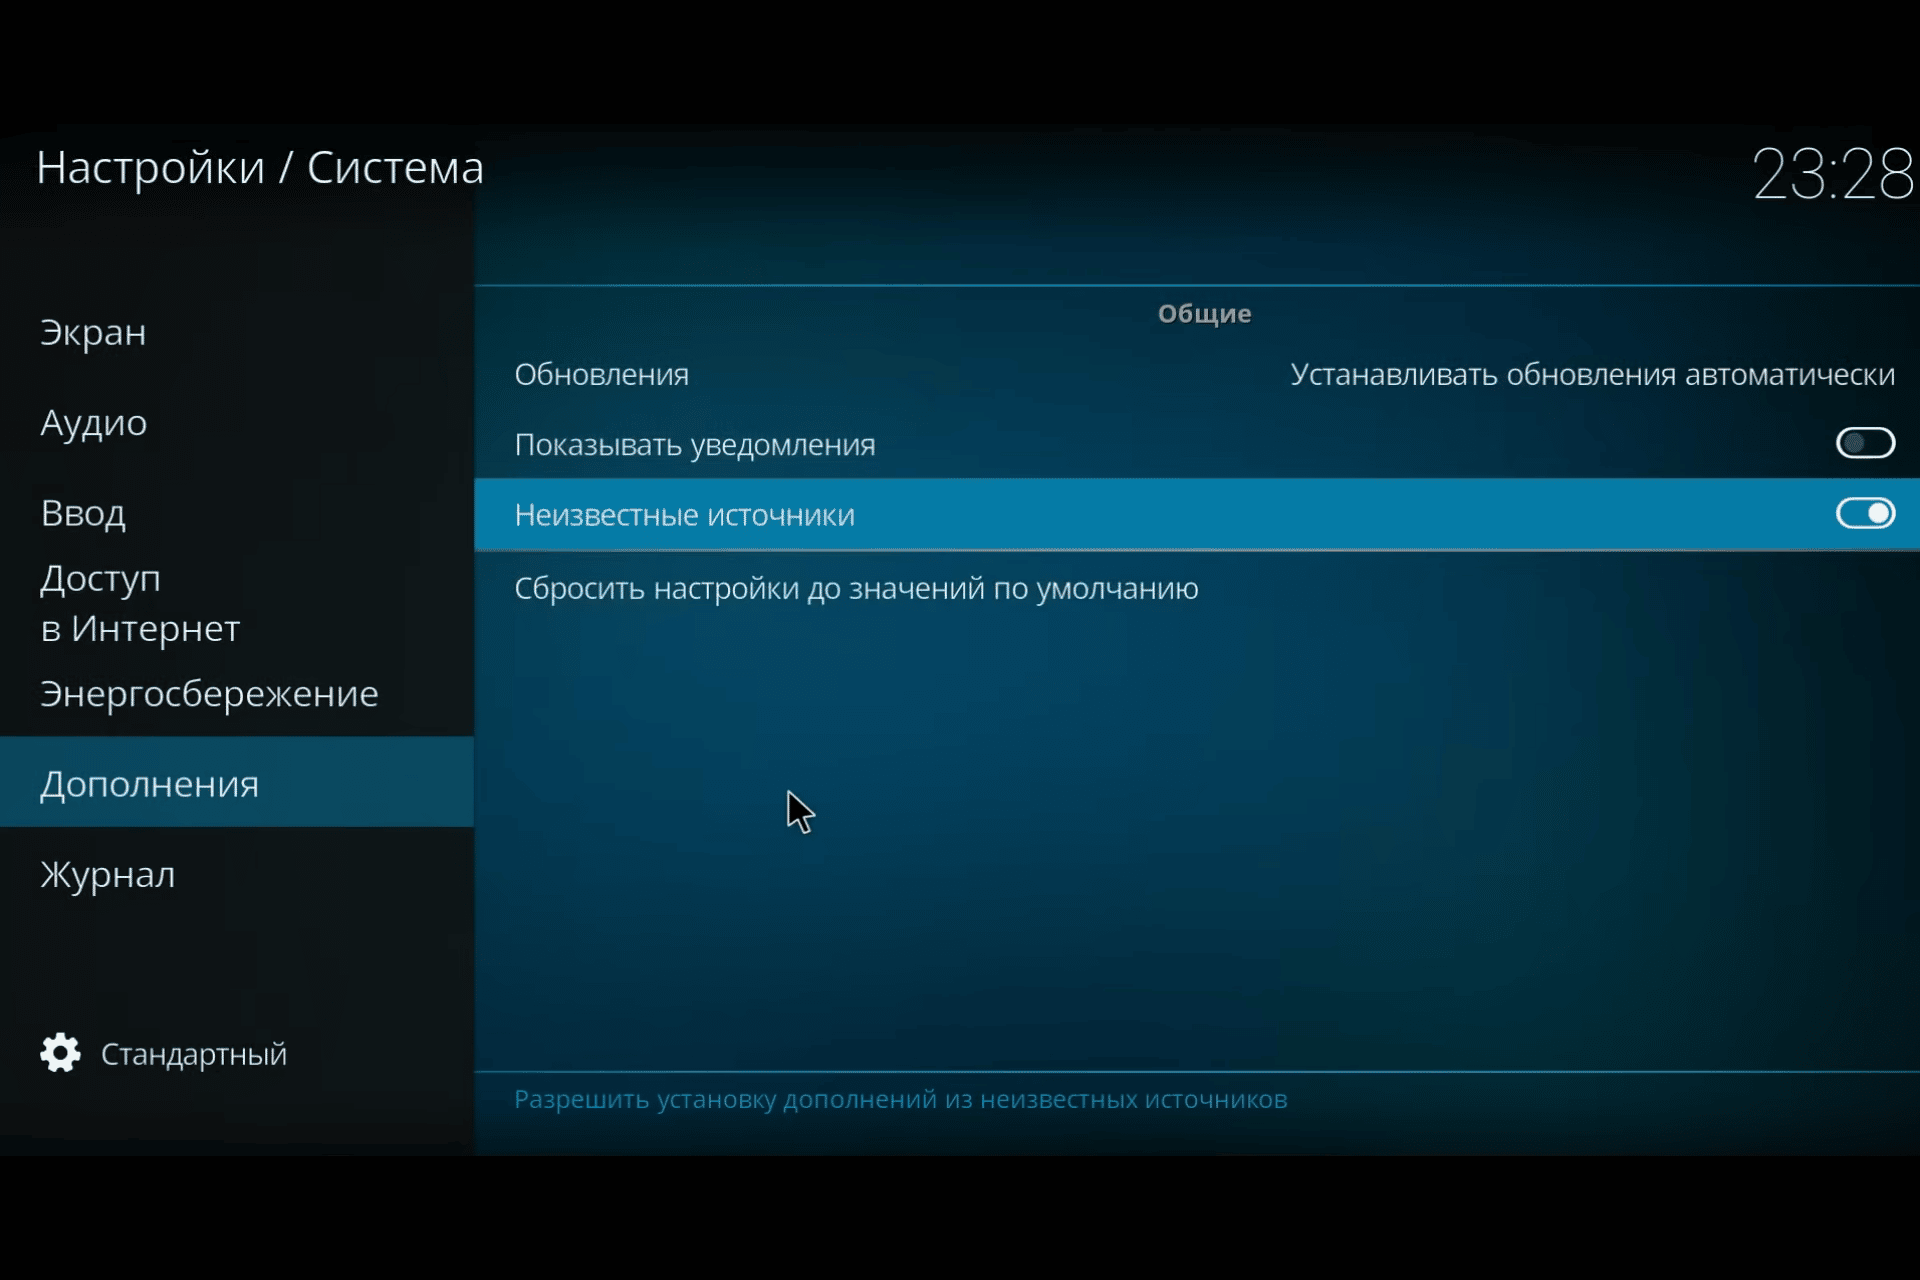
What are repositories and how to install them?
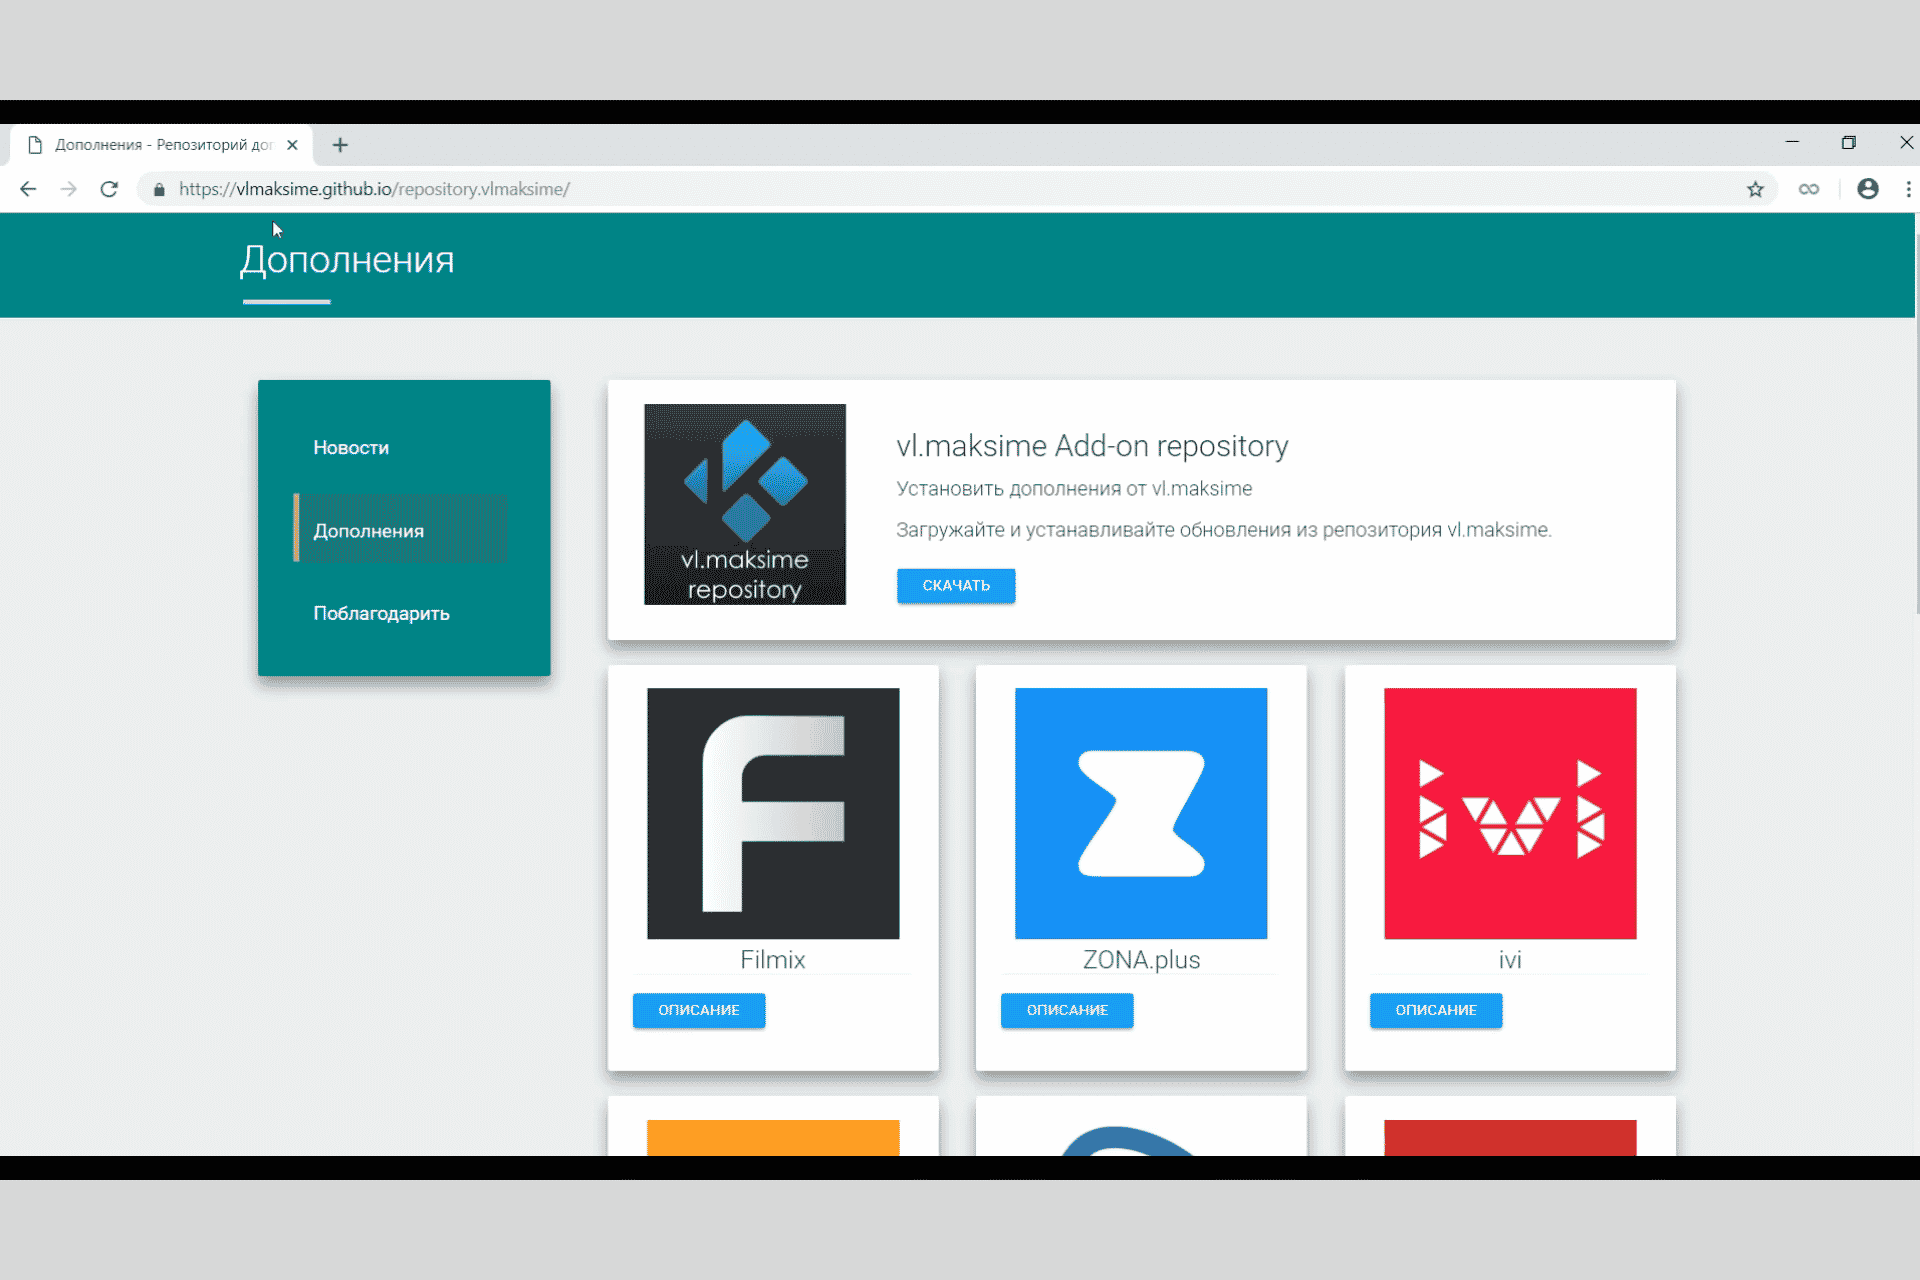
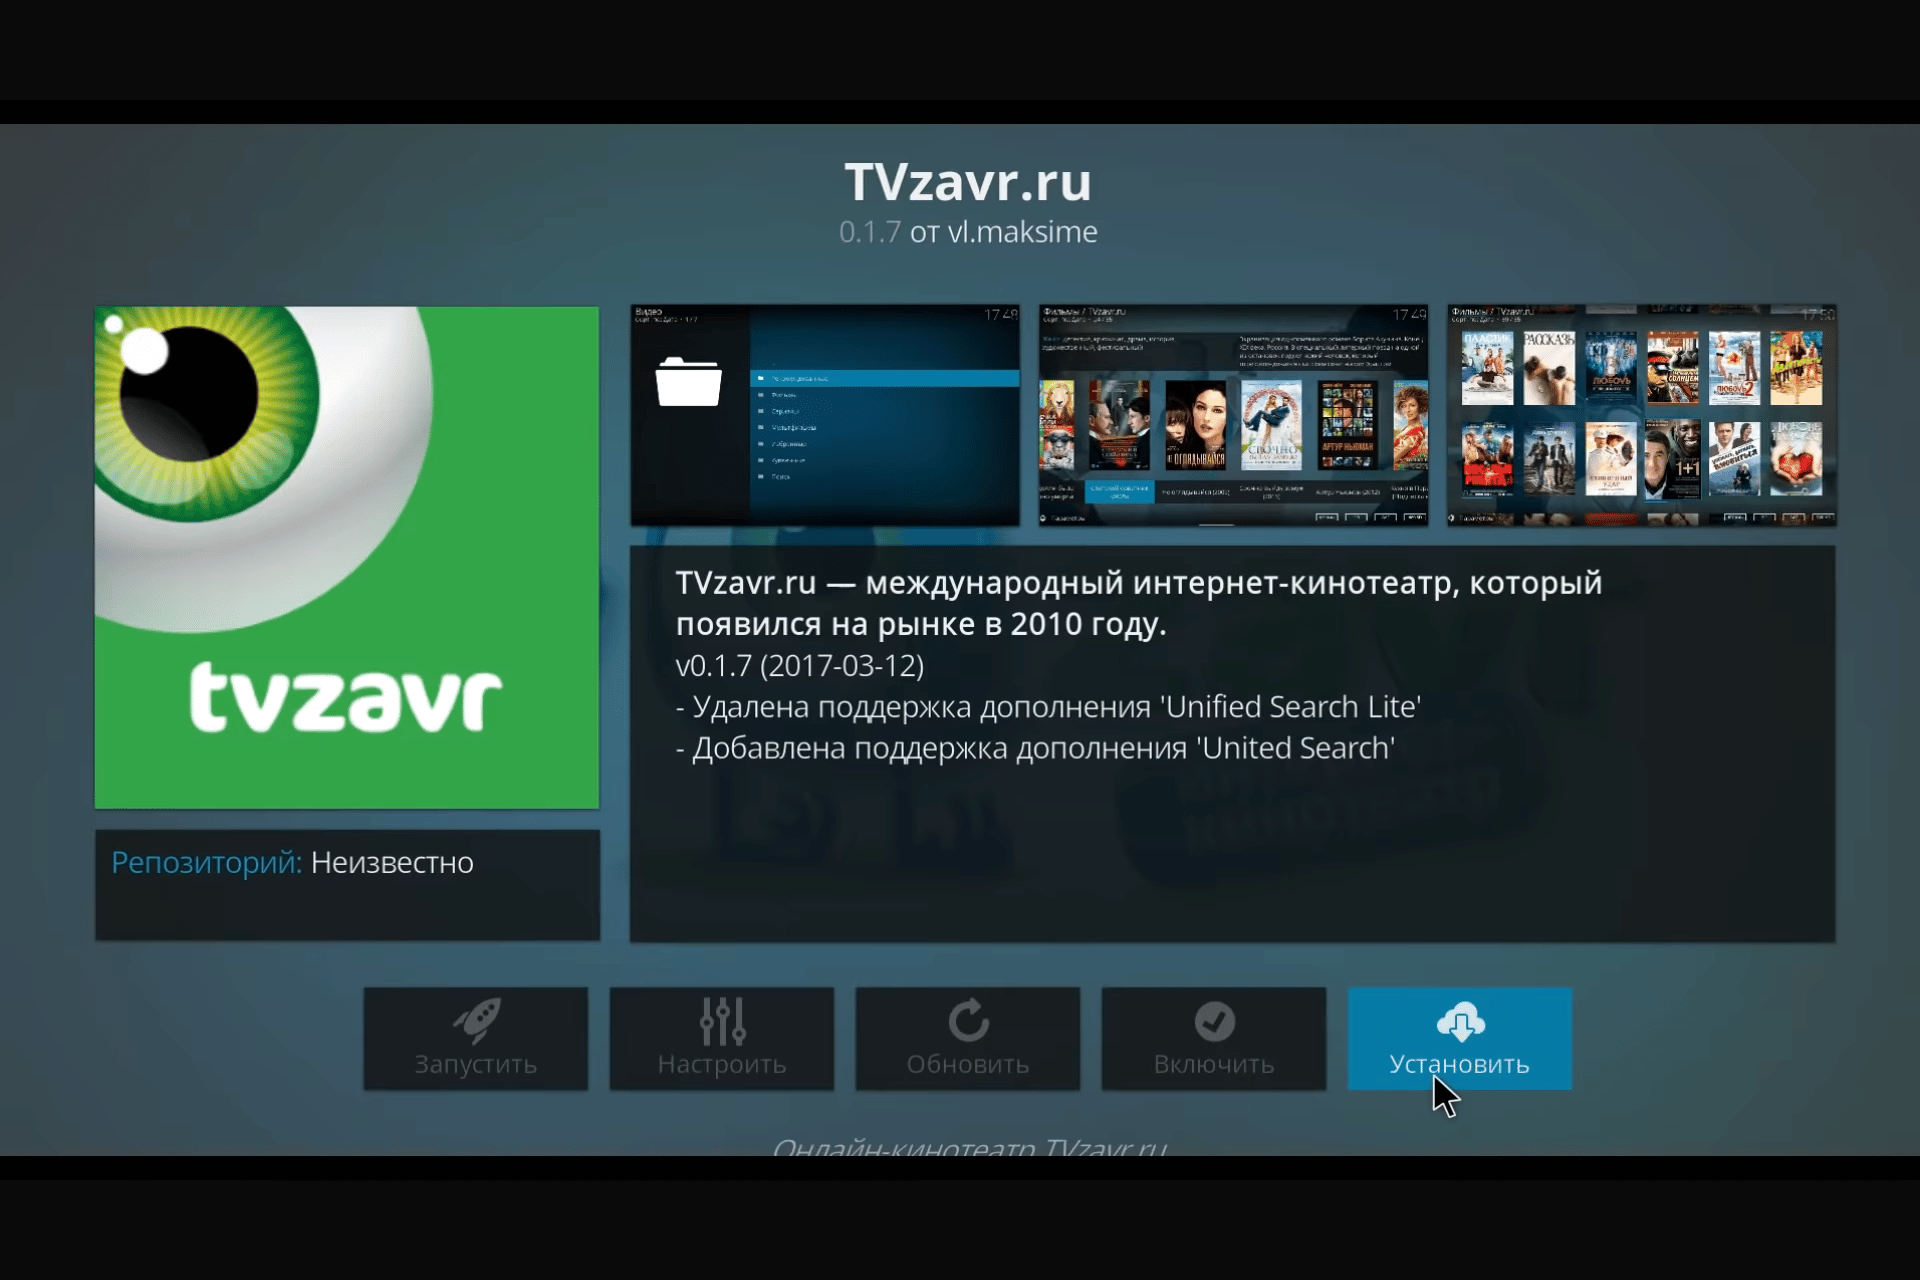
A repository is an archive of files where various plugins, modules and other utilities are located that expand the capabilities of the Kodi multimedia center. For example, the vl.maksime repository contains IVI, TVZavr and Filmix online cinema applications that allow you to enjoy your favorite movies. In his example, you need to follow the algorithm of actions:
- Download the repository from the link (https://vlmaksime.github.io/repository.vlmaksime/).
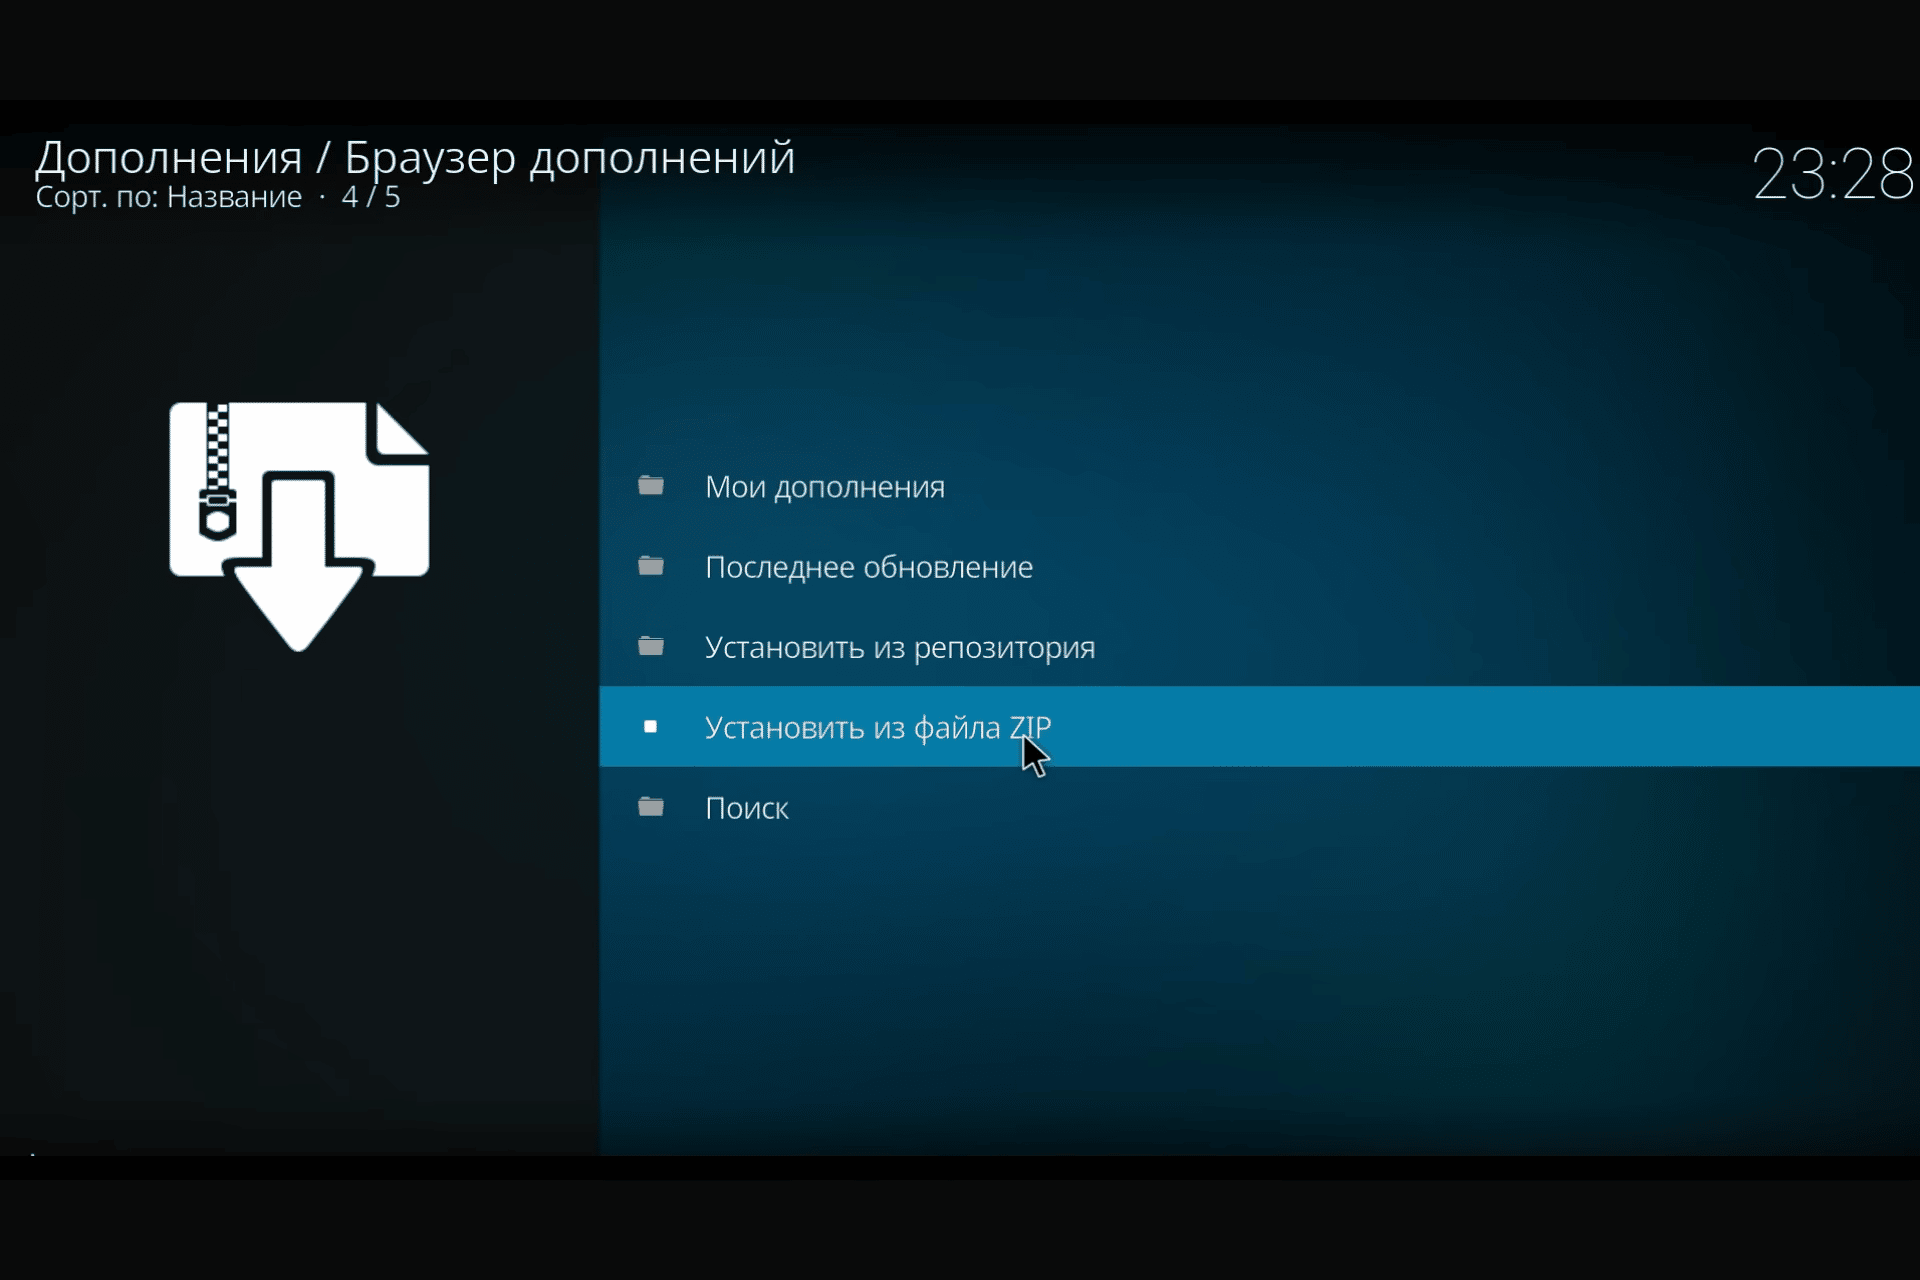
- When it opens, go to “Add-ons” and click on the “box”.
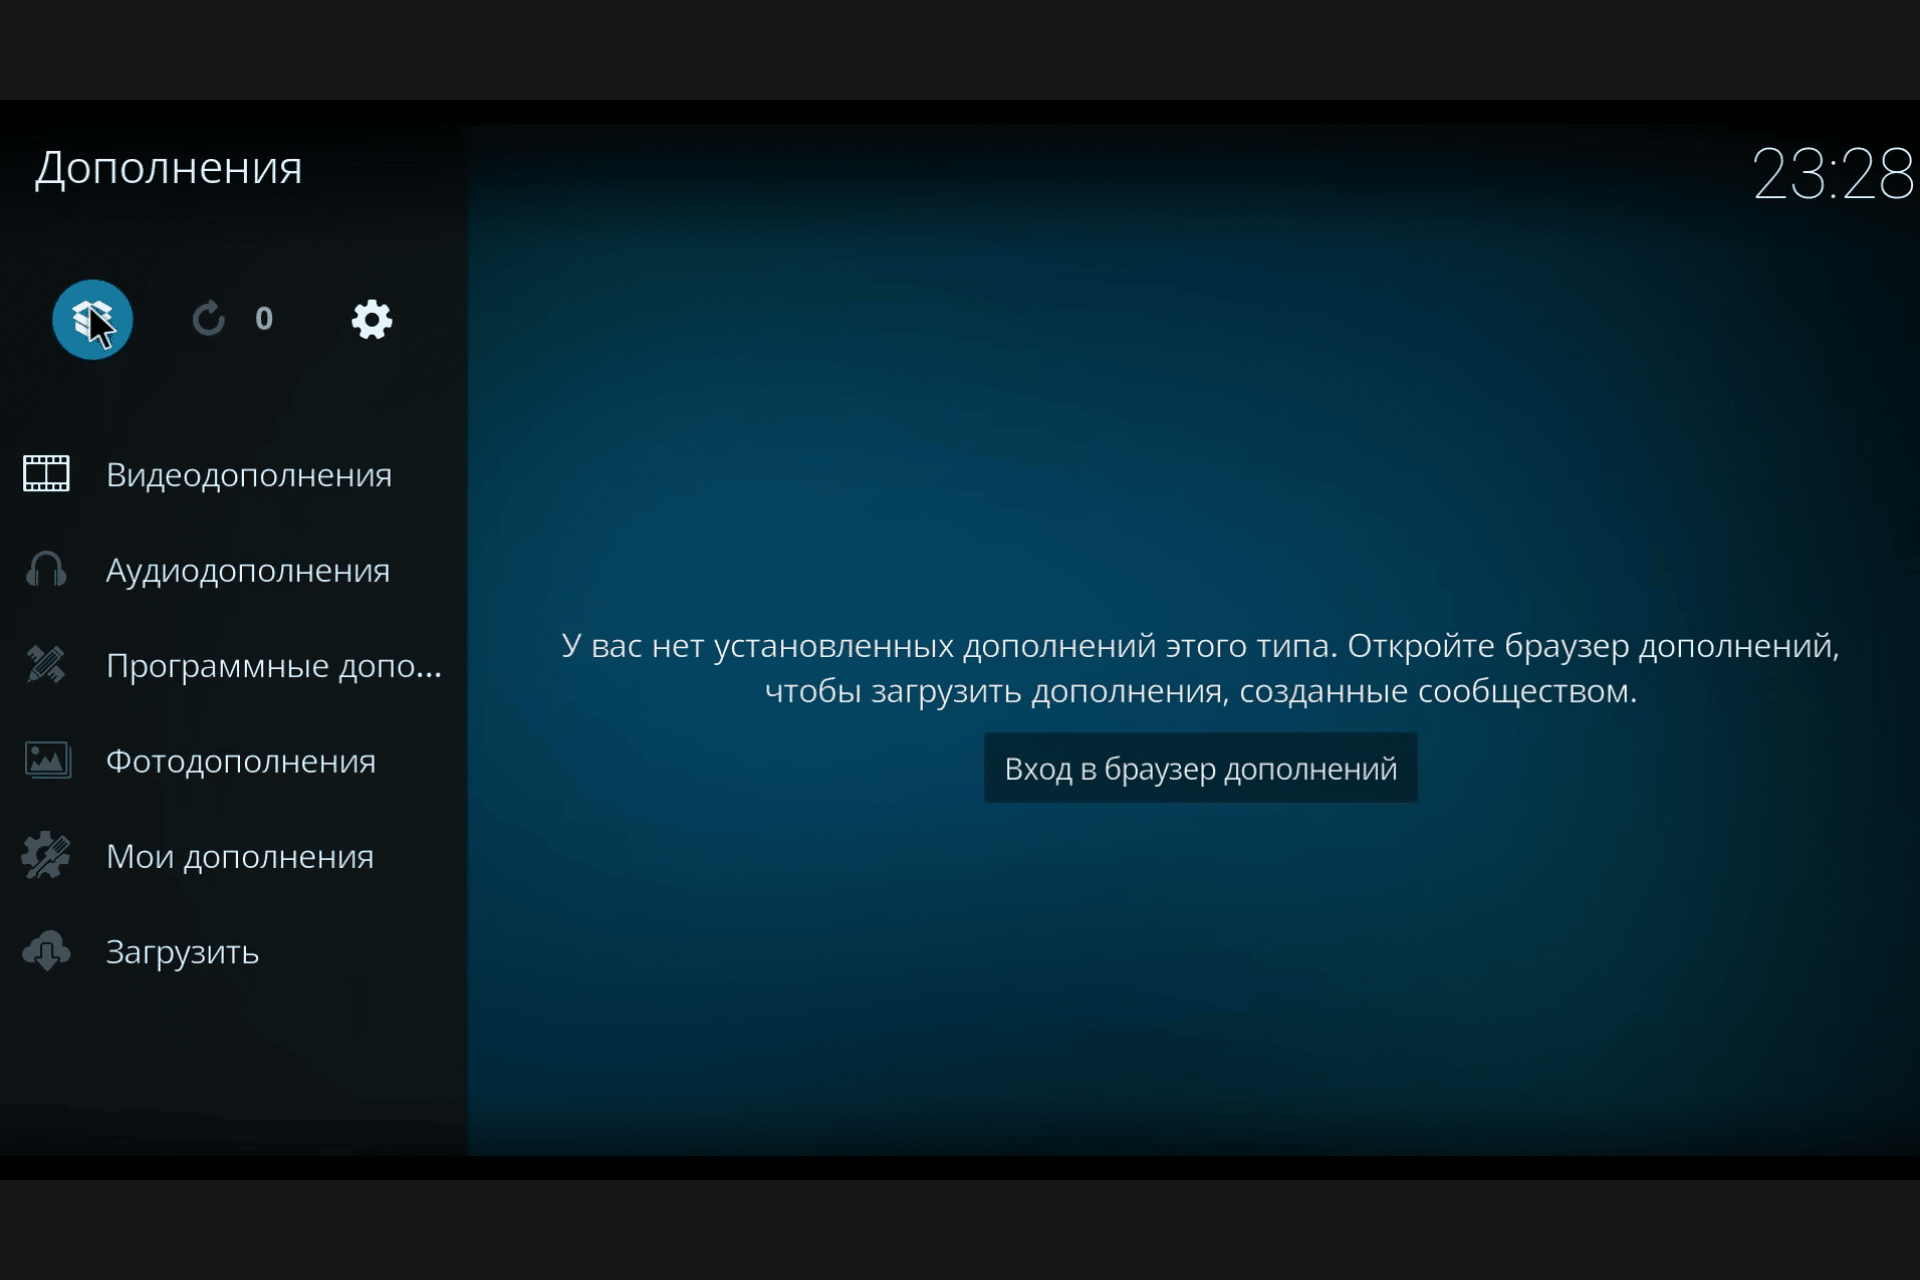
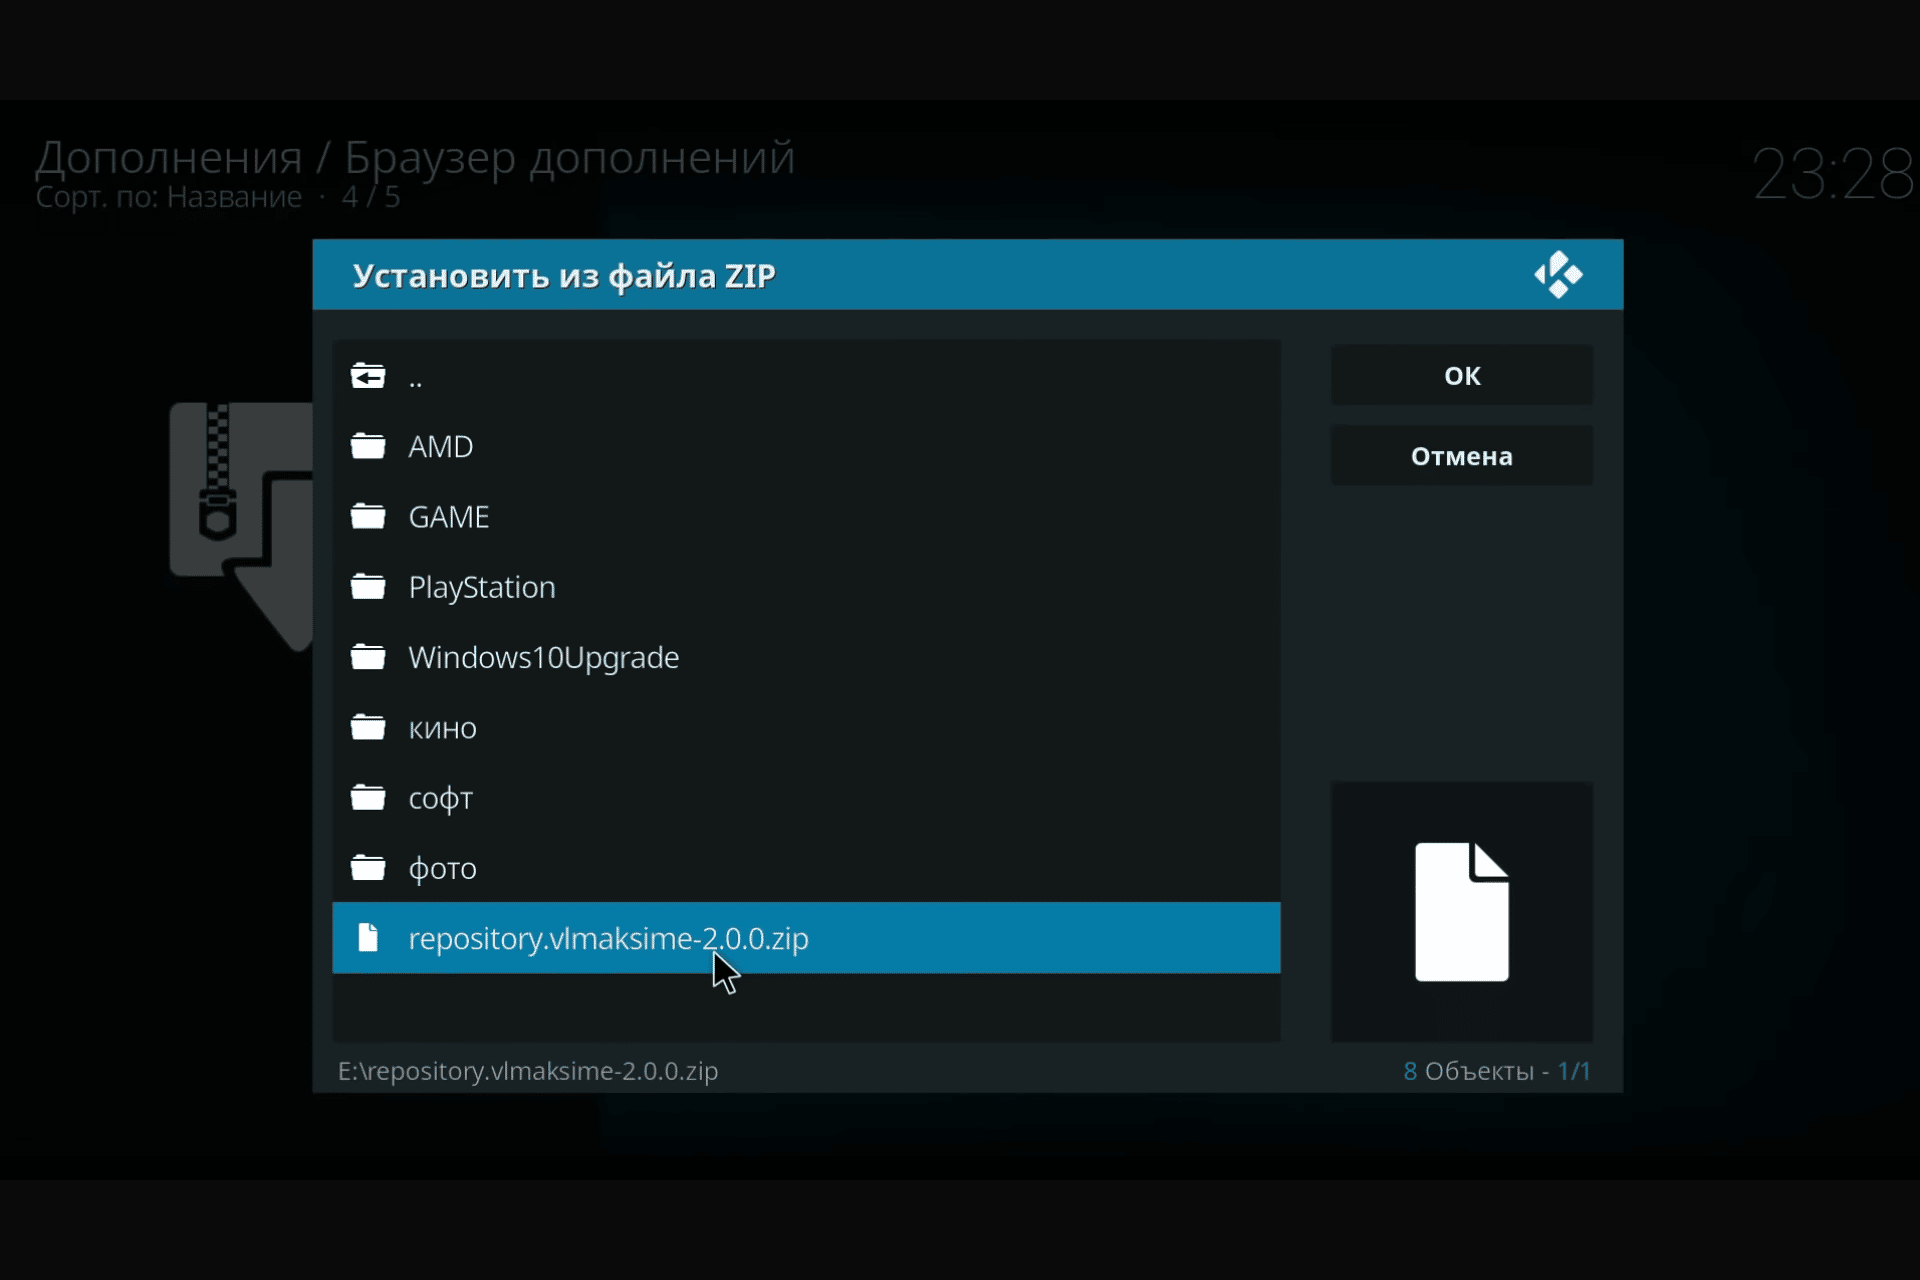
- Click “Install from ZIP file”.
- In the dialog box, select the downloaded folder.
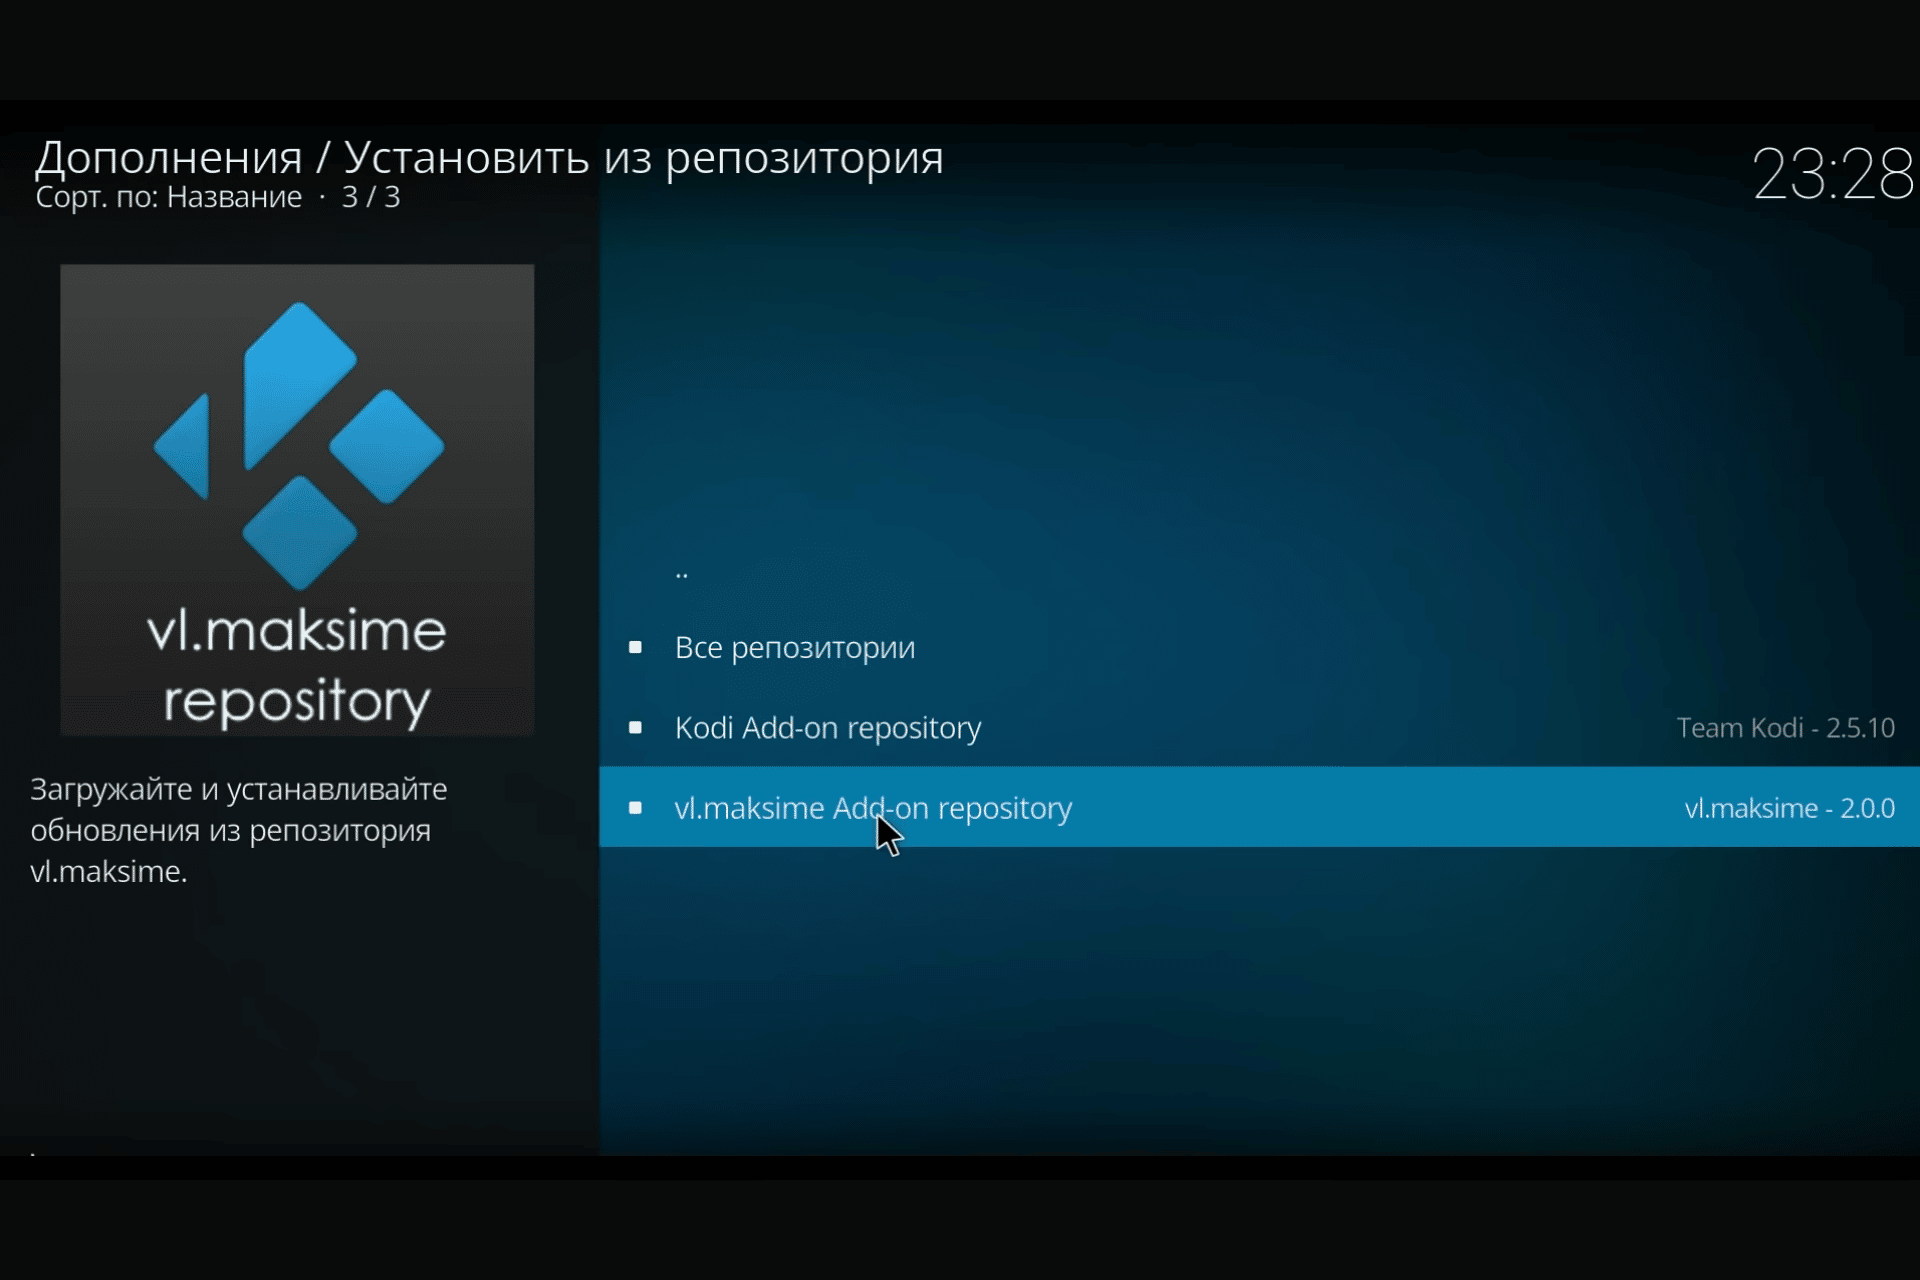
- Click “Install from repository” and select the “vl.maksime” repository.
- Open the “Video Extras” folder in the repository.
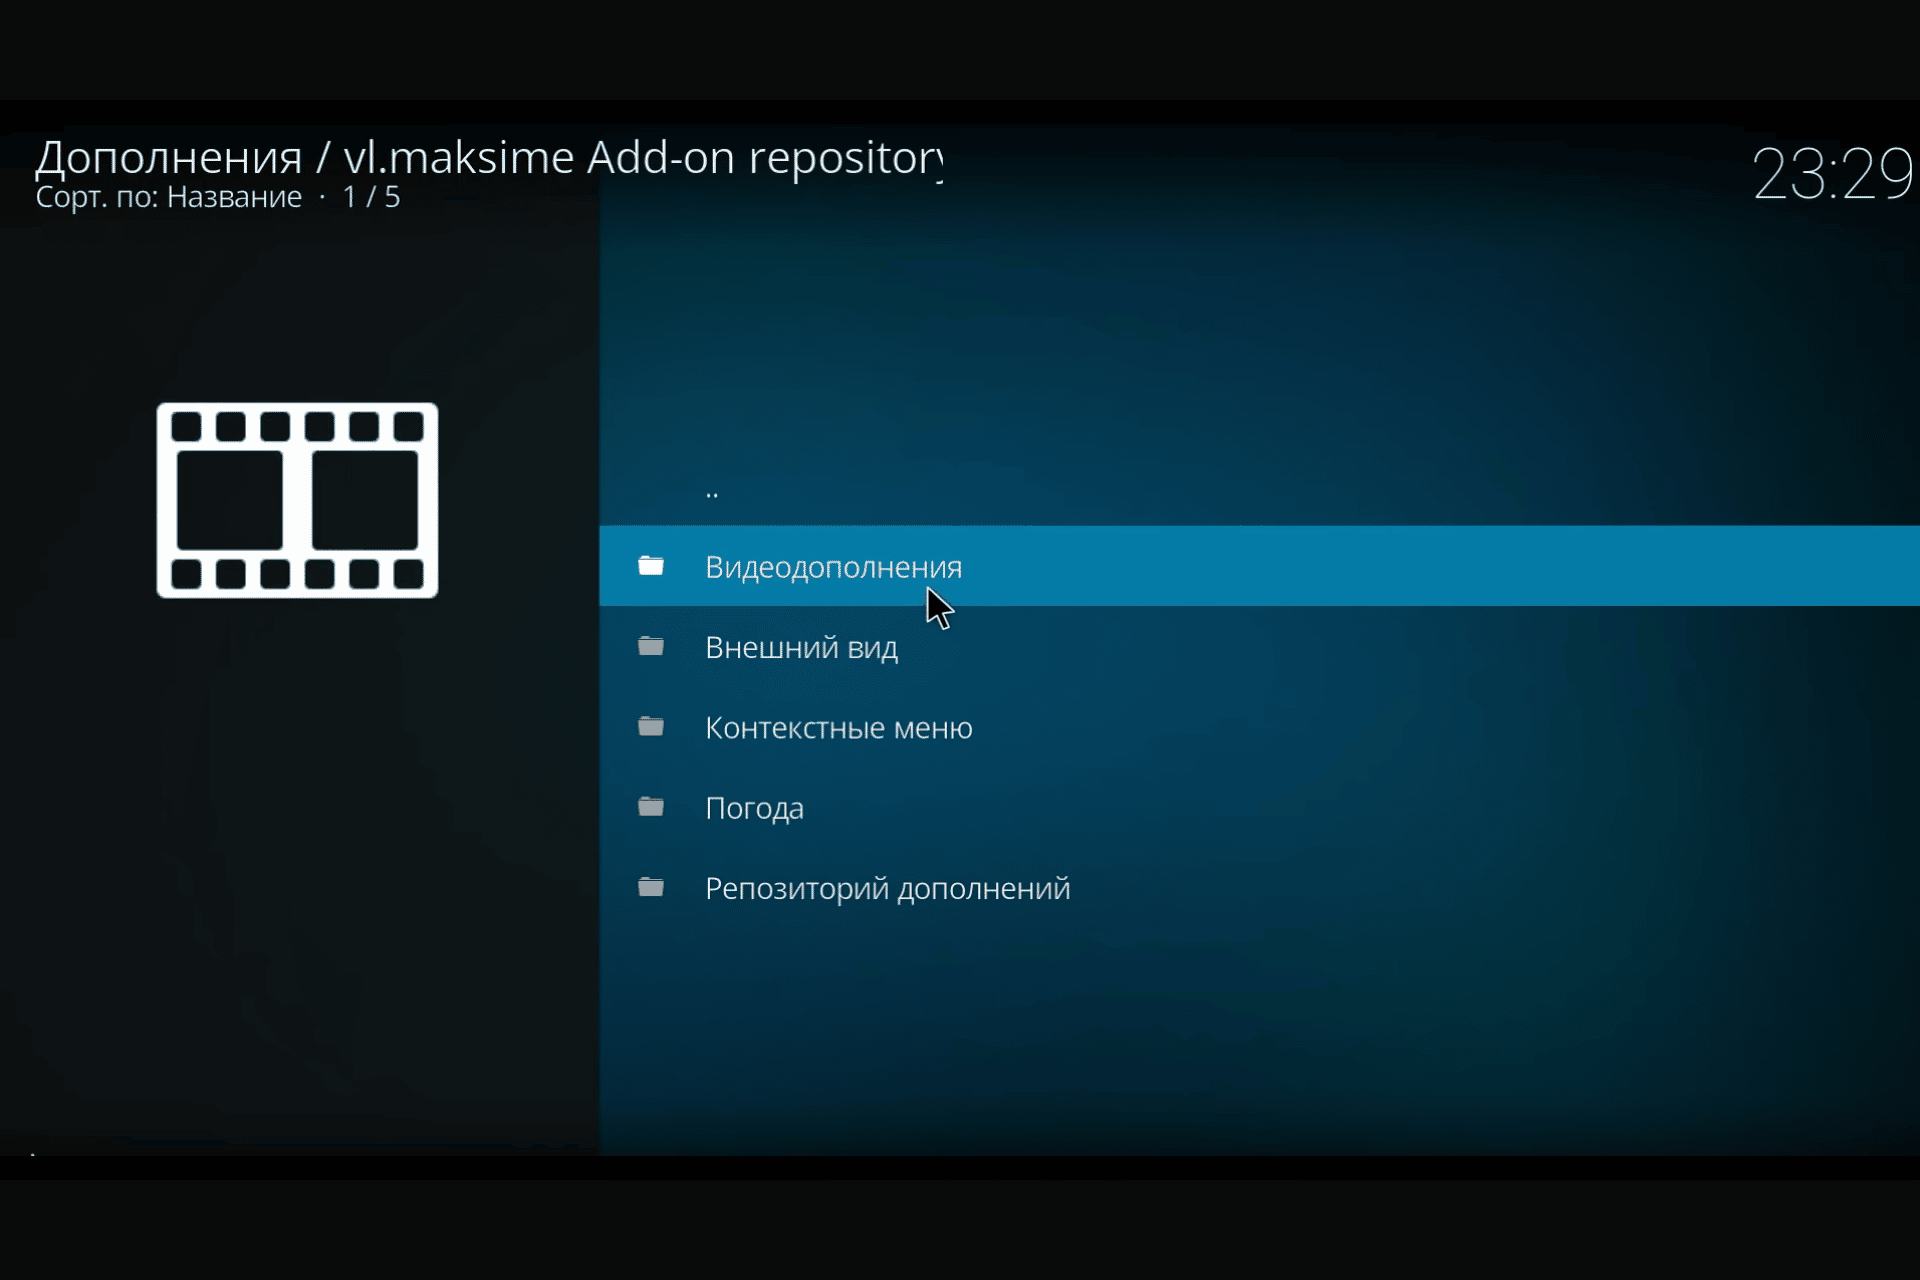
- Select any application (for example, TVZavr) and click “Install”. Ready!


How to install and watch Youtube in Kodi?
The Youtube extension is available in the official Kodi repository and is easy to download and install. However, recently there have been problems with the operation of this extension. To solve them you need:
- Log in to your Google account and open the Google console, then click “Enable APIs and Services”.

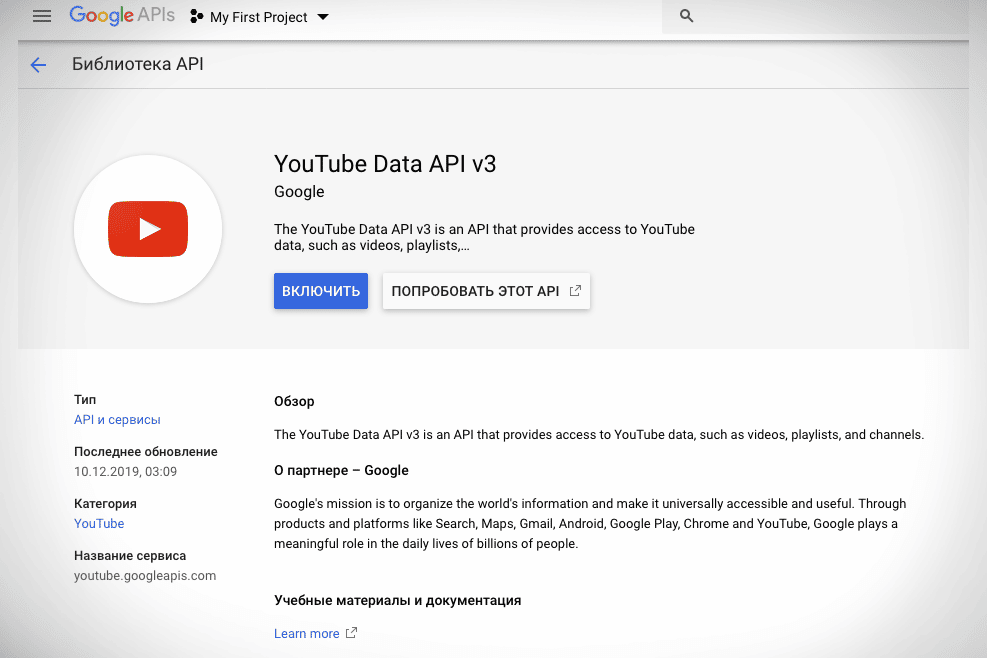
- Once in the API Library, select the YouTube Data API v3 plugin and activate it.
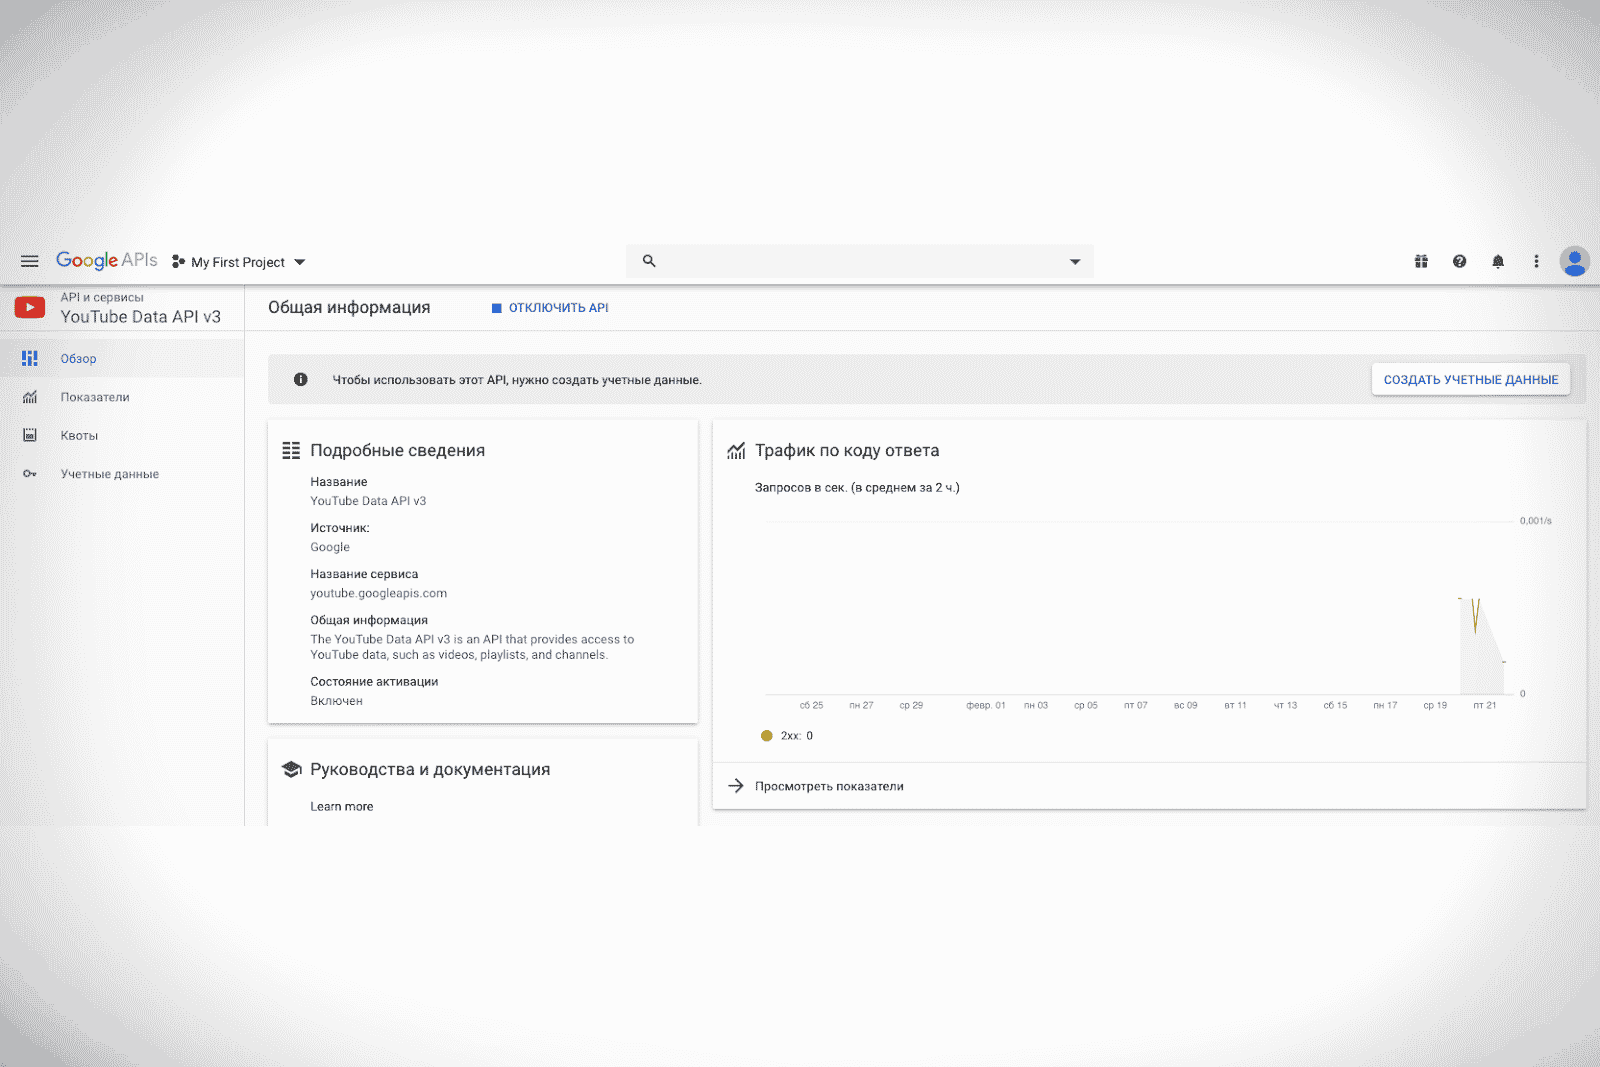
- On the main screen, click “Create Credentials”.
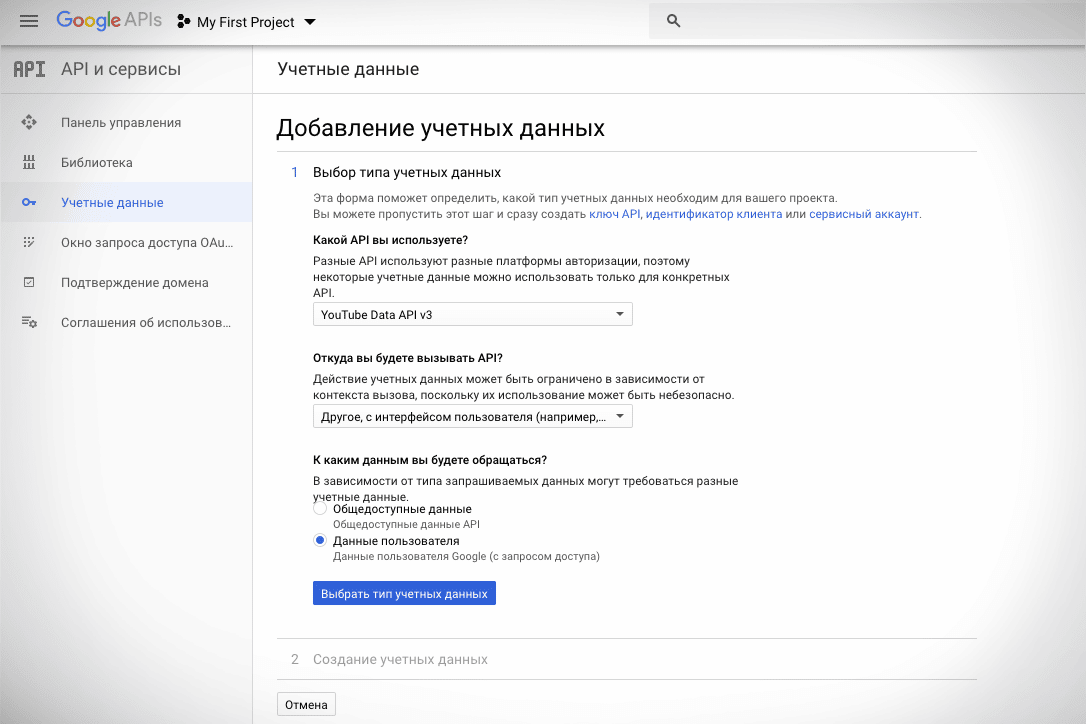
- Next, you need to answer a few questions:
- “What API is being used?” – “Youtube Data API v3”;
- “From where will you call the API?” – “Other, with a user interface, such as CUI”;
- “What data will you access?” – “User data”.
- The “Set up OAuth consent screen” dialog box will appear, where you have to click “Set up consent screen”.
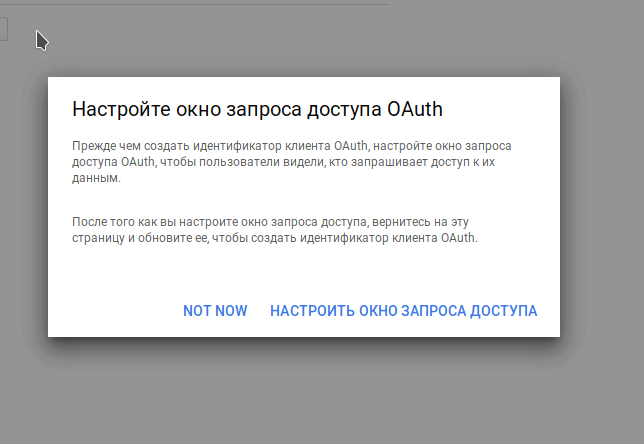
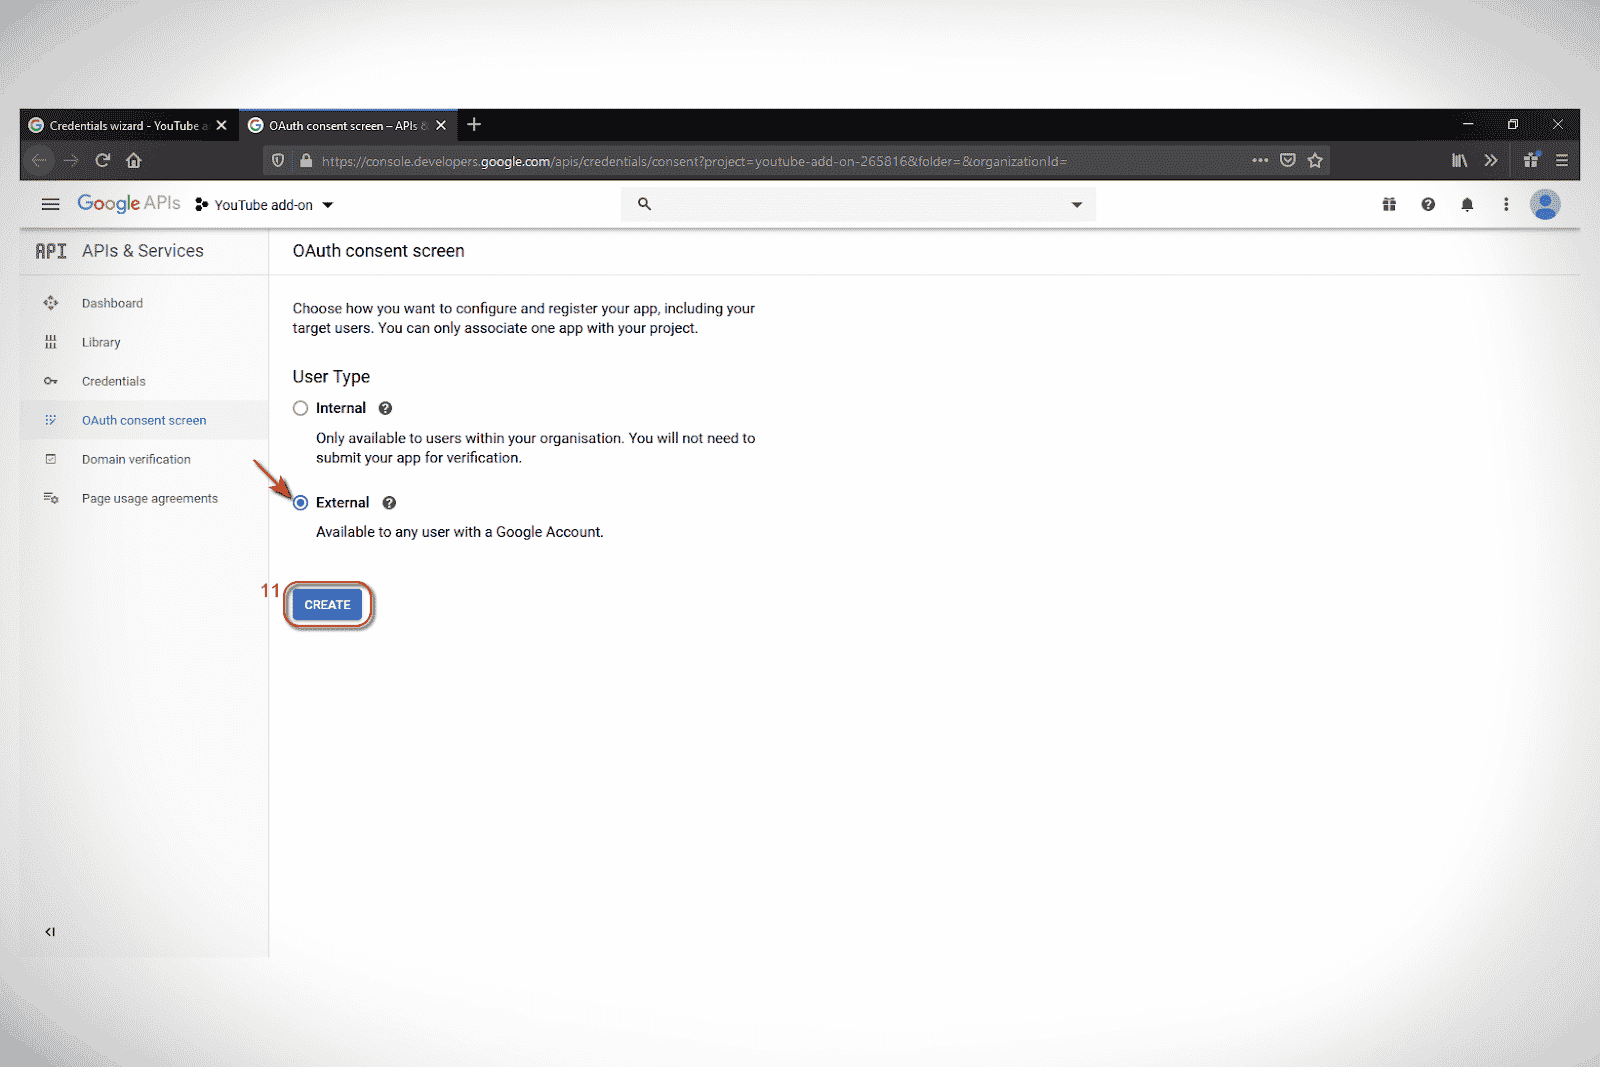
- In the new tab, select External and click Create.
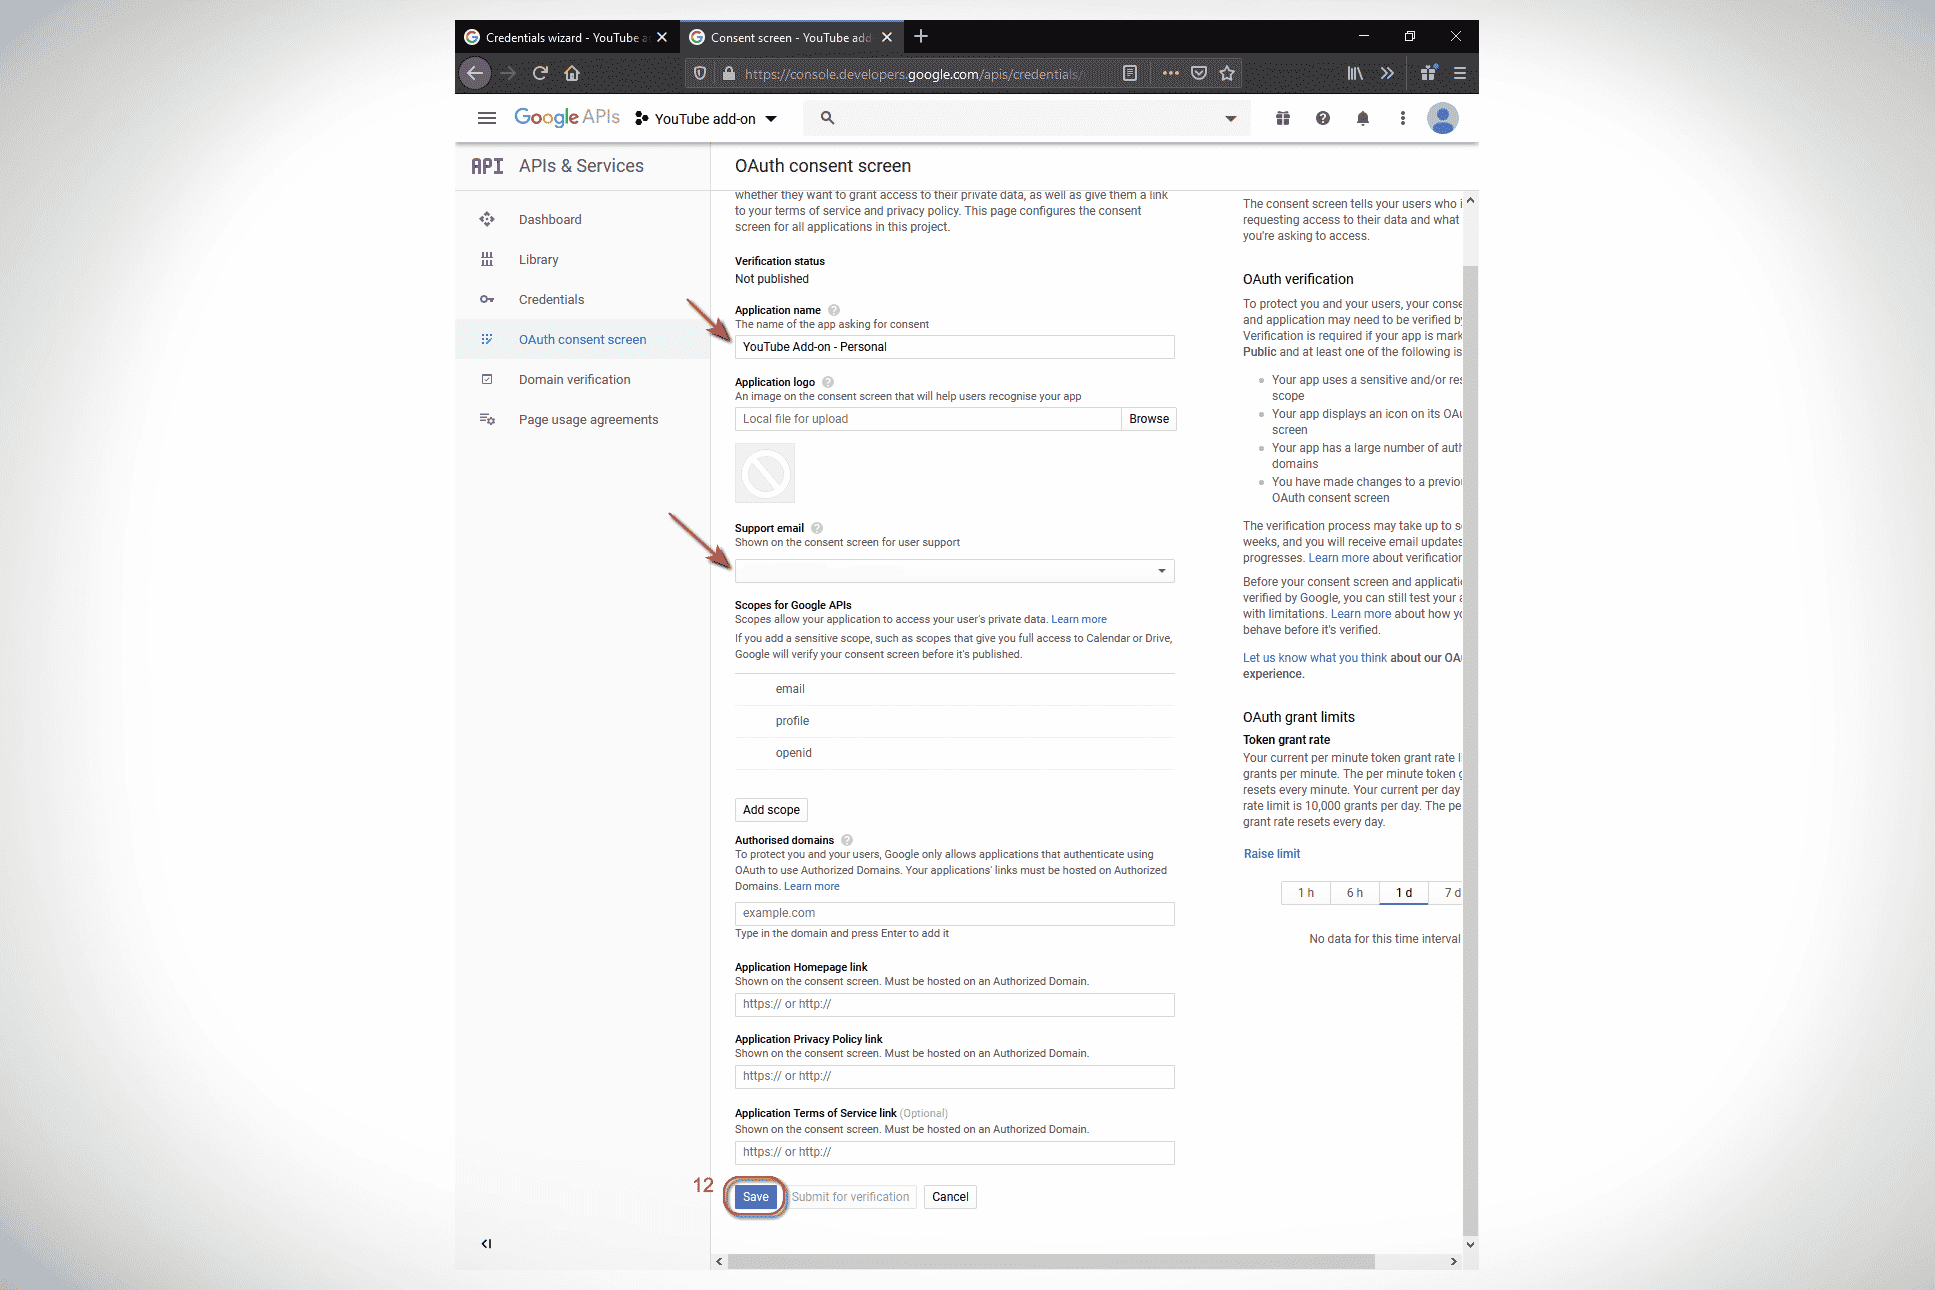
- Give the application a name and an email address, then click Save.
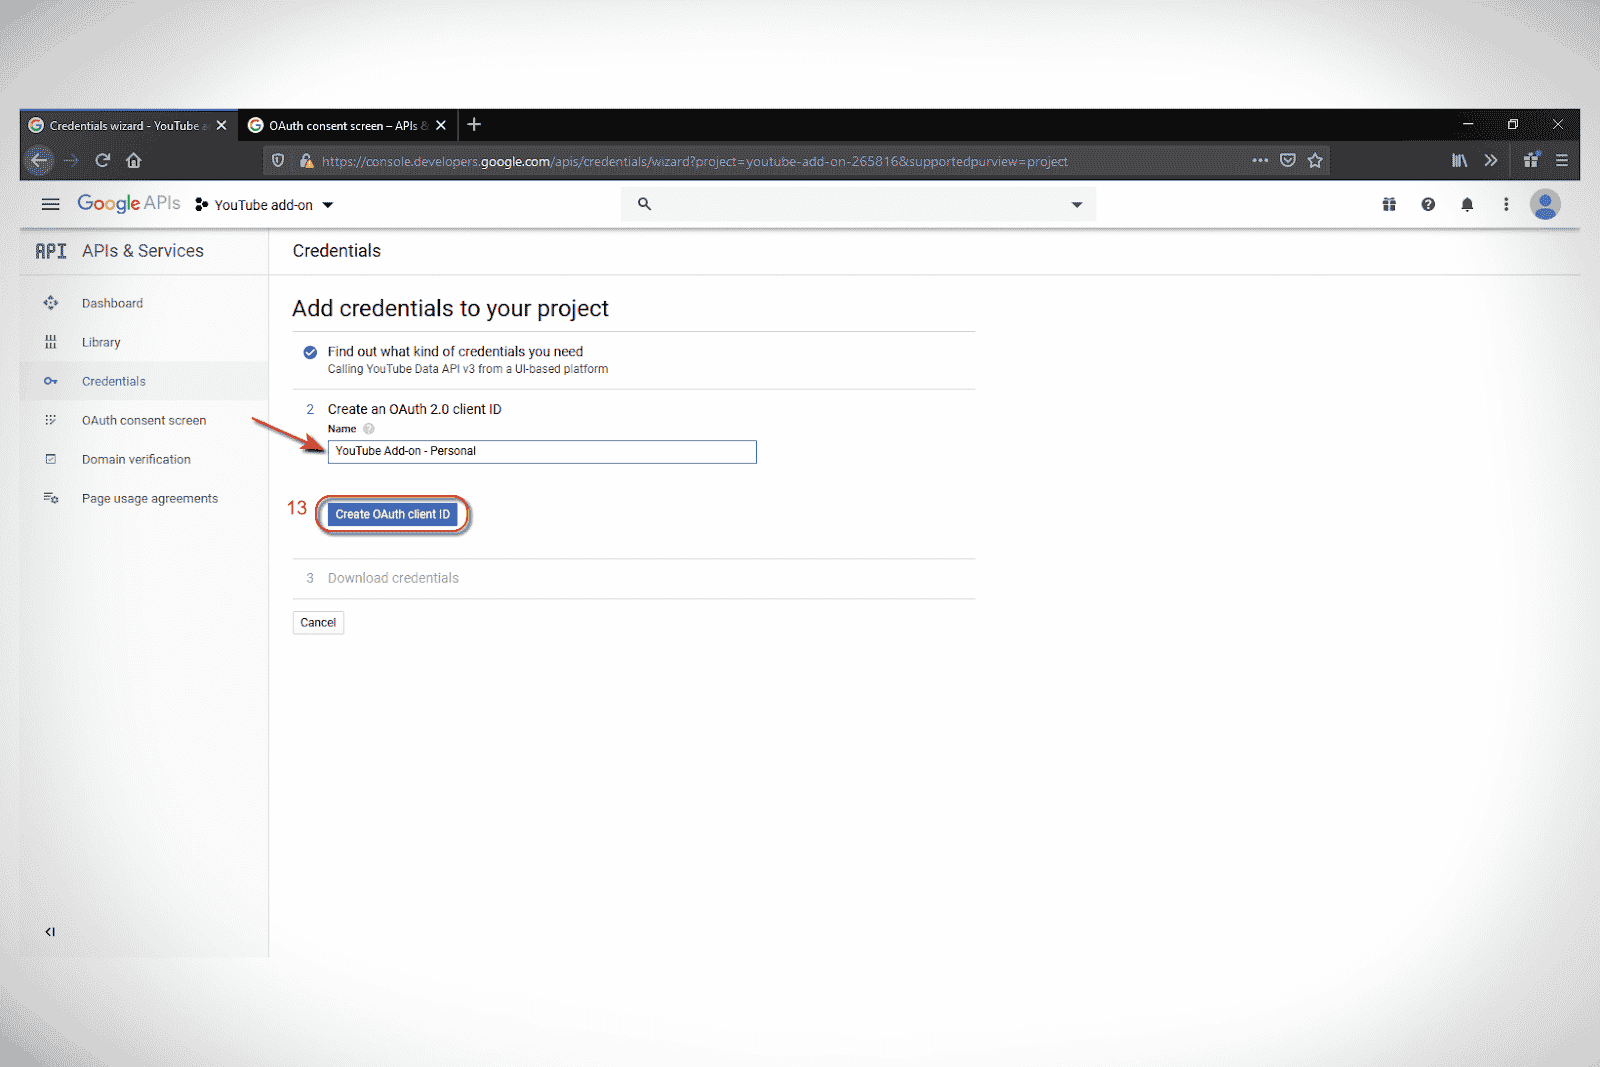
- Navigate to the Credentials item in the menu, where you need to name the project, then click “Create OAuth Client ID”.
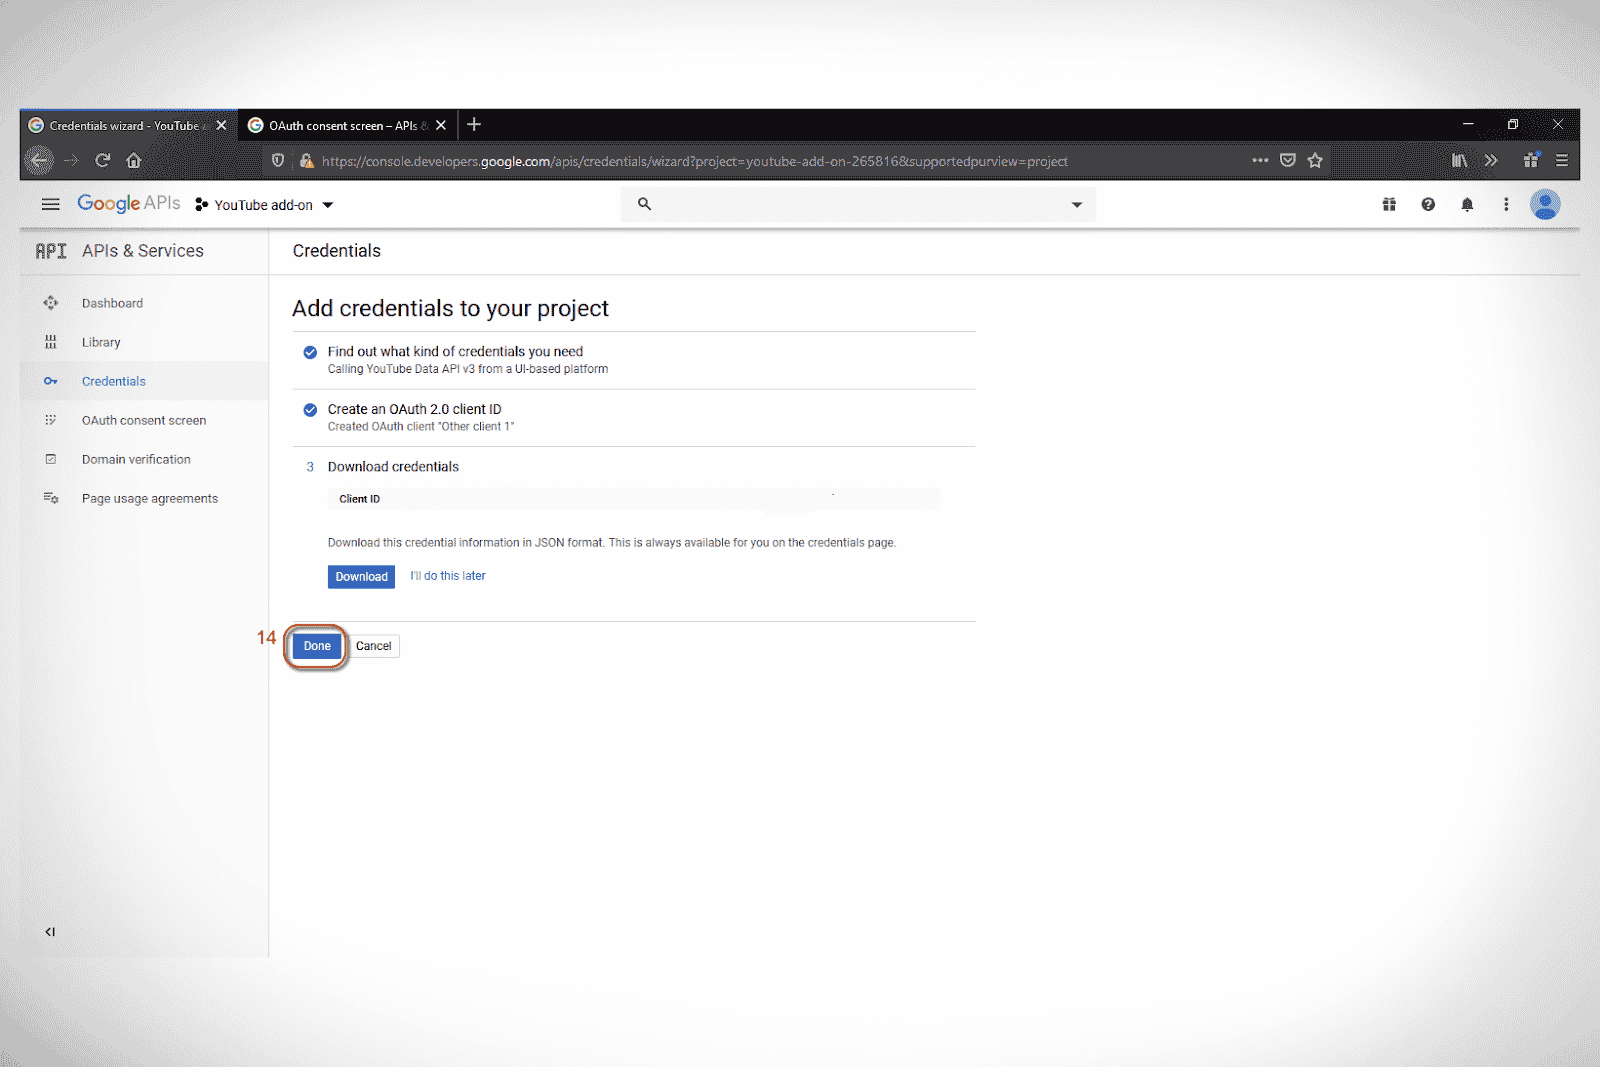
- Copy the Client ID and click Done.
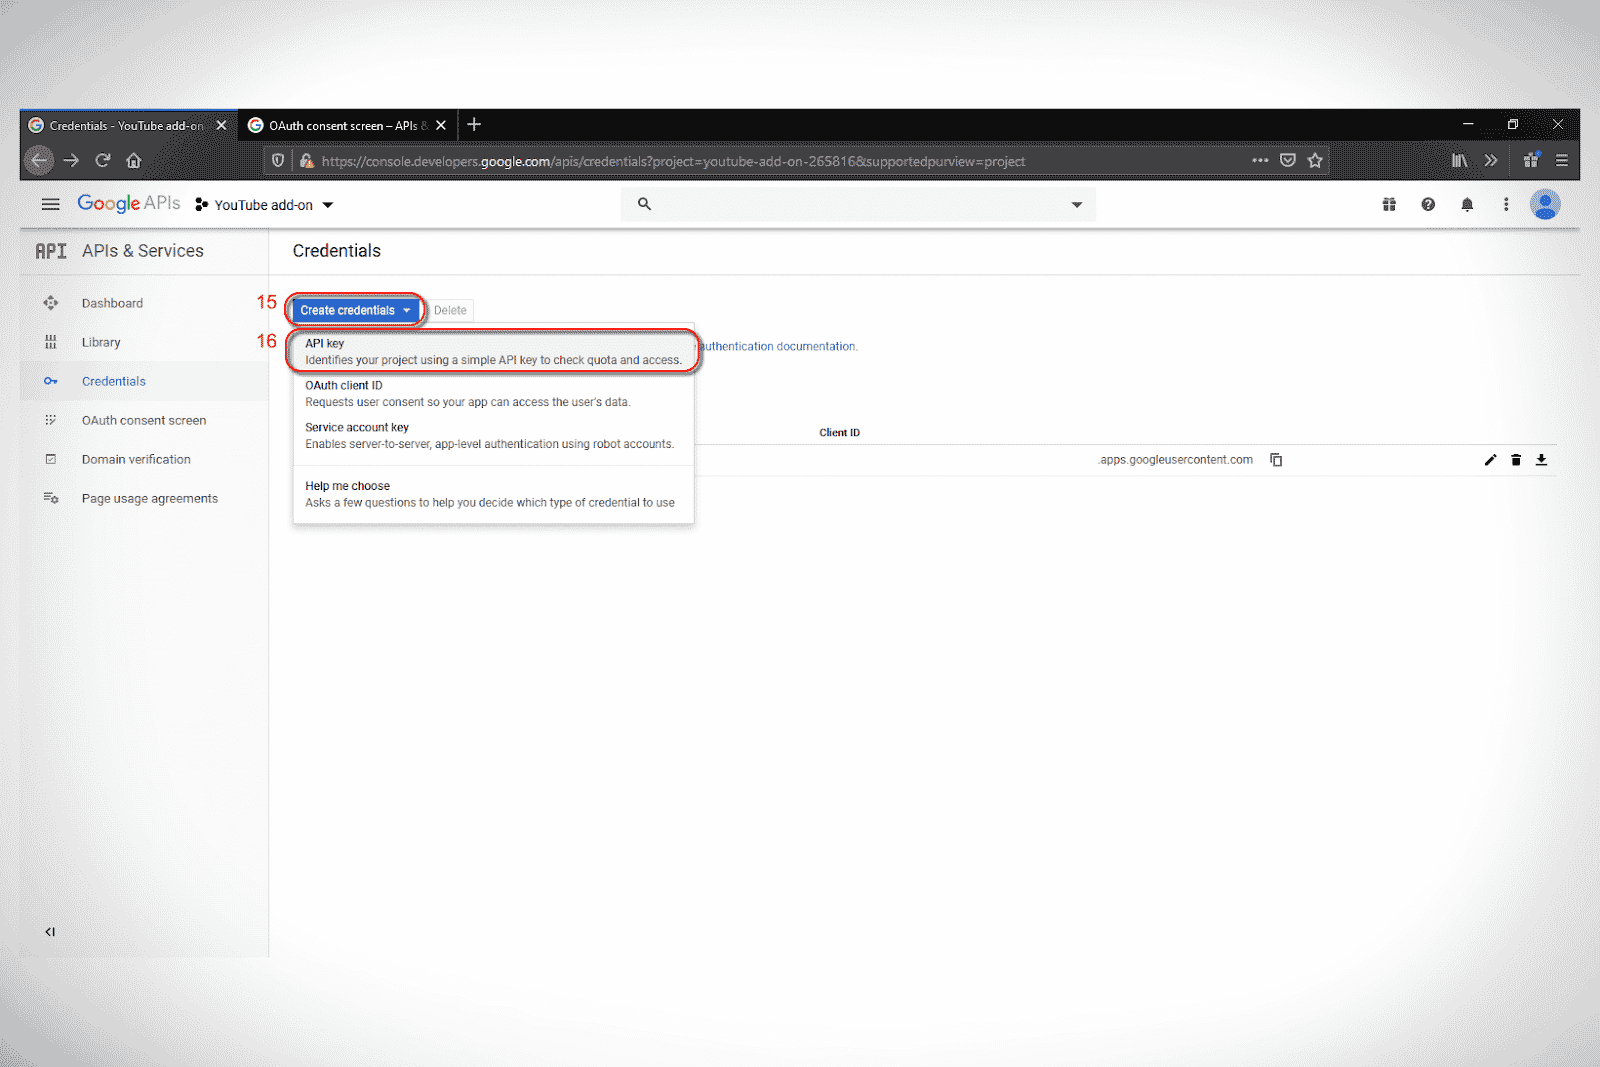
- Next, click the Create credentials button and select the API Key option from the list.
- A dialog box will open with the generated key to be copied.
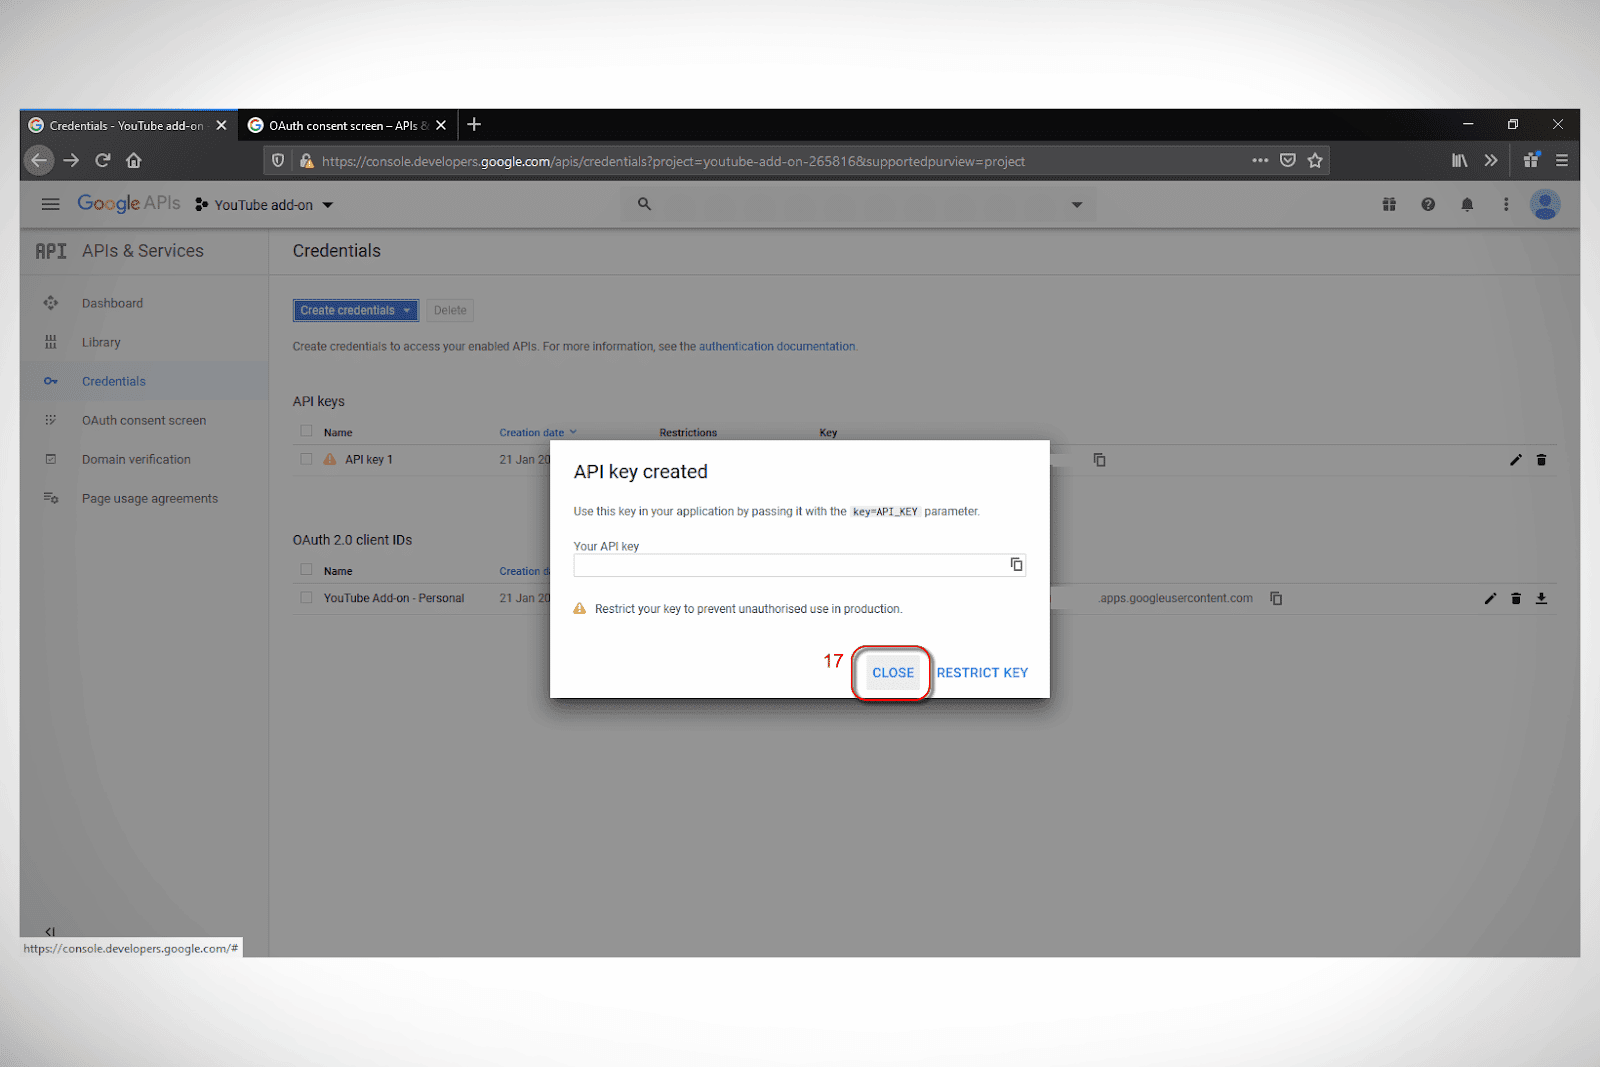
- You also need to copy the client ID and secret code.
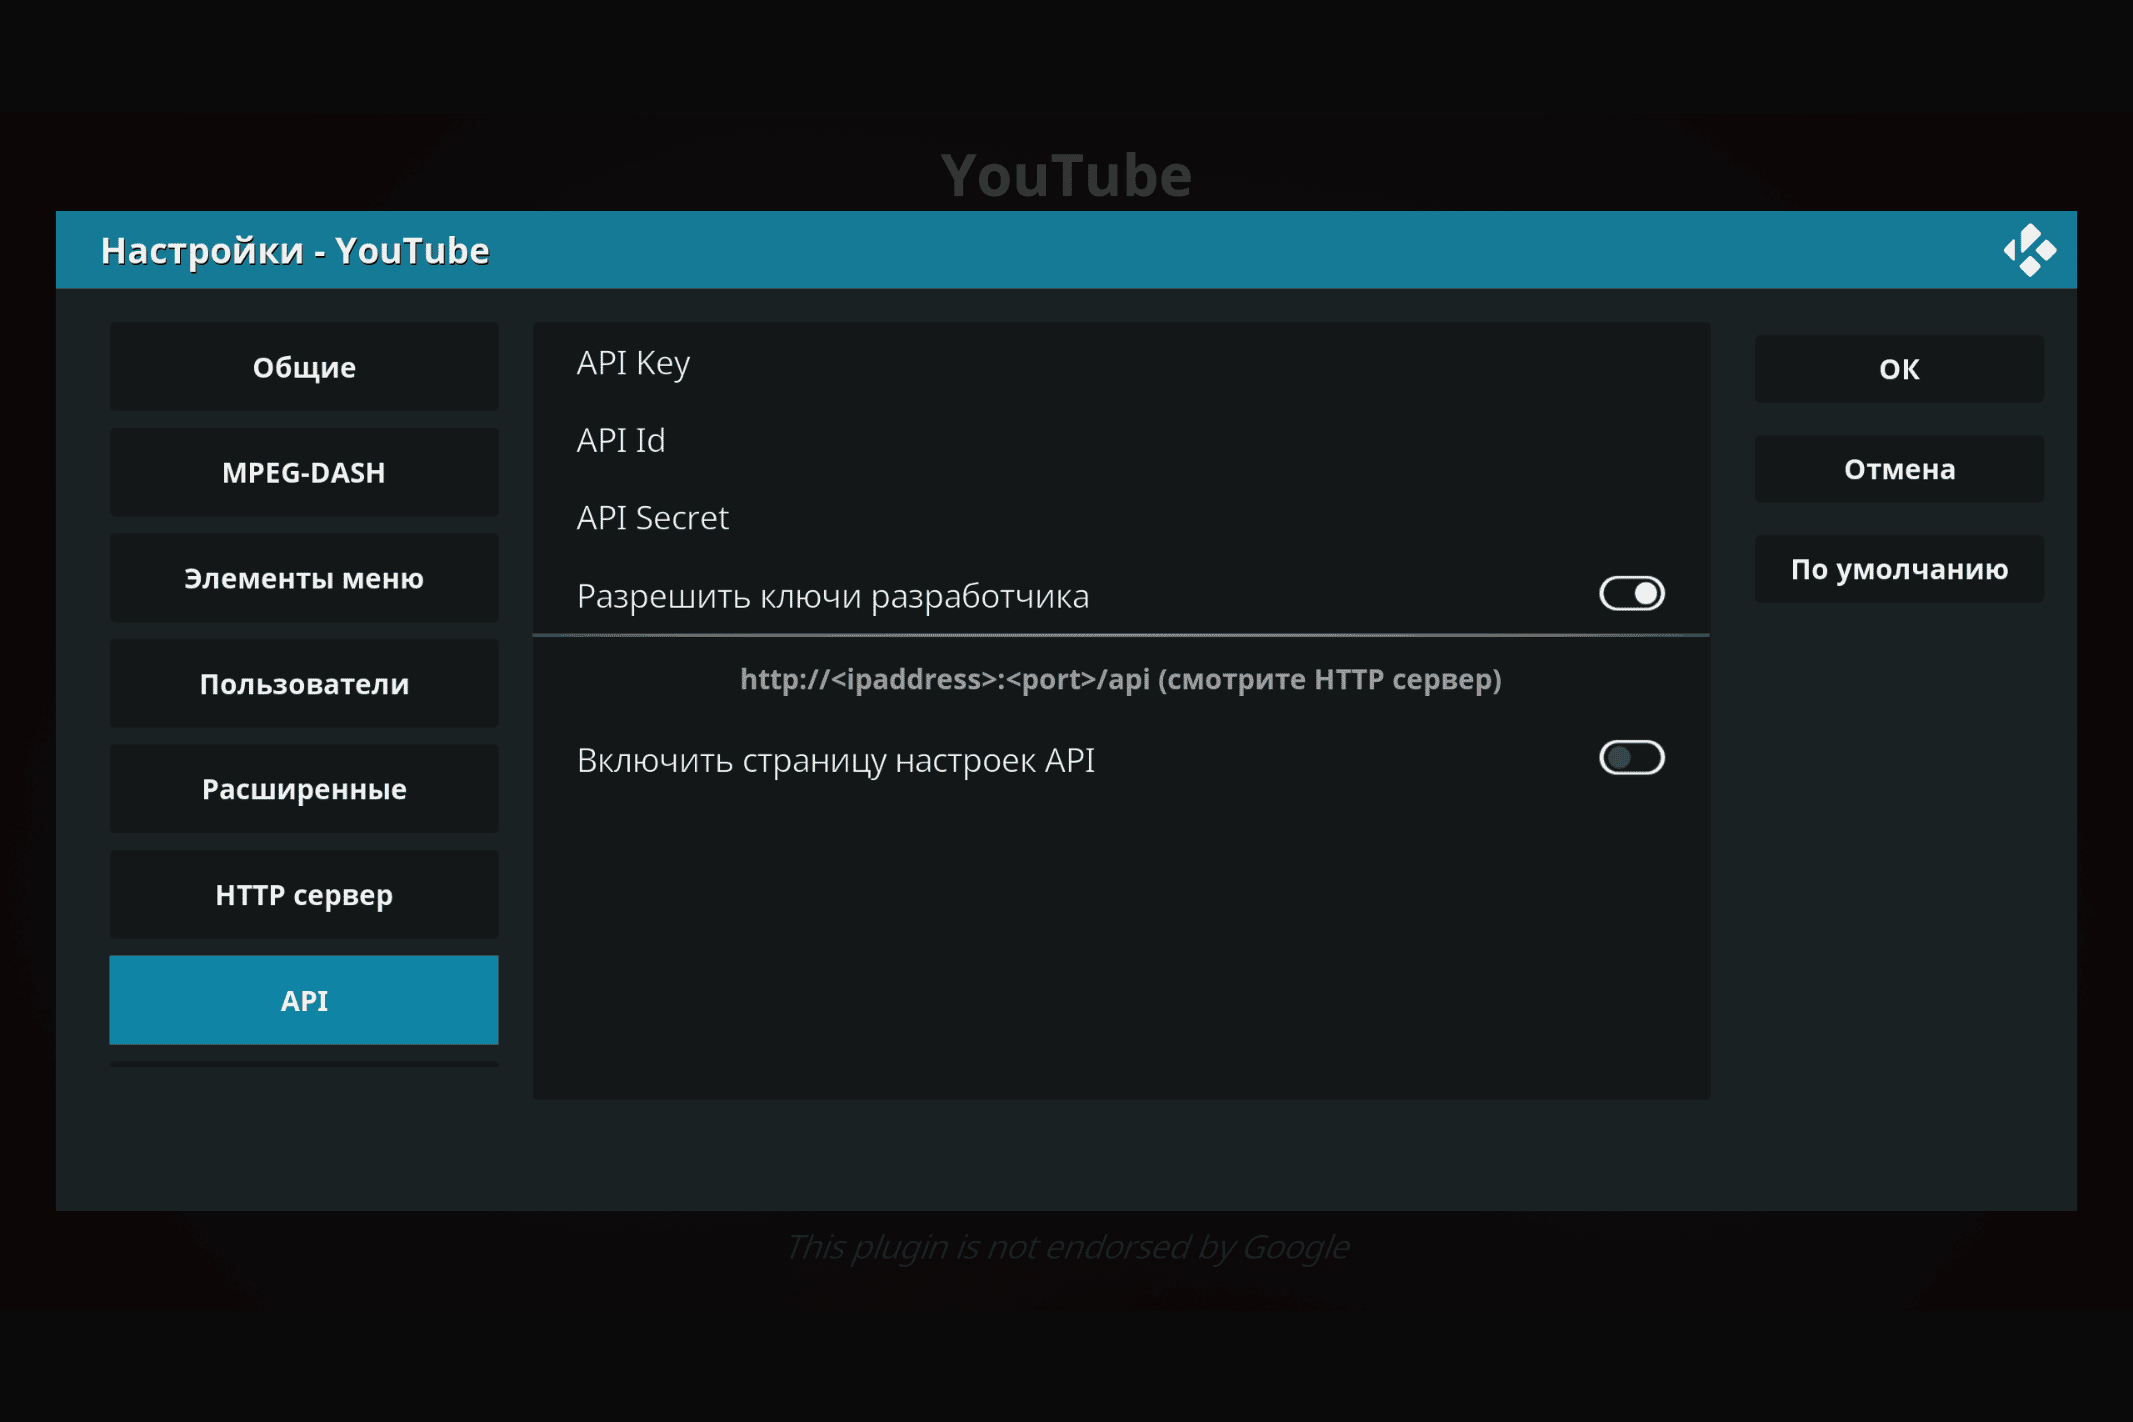
- Go to the “Settings” section of this extension. Paste the API Key, ID and secret code into the appropriate fields.
- If a window pops up asking you to go to https://www.google.com/device, open the page and enter the required key. After selecting an account, click “Allow”. Repeat if necessary.
- When a warning appears, open “Advanced Settings” and click “Go to Youtube Add-on Personal”. Ready!


Today, if there is a desire to turn your computer or set-top box into a full-fledged universal media center, one program is enough that does not take up much space. The Kodi player fits this requirement.


