
The process of recording video content (movies, TV programs) from a TV is not as complicated as it might seem at first glance to inexperienced users. To resolve this issue, you only need to follow the relevant instructions provided in this article.
- Devices for capturing video from TV – flash drive VS hard drive
- How to record a TV program that is already on or about to start
- Recording a show that hasn’t started yet
- Recording Programming
- How to Record Video from Samsung TV Screen
- Schedule TV video recording
- Capturing live broadcasts and videos from LG TVs
- Recording video from Sony Bravia TVs
- How to Record Movie and Other Video from Phillips TVs
Devices for capturing video from TV – flash drive VS hard drive
Before recording, you should take care of connecting external media in the form of a hard drive or USB flash drive. The disk must be formatted before use, and all materials from it will be lost. The flash drive must be checked on the TV for compatibility (to do this, press the “Source” button, select the “USB” flash drive and press “Tools”), and if necessary, format it there via Smart HUB.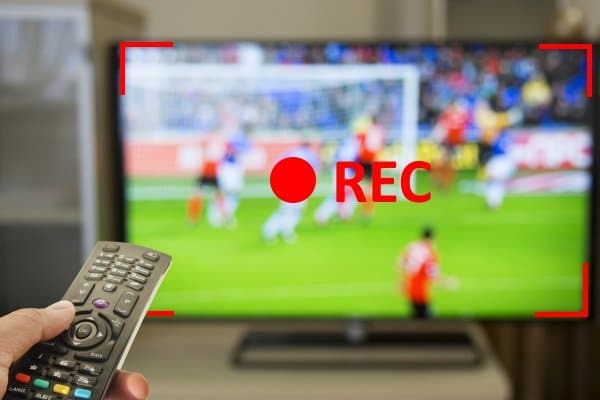
How to record a TV program that is already on or about to start
Procedure:
- Start the first recording by pressing the red button on the remote control and confirm formatting.
- All devices connected to the TV will appear. You should select your device and press “Enter” on the remote control.
- Formatting will take a short time depending on the size and speed of the drive. After formatting is completed, you can start recording the program. This requires confirmation in the dialog box.
- Recording starts when you use the red button on the remote control, and then the Guide button.
- From the list that appears, select the program you want to record. Then press “Enter” and “Record”.
- Perform the setting of the recording continuation time.
Recording a show that hasn’t started yet
In this situation, the procedure is as follows:
- The program to be recorded is selected.
- Jump to the entry and confirm using the “Enter” key.
- Program recording is confirmed. This process will be displayed as a red icon to show that the recording is programmed.
Recording Programming
To start the process you need:
- Go to “Program Manager” and select “Add Programming”.
- Select the TV channel from which you want to record the program.
- Assign a start date for the recording (on a specific date or any other order of days), specify the start and end time of the recording.
- To stop the current recording of programs, use the lowest right button on the remote control and confirm stop recording. You will be prompted to go to the recorded programs and view the recordings made.
How to record a TV show to a USB flash drive (external USB drive): https://youtu.be/L-QzkpBslWI
How to Record Video from Samsung TV Screen
In the case of recording video from Samsung TVs, a similar principle of action is applied (for example,
M series TVs ):
- Connect a hard drive or flash drive to the TV.
- Select the desired channel.
- Press the four-color button on the remote control.
- Select “More” and press the OK button (the round button in the center).
- Select “Record” and press OK.
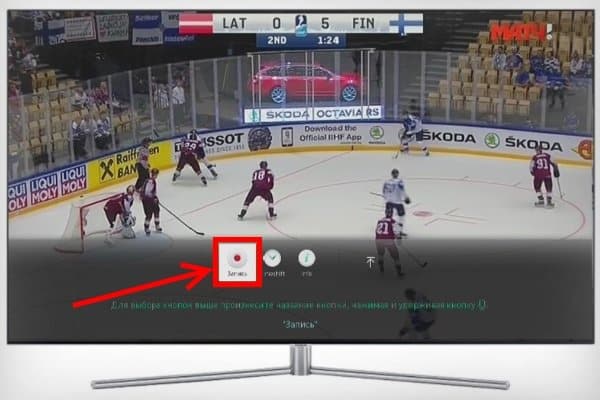
- Recording will start.
On J series TVs
, recording will start when you press the “REC” (or “Menu/123” on other models) button on the remote control. On
the H-series , recording starts after pressing and holding the “REC” button on the remote control. On Samsung F series TVs
, press the “Info” button on the remote control (or hold the yellow button on the Smart Remote), then press OK, and then select “Record” on the screen, confirming by pressing OK again.
On the K series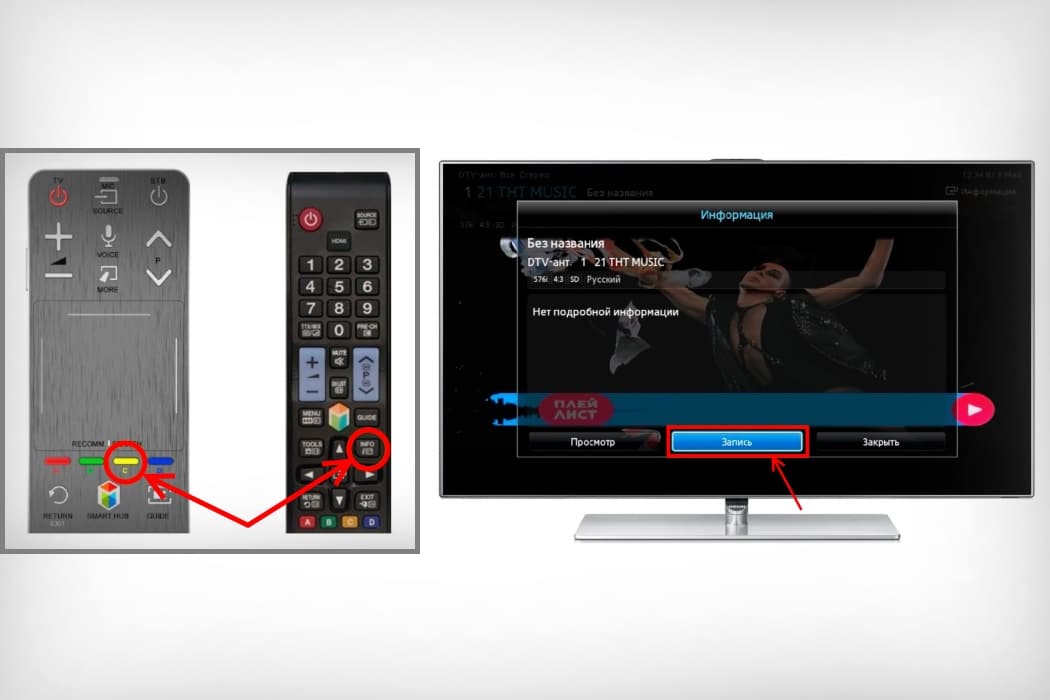 models
, the first two points are similar, and then to record a video, you need to press “Play / Pause” on the remote control, and then – “Record”.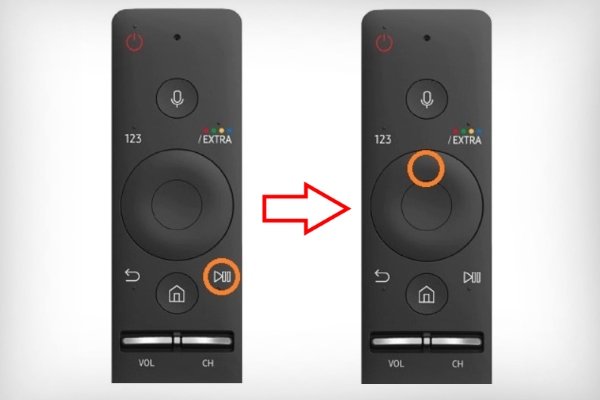
Schedule TV video recording
On Samsung
K series models , there is a schedule function where you need to specify the channel for recording video, the time and duration of the procedure itself. You can record not one program, but a series of recording repetitions with an indication of their frequency. Action algorithm:
- Connect the recording device to the TV.
- Press the button with the image of the house on the remote control, select “Live”, and then “TV Guide”.
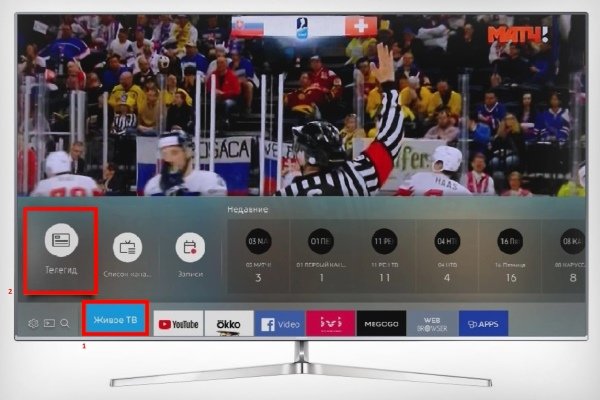
- Select the required program.
- Press OK on the remote.
- Click “Scheduled Recording” and set the parameters.
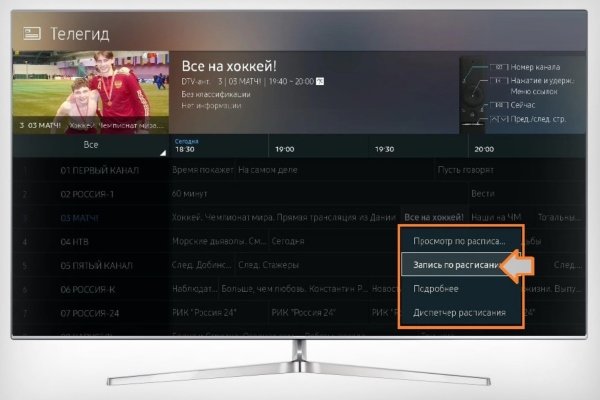
- Now the program will be automatically recorded even when the TV is turned off.
On J and
H series models
, scheduled recording is scheduled after pressing the “Menu” button on the remote control, selecting “Broadcasting” – “Schedule Manager” – “Schedule”. Next, you need to set the required data (channel, recording time, etc.) and click OK. On F-series TVs
, to create a scheduled recording, press the “Info” button (or hold the yellow button on the Smart remote control), select the desired program in the schedule with the arrows and confirm with the OK button. We mark on the screen “Recording according to the schedule” and press OK.
Capturing live broadcasts and videos from LG TVs
Many modern LG TVs released before August 2013 had a Time Machine feature that allows owners to perform various actions on video, as well as record it. Now this function is supported only by TVs that were not produced for the CIS countries, since in Russia changes were made to legislative acts on copyright protection in the field of television broadcasting.
In various forums, methods are common to bypass this limitation by flashing the microcircuit with the eeprom programmer.
On devices that support the Time Machine feature, you can:
- recording according to the schedule with the choice of time and channel;
- playback of the recording directly on the TV;
- the presence of the Live Playback function contributes to the rewinding of the picture in real time.
Limitations for LG TVs:
- when broadcasting a digital channel using a satellite dish, not everyone can record;
- if providers block the TV signal from copying, then the recording cannot be made;
- If the video was recorded on one TV, it cannot be played back on another device.
Follow the video recording process for LG TV models prior to 2013:
- Insert the flash drive into the slot on the rear panel and initialize it.
- Select the desired program in the list of TV guides and click on it.
- Click on the “Record” button.
- When recording is complete, click Stop Recording in the menu.
- To view the program, you need to find the item “Recorded programs”.
https://youtu.be/5ms-ZMu07gI
Recording video from Sony Bravia TVs
Recording programs for WD6 and RD4 series TVs:
- Press the “Home” key in digital TV mode.
- Next, use the up and down arrow buttons, then use the plus key to select “Recordings”.
- Again, use the up and down arrow buttons, and then press the plus key to select “Title List” > “Error List” or “Manual Timer REC”.
To record the digital programs currently being watched using the USB HDD recording function, use the REC button. Recording to external media is not possible on 2K TVs (2016) that are for Italy.
How to record video from Sony Bravia TVs is shown in this video: https://www.youtube.com/watch?v=qI8qYoDNCg8
How to Record Movie and Other Video from Phillips TVs
Programs can be recorded using the TV Guide on the TV or using the Record key on the remote control. Process description:
- You need to make sure that the TV software has been updated to the latest version and that DVB-T/C/S TV channels have been installed.
- Eliminate the fact of connecting other USB devices and connect the hard drive to the TV’s USB connector. The process of analyzing the hard disk will start.
- Formatting is carried out in a certain sequence:
- you need to press and hold the pause button on the remote control;
- the TV will start formatting the hard disk, information about the amount of memory will be displayed in the TV menu “Record”;
- When the formatting process is completed, a notification will be displayed.
- Restart TV.
- To start recording, you must select the appropriate option from the proposed:
- start recording immediately by selecting the desired TV program and pressing the “Record” button, and to end – “Stop”;
- use the function of delayed recording according to the schedule (possibly within 8 consecutive days): by pressing the “TV Guide” button on the remote control and selecting the channel and program, press “Options” (Options) and select “Change date” (Change day), select a specific day and click OK.
The rights to broadcast and recorded programs belong to the service provider. Recorded material is generally only available for a limited period of time.
The information obtained will help the user record streaming video from different TVs to a flash drive. It should be borne in mind that service providers (providers) can encrypt their own television broadcasts, making them completely unrecordable.


Нашла себе здесь полезную информацию, а то с записью телепередач всегда были проблемы, так как у меня телевизор LG 2009 года. И как оказалось в этом деле есть свои нюансы.
Записала несколько серий “Доярки из Хацапетовки” для бабушки по этой инструкции. Все легко и понятно, получилось записать с первого раза. Единственное, в чем была проблема: не обратила внимания на то, что флешка должна быть пустая. У меня оставалось там несколько важных документов, которые исчезли в неизвестном направлении, что очень жаль. Но сама виновата, надо внимательно читать инструкцию. Телевизор у меня достаточно новый – Samsung UE50NU7097U, поэтому, наверное, легко справилась с записью фильма.
Как хорошо что зашла к Вам на сайт!!! У меня телевизор Sony Вravia, хотела настроить запись серии нового сериала что вышел недавно по первому каналу,
сама никак не могла разобраться в инструкции, что приложена к телевизору. Эти тексты на бумаге сложно понять, а у Вас видеоинструкция, в которой всё наглядно и доступно для таких как я. Теперь после ночной смены смотрю то, что пропустила!
💡
В наше время сложно старшему поколению усвоить все новые возможности современной техники. И очень хорошо что есть такие статьи которые помогают нам разобраться в функциях. Данная информация полезная и необходимая. Все очень доступно, написано простым человеческим языком . Изучив статью и посмотрев ролик я смогла записать программу которую планирую посмотреть позже.
В наше время сложно старшему поколению усвоить все новые возможности современной техники. И очень хорошо что есть такие статьи которые помогают нам разобраться в разнообразных функциях телевизора. Данная информация полезная и необходимая. Все очень доступно, написано простым человеческим языком, настоящая подробная инструкция. Изучив внимательно статью и посмотрев ролик я смогла записать программу которую планирую посмотреть позже и серию фильма для дочери. Все получилось отлично. Теперь я могу записывать с телевизора все что мне нравится и смотреть в удобное для меня время. ❗ ❗ ❗
Очень полезная статья, спасибо автору! Все разложено по полочкам,что даже чайник поймёт. У меня телевизор LG, иногда нужно записать какую-то передачу,чтобы потом посмотреть или показать детям. Но до этой статьи я не знала,как сделать запись. Все поиски в интернете не увенчались успехами,пока не наткнулась на этот сайт. С первого раза получилось записать нужный эфир(действовала по вашей инструкции) и вуаля,все готово! Еще раз спасибо за полезность!
Очень удобная и легкая статья для изучения и восприятия. Все расписано и понятно!
Как сделать эту штуку, если у вас телевизор ergo?
Как записать видео с телевизора “Берёзка” и “Витязь”?
(Телевизор “Берёзка” появился в 1999 году)
Problémát nem oldó oldal!!