
Many users prefer to watch video production on large screens rather than on computer monitors. Thanks to wireless communication and special programs, your TV can, if necessary, act as a large display, working in conjunction with a computer via Wi-Fi.
- How to connect a TV to a computer or laptop via Wi-Fi?
- How to transfer picture and video from computer to TV via Wi-Fi (DLNA)
- TV as a wireless display (WiDi)
- Connecting laptop to smart TV via WiFi wirelessly
- Wi-Fi connection of a regular TV without a wireless adapter via HDMI input
- Wireless connection of a computer / laptop to a TV in Windows 10 via Miracast
- How to control audio when connected via Miracast
- If Miracast does not work and the item “Connect to a wireless display” is missing
- Can’t Connect to Wireless Display
- What to do in case of problematic duplication of the computer screen to the TV via wifi
- Media Center Extender
- Third Party Programs
- Types of adapters
How to connect a TV to a computer or laptop via Wi-Fi?
The TV is connected to the computer not only by various wired methods, but also via Wi-Fi. The signal source can be either a stationary computer or a laptop. The screen can be used to view videos and audio recordings from the hard drive.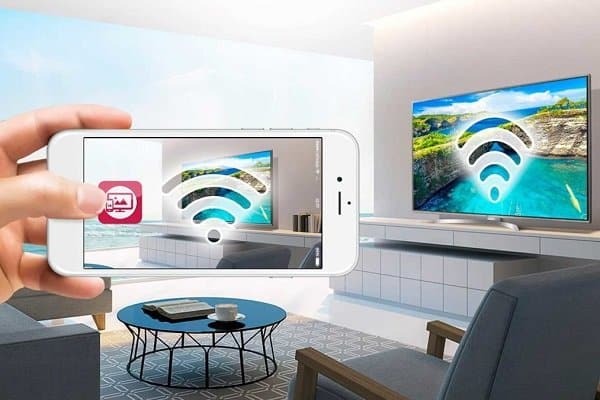 Almost all the methods used to connect the TV to Wi-Fi require that it has support for wireless communication. That is, the TV must have a Wi-Fi adapter. Most modern TV devices have a similar device.
How to transfer picture and video from computer to TV via Wi-Fi (DLNA)
This method of wirelessly connecting TVs is considered the most common. This and all subsequent instructions are written for the operating systems Windows 7, 8.1 and Windows 10 TV requirements:
- the presence of a Wi-Fi block;
- the TV is connected to a router, from which computer equipment works with video and audio materials.
If your TV supports Wi-Fi Direct, you don’t need a router – you can connect directly to your TV network. To make a connection, you need to go to the corresponding TV menu. The DLNA function can be used to play content without setting up a DLNA server. Condition – the computer and the TV must be in the same local network – connected to the same router or via Wi-Fi Direct. Procedure:
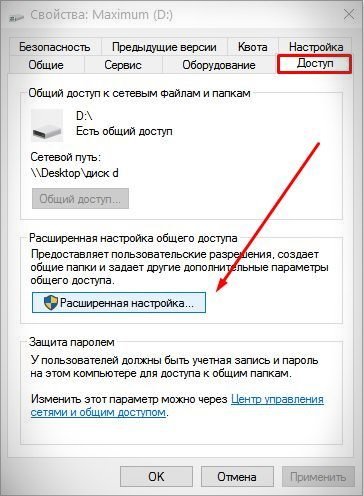
- Configure DLNA server on your computer . You need to open access to the files you want. To do this, select the “Home” type in the network settings. All other folders – with documents, images, music and videos become available by default. To open access to a specific folder, just right-click on it. Select the Properties and Access tabs from the context menu.
- Turn on sharing . The fastest option is to open File Explorer and select Network. If you are then informed that network discovery and access are disabled, click the message and follow the instructions that appear.
Configuring Windows Access: If this message does not appear and computers and media servers appear instead, it is likely DLNA is already configured. Otherwise, you will have to configure the DLNA server. When DLNA is configured and connected, open the TV menu and see what devices are connected. The algorithm of actions depends on the brand of the TV, for example:
- in Sony Bravia, press the Home button, and then, selecting the desired section – Music, Movies, Pictures, view the contents of your computer;
- in LG, select SmartShare , there you will see what is in the folders, even if you do not have this program on your computer.
In TVs of other brands, you have to perform approximately the same manipulations using the appropriate programs. Accessing files via Wi-Fi DLNA on TV: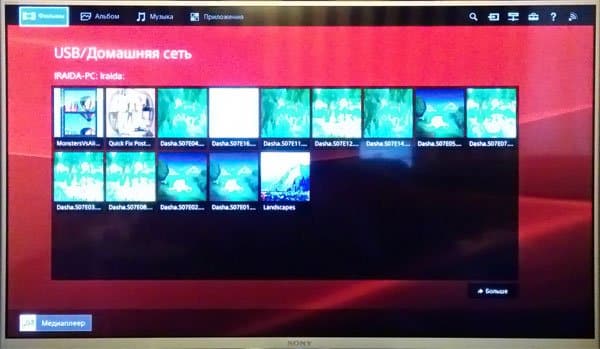 When DLNA is connected, go to the desired folder on your computer and click on the video file in the explorer, select “Play on ….”. The dots will be replaced by the name of your TV. Then the video signal transmission via Wi-Fi will start – from the computer / laptop to the TV.
Even if the TV has support for MKV movies, “Play To” does not work for them in Windows 7 and 8, so they will not be visible in the TV menu, the easiest way to fix the problem is to rename these files to AVI on your computer.
TV as a wireless display (WiDi)
We figured out how to play computer files on a TV screen, and how to make them available. Next, we will learn how to watch any picture from a computer / laptop on TV. The TV will act as a wireless monitor. To accomplish the task, they use one of two technologies – Intel WiD or Miracast. The connection does not require a router, since a direct connection is established using Wi-Fi Direct. What you need to know about your computer:
- If your computer has a 3rd generation Intel processor , it has an Intel wireless adapter with an integrated Intel HD Graphics chip, then it supports Intel WiDi in Windows 7 and 8.1. You may need to download Intel Wireless Display. You can download the program on the official Intel website .
- If Windows 8.1 was preinstalled on the computer / laptop and there is a Wi-Fi adapter, then Miracast must be supported. When installing Windows on your own, there can be any option – with or without support. Earlier versions of the operating system – up to 8.1, do not support Miracast.
Support from TV is required to use Miracast. A couple of years ago, you would have had to buy a special adapter, but today many TVs are released with built-in support for Miracast technology, or receive it after a flashing.
Miracast on TV: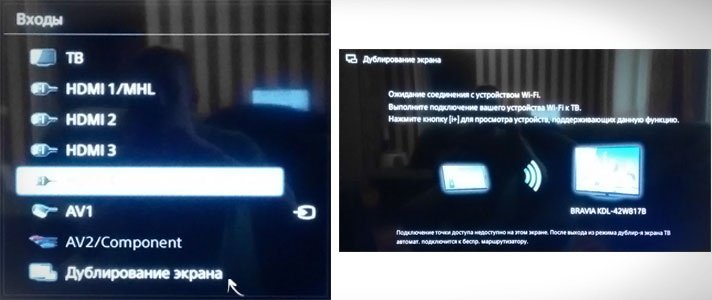 Connection process:
- Turn on WiDi or Miracast support on your TV. It usually works by default. It happens that the TV does not have such a setting at all, then it is enough to turn on the Wi-Fi module. In “Samsung”, for example, this function was called “Screen Mirroring”, it is located in the network settings.
- Turn on WiDi by launching Intel Wireless Display and select a wireless monitor. You may be asked for a code – it will appear on the TV screen. Looking for a WiDi wireless monitor:

- To enable Miracast in Windows 8.1, open Charms – this panel is on the right. Click successively the “Devices” and “Projector” tabs. Then click on the Add Wireless Display label.


If this item is not present, it means that your computer does not support Miracast technology, in order to correct the situation, you will have to update the Wi-Fi adapter drivers.
Connecting laptop to smart TV via WiFi wirelessly
Most televisions today are equipped with a function that makes interactive content available to them. You can display movies, music, games and more on the TV screen. This technology is called
Smart TV . “Smart” is implemented in Samsung TVs, similar technologies are available from other manufacturers – “Sony”, “Philips”, “Panasonic” and others. Let’s take a closer look at the procedure for connecting a TV with Smart technology to a regular laptop via Wi-Fi. Procedure:
- Connect your laptop and TV to the same Wi-Fi network . If the computer equipment is already connected to the router, it remains to do the same for the TV. Turn on the TV and use the remote control to enter its “Settings”, and then to the “Network” tab.
- Turn on the Wi-Fi adapter . Select the laptop connection point from the list. Both devices are now connected to the same local network.
- Configure DLNA Server . Open on your laptop access to folders containing videos and other content. This is done in the “Network Control Center”. Go to the “View active networks” section and change the shared network to the local one. DLNA Server Setting:


- Expand file access . For example, you need to watch a movie that is on your hard drive. Find the My Videos folder and click on it to open the context menu.
- In the drop-down list, select “Access”, and from it go to “Advanced settings” . Check the box at the top – next to Share this folder. Click “Apply” and then “Ok”. Selecting “Advanced Setting”:
- There is another way to enable sharing . Open File Explorer and select Network. Click the tab that turns off network discovery and file sharing. Then follow the directions.
- After enabling DLNA, take the remote control and find the section on viewing content on your computer in the menu . For example, on Sony TVs this item is called “Home”, in LG – “SmartShare”.

Selecting content from a computer: If all settings are made correctly, you will include video from a laptop in two clicks:
- Having highlighted the file you like in the laptop, right-click on it and select “Play on …” from the menu.
- Find your TV model in the list of devices. Click on it and the video file will be broadcast to the screen.
Wi-Fi connection of a regular TV without a wireless adapter via HDMI input
If you haven’t gotten a modern Smart TV, nothing is lost. A simple TV can also be used to solve the problem. The main thing is that the device has an HDMI input. To achieve this goal, you will need one of the following devices:
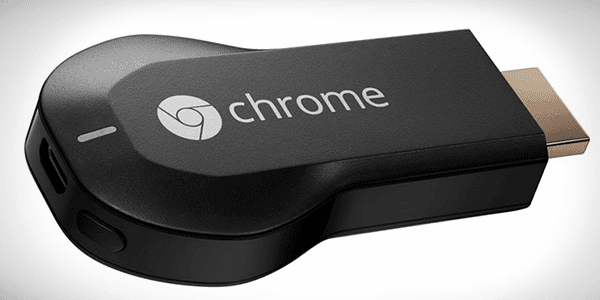
- Google Chromecast. This little gadget is called a digital or network media player. These are Google products. The device is designed to transfer video and audio files via Wi-Fi from the Internet or a local network. What Google Chromecast looks like:
- Android Mini PC. It looks like a USB flash drive. Connects via HDMI port to the TV.
- Intel Compute Stick. The device is about the size of a package of chewing gum and can turn any monitor with HDMI input into a full-fledged computer with high-quality graphics and wireless connectivity. This compact computer measures 11.5 cm.
https://youtu.be/ilP4_oVATQQ Notebooks have many synchronization options besides the above algorithm. You can duplicate the image – the same picture will be on two screens. If you make one screen the main one, then the second one will automatically turn off. Instead of a laptop or computer, you can use a smartphone. This makes screen management even more convenient. Modern TVs can be used to access the Internet, while they do not lose their main function – they play video on a large screen. How to connect a TV to a computer via wifi: https://youtu.be/kM8lQp_pwTU
Wireless connection of a computer / laptop to a TV in Windows 10 via Miracast
To carry out the connection, press Ctrl +
Win + P . A menu with video display options will pop up on the right. Select “Connect to Wireless Monitor”. If this option is not available, then your technology does not support this function. After clicking the specified item, the computer will start looking for wireless devices. Turn on Miracast / Intel WiDi on the TV. For example, in older LGs, go to the “Network” section for this. Enabling Miracast / Intel WiDi function on LG brand TV: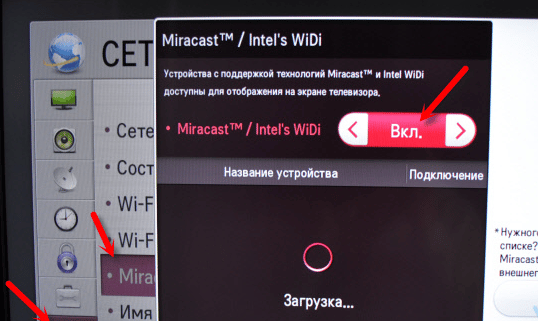 The procedure depends on the TV brand:
- on Samsung TVs, go to the menu and select the signal source – “Screen Mirroring”;
- at Sony select “Screen mirroring” by pressing the corresponding button on the remote;
- in Philips go to Settings, click Network Settings and Wi-Fi Miracast.
If your TV does not support Miracast, buy a special adapter and connect it via the HDMI port to the TV:
- Select your TV that appears in the search, then the connection will start.

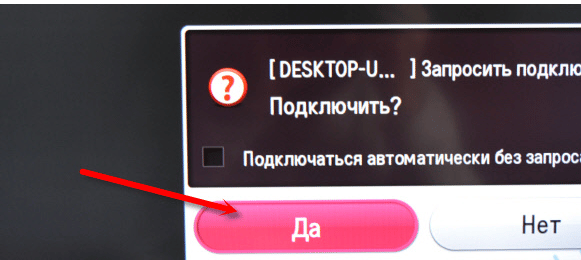
- If necessary, confirm that the computer is connected (confirmation is not always required).


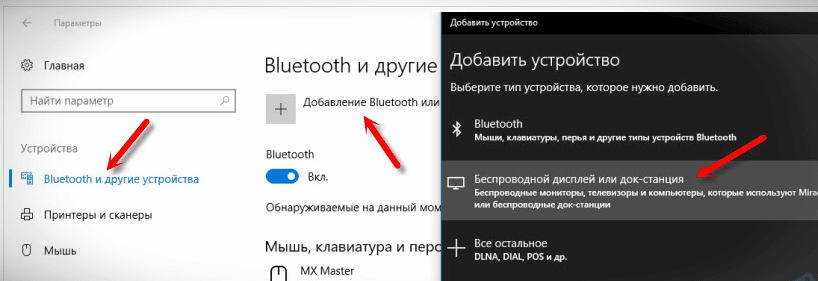
Sometimes you can’t connect right away. Try restarting both devices. Another option is to change the projection mode. You can, for example, enlarge the screen or duplicate the picture on two screens. Change projection mode: TV connection can be done by adding a new device in the parameters. To do this, go to the “Devices” tab. There you need to select “Add Bluetooth / other device”. For this:
- Select “Wireless Display or Docking Station”.
- Select Miracast on your TV. After that, it will appear in the list of devices. Click on your TV and the connection will start.

https://youtu.be/5BqjJEoRI20
How to control audio when connected via Miracast
Sound can be transmitted via Miracast as well as through a wired connection. The sound from the computer should be output from the TV speakers. If the default setting is “Digital Output”, you can change the item by selecting the desired device for playback.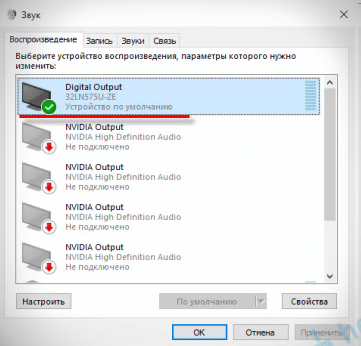 By doing this manipulation, you will receive sound from the computer speakers. Set back “Digital Output” if necessary.
If Miracast does not work and the item “Connect to a wireless display” is missing
If in previous versions of the 10th version of Windows the system, “realizing” that Miracast was not supported, displayed a corresponding message, then the new versions simply do not have an item about connecting to a wireless monitor in the menu called by the Win + P combination. Menu “Project”: For the desired function to work, you need support from the adapters – Wi-Fi and graphics. Verify by typing “netsh wlan show driver” at the command line. If “Wireless Monitor Supported” appears, great. If there is no support, do the following:
- update the driver of the Wi-Fi adapter, the success rate is small, but there is a chance that this manipulation will help;
- try changing your Wi-Fi adapter;
- connect your TV via HDMI cable.
Can’t Connect to Wireless Display
If the TV cannot connect for a long time, then an error message appears. Or computer equipment cannot “see” the TV and it is not even displayed in the list of available devices. Cannot connect to display: Try to reconnect using one of the following methods:
- Press restart your computer and unplug the TV for a few minutes.
- The reason may lie in poor signal quality. Therefore, try to shorten the gap between the techniques, and at the same time check if Miracast is active.
- Update the driver for the Wi-Fi adapter.
- If you have another TV, connect to it to test the connection.
- Try disabling the discrete graphics card.
Do not disable the integrated one. To do this, go to the device manager. Thus, you turn off the video adapter. It happens that this method helps to solve the problem.
Turn off the video card: Then, when you are not using the TV as a wireless monitor, turn on the video card again.
What to do in case of problematic duplication of the computer screen to the TV via wifi
If you cannot use the TV as a monitor, due to the fact that it does not display the items necessary for setting, it is probably the matter of device incompatibility. The instruction for TV can help you – you can download it to your smartphone. Another solution to the problem is to update the Wi-Fi adapter driver. You can find out how this is done on
the Microsoft website . Many users have noticed that broadcasting content to a TV screen is more difficult than from a laptop. Possible causes of problems:
- incorrect operation of WiDi or Miracast;
- No internet connection;
- the router is faulty;
- the settings on the TV are incorrect.
Media Center Extender
This program is built into Windows 7 and 8. To open Media Center Extender, click “Start” and write the name of the program in the search box – this is for the seventh version. In Windows 8, you need to hover courses to the right-up and select “Search” from the menu. It happens that a suitable OS is installed on the computer, but still it is not possible to find the required option. Then you have to put it on. To do this, visit the Media Center Extender website and download the necessary updates. After installing the program, go to the settings. Select “Media Extender”, and then its “Installation”: Using the program does not require special knowledge. It is enough to follow the steps of the instructions that will be displayed on the screen. When the TV and computer are successfully connected, send the necessary files to the set-top box – to the TV.
Third Party Programs
The Internet is teeming with a huge number of programs with the help of which it is possible to display information from computer equipment on a television screen. It is not so easy to choose the appropriate option, so we advise you to stay on versions that have been tested by time and users. Best programs:
- Samsung Share;
- home media server ;
- Share Manager.
The second option is especially attractive. It has a simple interface and great functionality. True, the program is applicable only to Samsung TVs. Possible malfunction when used with other brands.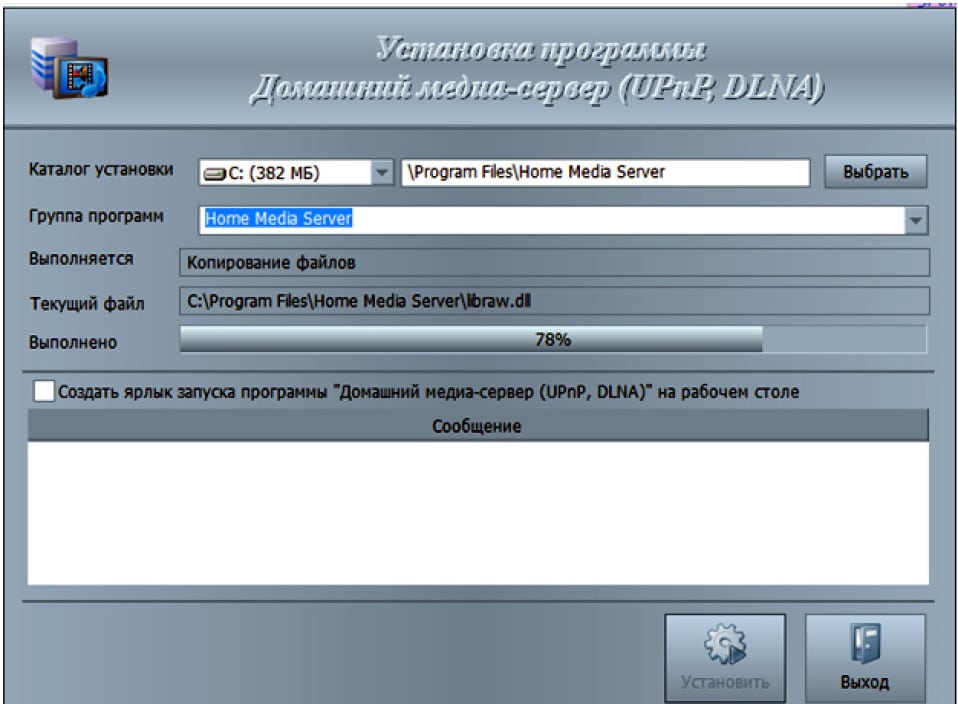
Types of adapters
There are two types of adapters – built-in and external. In the first case, in order to connect the TV to a signal source, it is enough to set up the connection. External devices are connected via USB. If you are buying an adapter to connect your TV to your network, first check the list of supported devices by going to the TV manufacturer’s website. Approximate cost of Wi-Fi adapters:
- Up to 1200 rubles . 802.11n standard. The transmission speed is 150-300 Mbps.
- From 1200 to 2500 rubles . 802.11ac standard. The transmission speed is 300-867 Mbps.
- More than 2500 rubles . Supports speeds of 1300 Mbps or more.
There are many ways to connect a TV to a computer. When choosing one or another option, it is necessary to take into account the TV model and other technical nuances. If you can’t connect the first time, try again and try different solutions to the problem.


Мы тоже недавно купили телевизор с вай-фай, так как смотреть по интернет все фильмы и программы намного удобнее и интереснее. Мы выбрали LG со встроенным адаптером, поэтому все настроить было относительно несложно. Правда, так как мы не очень уверенные пользователи, то повозиться все-таки пришлось. Здесь все рассказало по каждому вопросу и расписано понятно, а вот мы по самой инструкции к телевизору разбирались методом “тыка”, нужно было попросить детей, они там все знают. С вашими инструкциями все проще бы было.
Большое спасибо за описание, очень помогло подключить телевизор к компьютеру! 💡
Недавно как раз столкнулись с проблемой подключения ноутбука к телевизору через wi-fi, никак не могли понять, что делаем не так. Хорошо, что наткнулась на эту статью. Расширили доступ к файлам и всё заработало! Спасибо, не пришлось тратить деньги на вызов мастера!
Искала информацию как подключить телевизор к компьютеру через Wi-Fi на даче. Вызывать мастера не хотела, решила сама подключить. Много что читала в интернете, и эта статья оказалась самой полезной и понятной. Я как новичок в этом деле разобралась без проблем, подключила самостоятельно.
Недавно, из-за сломавшегося телевизора “не SmarTV”, пришлось покупать новый, на наш взгляд упала модель LG SmartTv 4k, только ничего в этом не разбирались, спустя время, осознали в какой-то мере, как пользоваться данным устройством, и задались вопросом просмотра фильма, а так как фильм уже был скачан на компьютер, не понимали, как же все таки это сделать, но благодаря данной статье, удалось разобраться и подключиться, спасибо большое, если есть, те у кого не получилось, то скорее всего, вы не делали все по инструкции