The Home Media Server program (HMS, home media server) is used as a DLNA server to watch content and listen to music from a computer and laptop on a TV. Home Media Server is optimally suited for this purpose and has various useful settings.
- What is DLNA?
- Installing Home Media Server (HMS)
- General setup of HMS (home media server) as a DLNA server
- Connecting and viewing media content
- Viewing with LG TV as an example
- Setting up a home media server using the example of a SONY Bravia TV
- Possible problems (errors) when setting up and using HMS and their solutions
What is DLNA?
In the English translation of the Digital Living Network Alliance (DLNA) – certain standards, thanks to which compatible devices can transmit and receive various media content over a home network and display it in real time using wired and wireless channels. Thanks to this technology, home computers, mobile phones, consumer electronics, laptops are united in a single digital network. When using DLNA certified devices, they are automatically configured and connected to users’ networks.![]()
Thanks to the transmitting device (server), information is transmitted to the TV. A PC, a phone, a camera, or a camera can act as a server. DLNA support may mean that the device is capable of receiving video.
This wired or wireless network has its advantages:
- The ability to instantly access materials located on all home devices of the user. Watching a movie or photo is possible immediately after downloading, music can be listened to on the music center in the highest quality.
- No need to drill holes in walls and doors for wireless connection.
- With a wireless connection via Wi-Fi, it is possible to download files entirely to the desired devices for further viewing.
Disadvantages of DLNA include:
- To make a wired connection (for example, through reinforced concrete walls that block the radio signal), holes must be drilled in the walls and doors, which will negatively affect the interior.
- The wireless connection is significantly affected by various obstacles such as steel reinforcement or thick concrete (brick) walls.
- As with the Internet, there is the possibility of file playback delays during streaming if the file is too large or if the connection speed is not high enough.
- Using a weak router can affect the speed and quality of data transfer.
- Not all file types may be played back, and HD video transmission may be inferior.
Installing Home Media Server (HMS)
HMS (home media server) installation is carried out in the following sequence:
- Download the home media server installer, preferably from the official website .
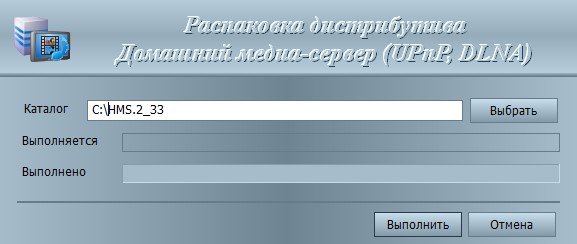
- Run the installer. The window prompts you to select a directory into which the installation files will be unpacked. You need to select a directory and press the “Run” button.
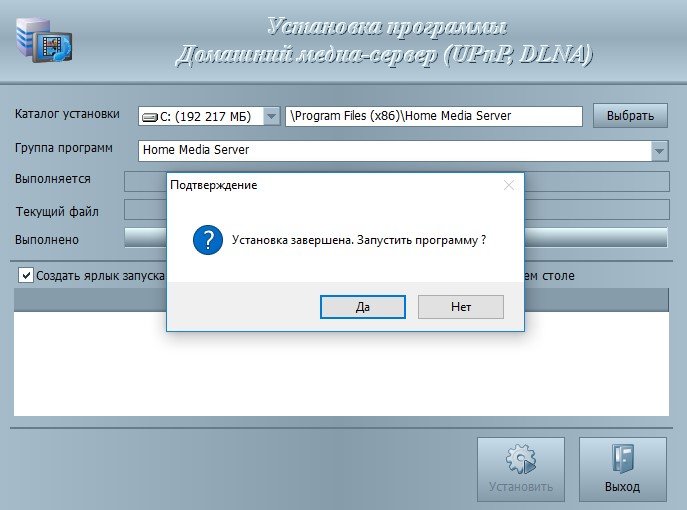
- After the unpacking is completed, the program installation will start automatically. There are various settings here. In this window, you need to select the directory for installing the Home Media Server (HMS) program and the “Program Group” (folder in the “Start” menu).
- After the installation folder is selected, you need to make a mark on “Create a shortcut to start the program on the desktop”, if necessary, and press the “Install” button.

- At the end of the installation, which lasts no more than a minute (depending on the equipment), the launch of HMS is immediately offered. The installation process is complete.


After the installation is complete, it is better to remove the unpacking files manually, because they are not automatically removed.
General setup of HMS (home media server) as a DLNA server
The installed DLNA server will prompt the user to continue the configuration process at startup:
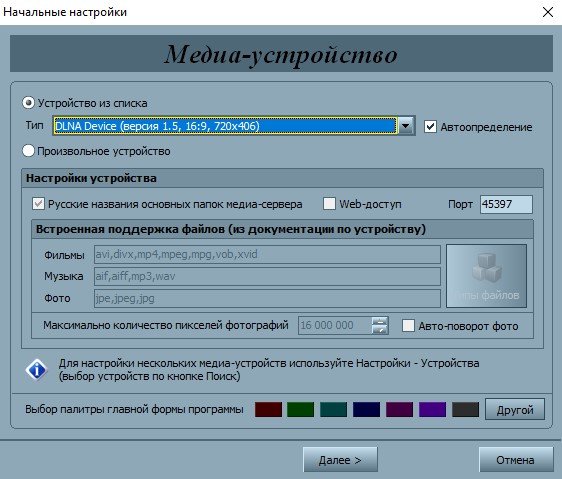
- At the first start, a window will appear with the initial settings. It will ask you to choose a device for broadcasting media content. Many templates with devices will appear in the proposed list. If your own or a similar device was not found, then it is worth stopping at the standard DLNA Device. Having made a choice, you need to move on to the next step.
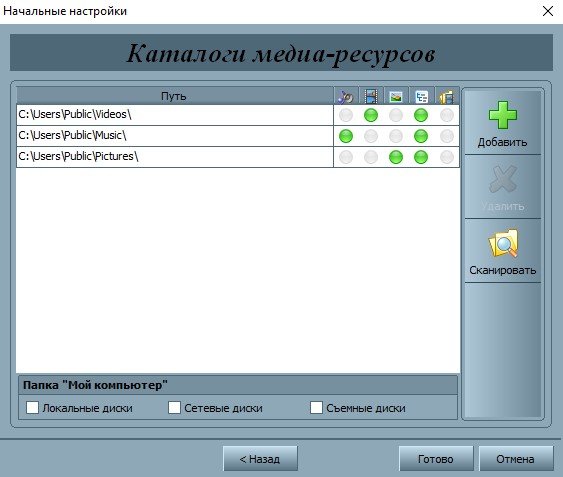
- Select folders from which to take media content. You can select folders with media content at this stage or add them later. After selecting the folders, you need to press the “Finish” button.
- After making the initial settings, you will be prompted to create a backup with settings, image cache and database. You will also be prompted to configure the automatic backup schedule. Then the “Close” key is pressed.
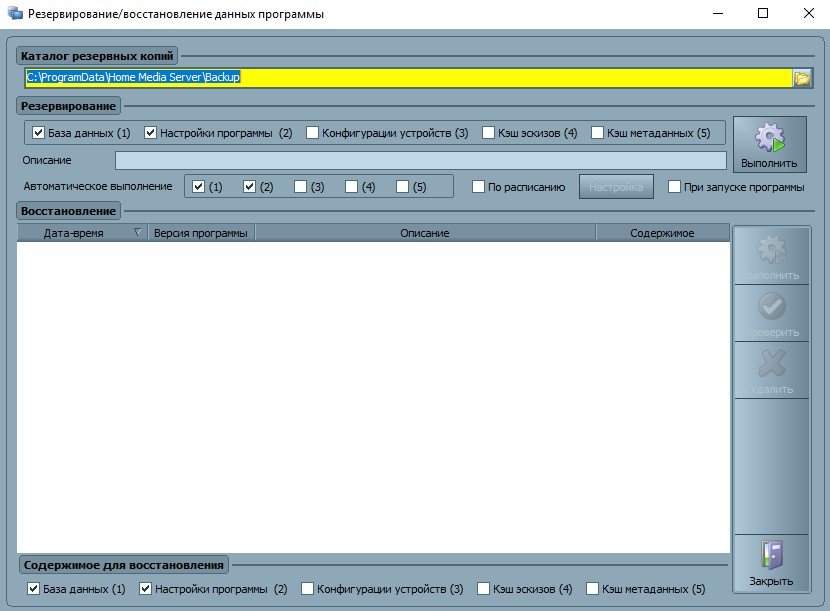
- The main window of the program will appear. There are some important settings to pay attention to here. On the left side, the types of settings will be listed, and on the right side there are sections with specific settings.
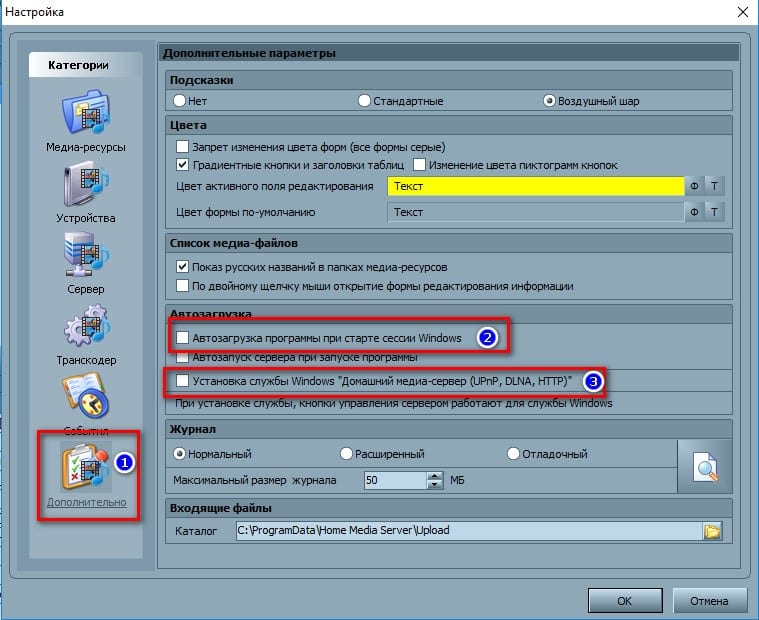
- On the left side, you need to go to the advanced settings and configure the DLNA server to automatically load when the computer is turned on. For this purpose, you need to select the second and third points.
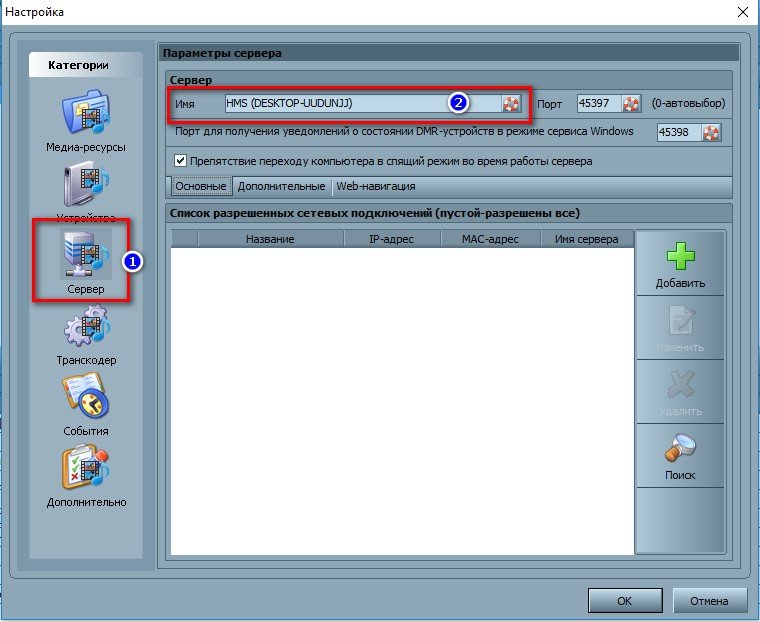
- Next, you need to go to the “Server” tab and specify your DLNA server as it will be on the network.
- After changing the name, you need to go back to adding folders (if this has not been done before or when adding other folders). To do this, press the “Add” button, then select the folder you are going to add. Next, you need to perform its “Scan” to get files from folders into the server.
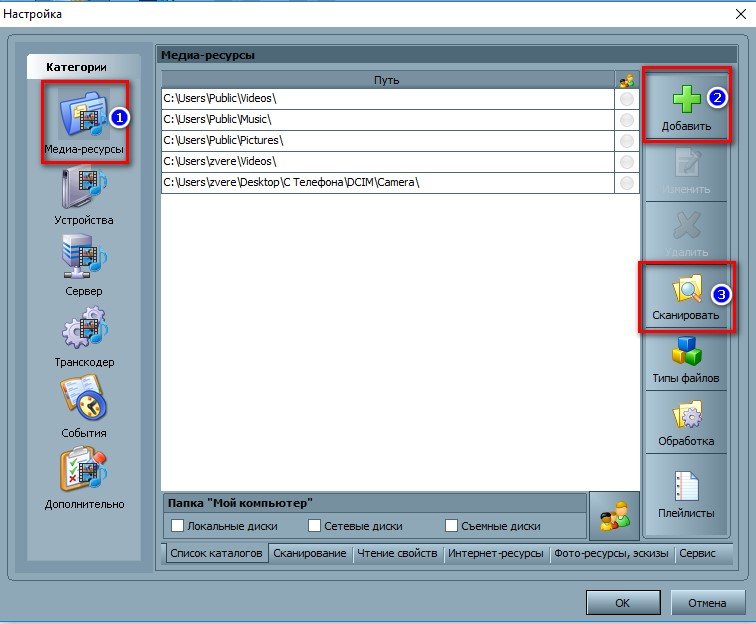
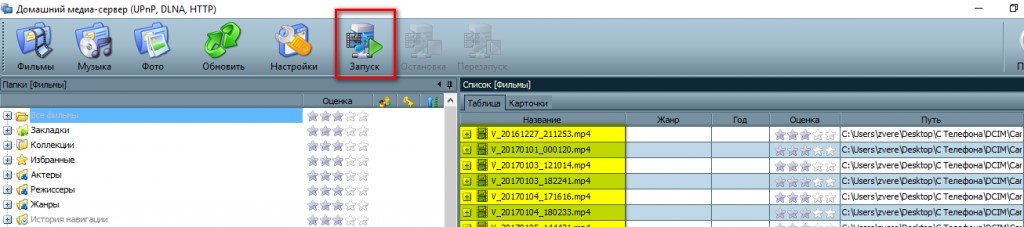
- When done correctly, these files will be listed on the right side of the screen. If there are necessary files in this list, all that remains is to launch and start using the program. To do this, press the “Start” key.
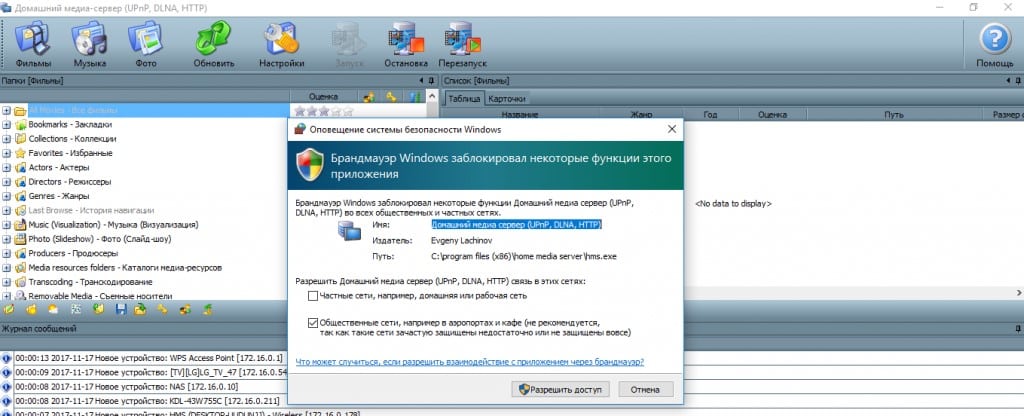
- In the case of enabled “Windows Firewall”, the system will ask for permission to access the network. Select which networks will be allowed access, and press the “Allow access” button.


https://youtu.be/WI2mqYybFhA
Connecting and viewing media content
After starting the program, turn on the TV. If connected correctly, it will be in the “Home Media Server”.
Viewing with LG TV as an example
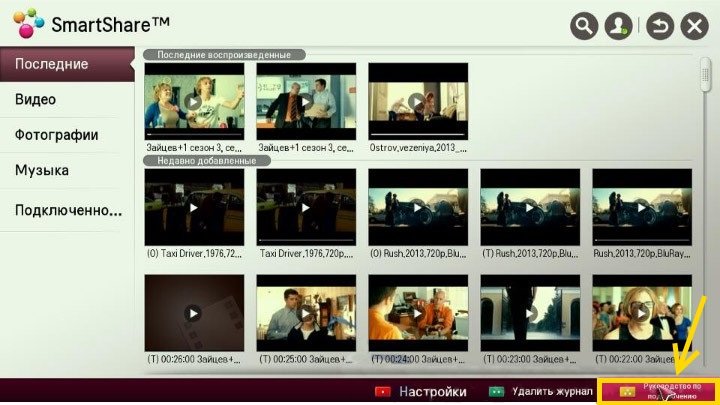
As an example, a variant of the LG LN655V TV receiver with a DLNA server is presented. In the main Smart TV menu, go to
LG SmartShare . First connection:
- When connecting the unit to the TV for the first time, refer to the “Connection Guide” located in the lower right corner.
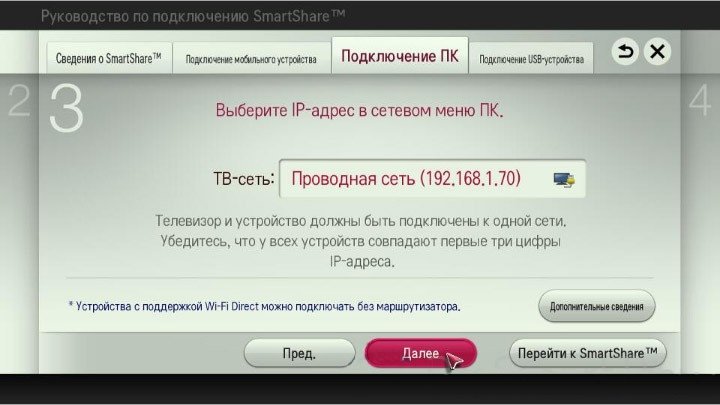
- Next, you need to go to the “PC Connection” tab and click “Next”.
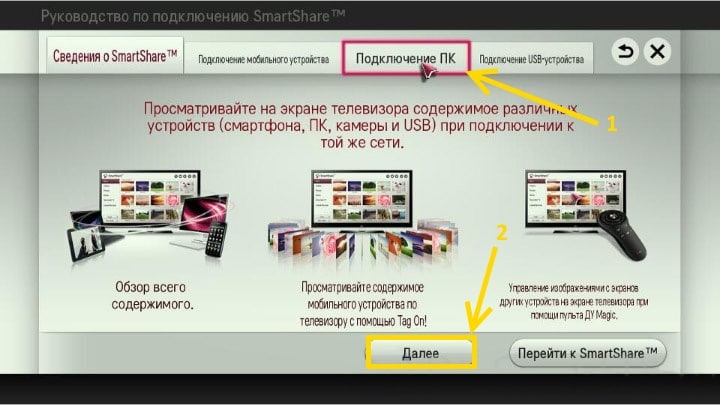
- Then there will be two more windows, where you also need to select “Next”. If nothing is automatically set in the window with the choice of the IP address, then select your home network (wired or wireless, in accordance with the method of connecting the TV).
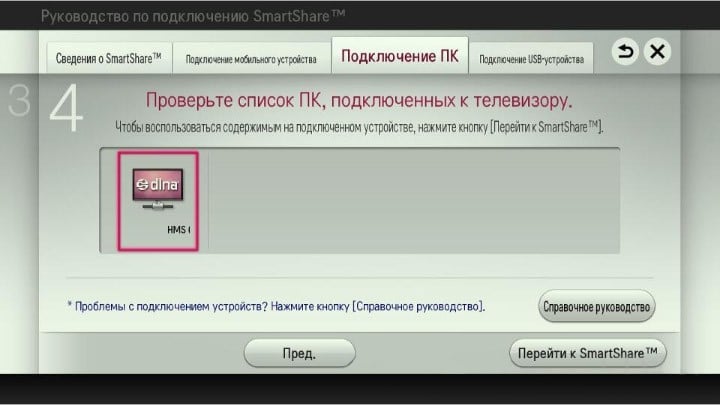
- On the fourth press, the owner’s computer should be visible. If it is missing, you must restart the server.


After initial connection, the device will be displayed at the end of the LG SmartShare “Connected Devices”. If it is not there, you need to restart the server on the computer. For example, for movies, select the “Movies” folder and then “Media Resource Directories”.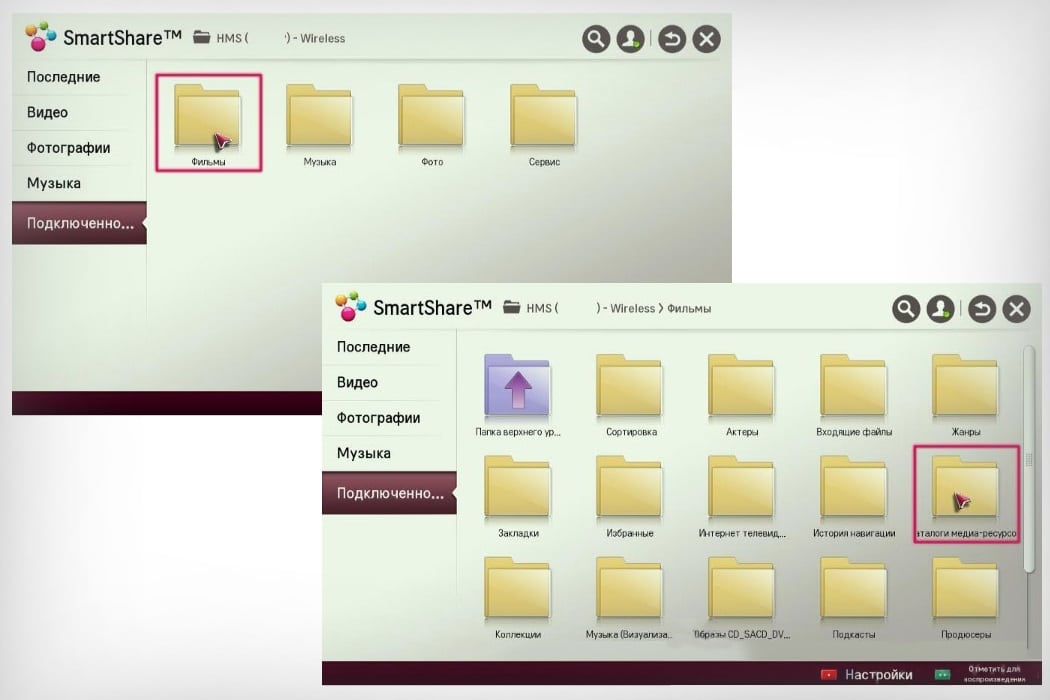 A list of folders that have been added to the HMS settings will appear. You can use any folder to start a movie.
Setting up a home media server using the example of a SONY Bravia TV
In this case, a KDL-46XBR9 TV was used. Algorithm of actions:
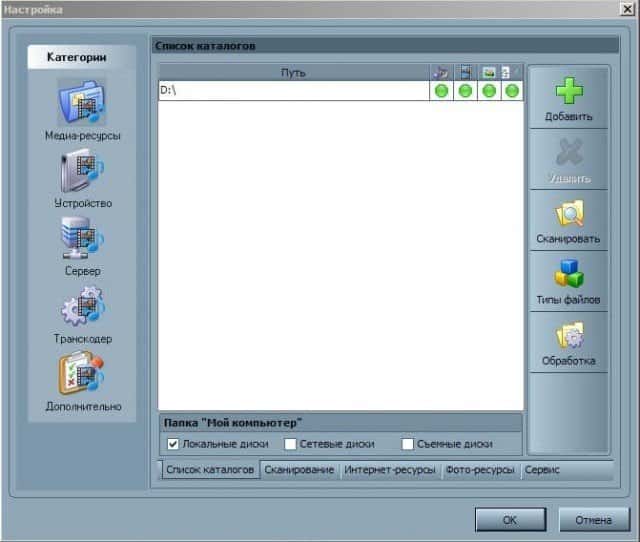
- The “Home Media Server” program is installed and launched on the computer. To go to the settings, use the corresponding key.
- On the right side you can see the “Add” button. In addition, it is possible to select a file for scanning during the start of the program. Scanning is needed if the user changed the contents of this directory. The green circle shows scanning.
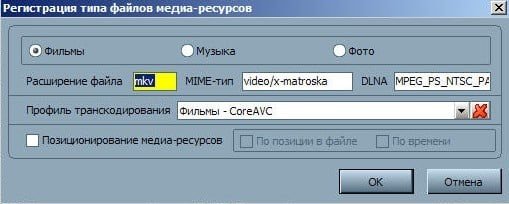
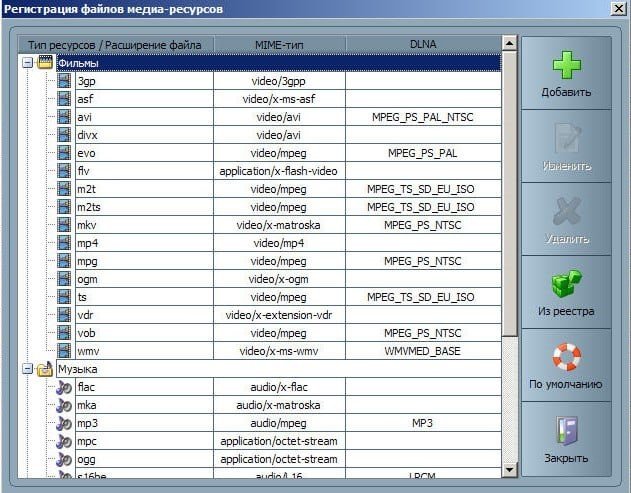
- Next, you need to go to the button with file types on the right side. PAL video files cannot be played on certain TVs. “NTSC” should be inserted for content recognition capability (eg MPEG-PS_PAL_NTSC for avi).
- Transcoding (Core AVC) should be selected for the mkv container. In DLNA, you need to record MPEG-PS_PAL or MPEG-PS_NTSC (depending on the TV).
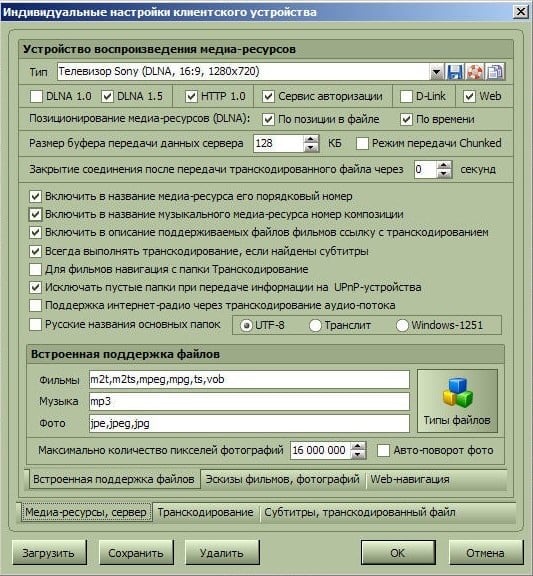
- Then you need to go to “Categories”, then select “Device”. There it is necessary to make a choice of the type and resolution of TV. Select DLNA1 or DLNA1.5. You can find out which version is supported in the instructions or when visiting the official website.
- Configure Web access to the server, for which you need to go to the next item in the categories.
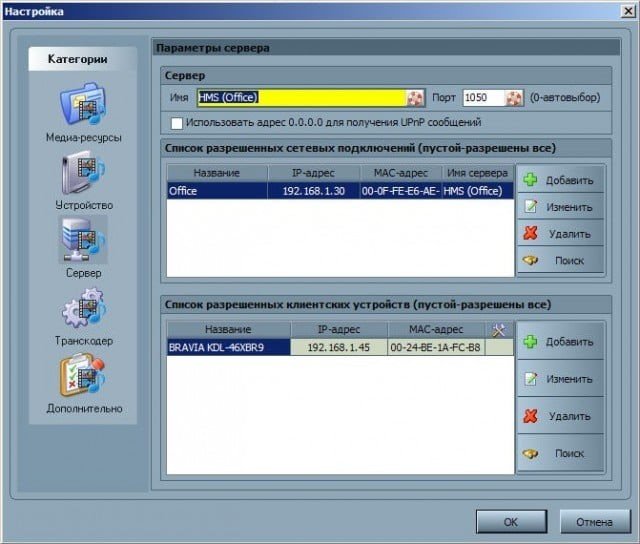
- Add your TV to the client devices. When you click on the icon with a lifebuoy, the program will automatically determine the name of the computer, and it will be added to the “Server” section, the “Name” field. To find devices on the network that support DLNA technology, you need to use the “Search”. Make sure the TV is turned on and connected to wireless or wired networks. After scanning the network, the program will add network clients (TV and computer).
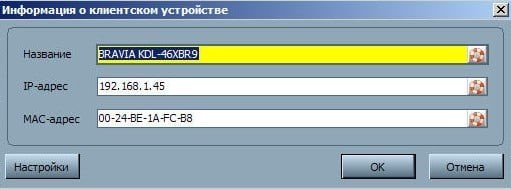
- You need to go to the individual TV settings and insert the above data for setting.
- The “File Types” key will navigate to the registration settings for the proposed fixes.
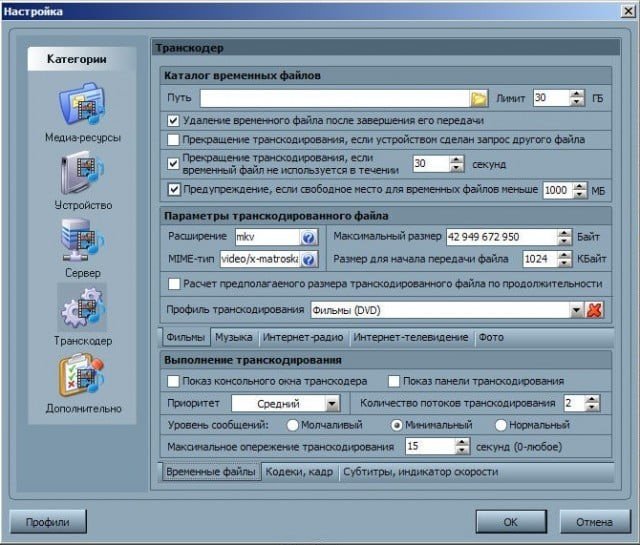
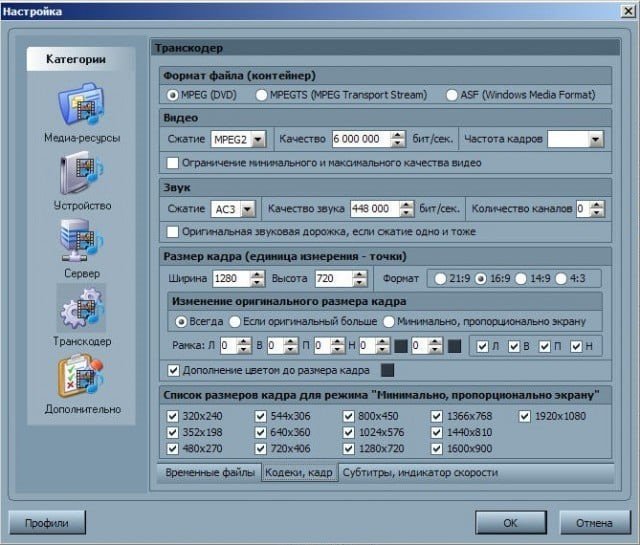
- You should return to the main settings window and go to the “Transcoder” category item. In the “File Format” section, you must specify “MPEG (DVD)”. In the “Video” section, select the MPEG2 compression, quality 6000000. In the “Sound” section, select AC3, 448000, “Frame size” – 1280×720, 16: 9. Changing the original frame size is always. Check the box “Color fill to frame size” and on all the boxes of the lower list.
- Go to the bottom tab “Codecs, frame”. In the item “Sound – Original audio track, if the compression is the same”, if you uncheck this mark, you can exclude the loss of the Russian track during video playback.
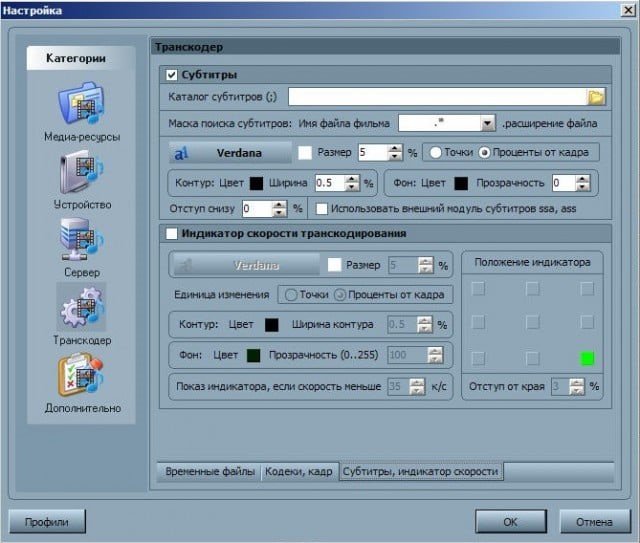
- Next, go to the subtitle tab. Here you can adjust the subtitle picture style according to your preferences and other parameters necessary for the optimal picture of them.
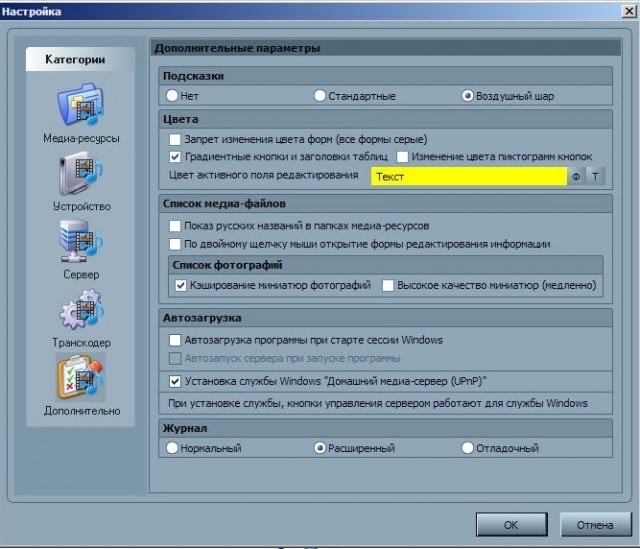
- In the final Advanced category, check the Install Windows Home Media Server (UPnP) service box. This will facilitate automatic loading of the program when the PC is turned on as a service.


Possible problems (errors) when setting up and using HMS and their solutions
Possible problems with setting up Home Media Server as a DLNA server include the following:
- The server was found but does not open on media devices . Configuring the settings in “Home Media Server (UPnP)” will help eliminate this inconvenience. Setting the settings in the “Device” (specify the old and new version of the model): “Authorization service” – “Russian names of the main folders” – in the “Server” section, specify the constant port (from 1024 to 65535).
- Errors occurring, stopping, slowing down during playback . It is necessary to make the choice of “Transcoding” of a smaller frame size and quality of video content, then stop watching the movie so that a sufficient amount of the transcoded file is formed, and set a disk for storing temporary transcoding files that is different from the one used for the paging file. You also need to optimize the system as a whole (disk fragmentation, a list of automatically loaded programs).
- In some cases, a message may appear on the screen that the file type is not supported . After two or three restarts, everything should be fixed.
DLNA technology makes it easy to transfer files between devices connected to the Internet. Setting up your Home Media Server as a DLNA server is straightforward, the main thing is to follow the step-by-step instructions in this article exactly.


Согласен с выводом автора статьи: да, действительно, технология DLNA – несложная, и процесс установки и настройки Home Media Server тоже несложен. Но… моя личная практика установки подобных программ показывает, что вся простота и схематичность их установки наталкивается на такое явление, как индивидуальность каждого отдельного компьютера и телевизора. Я не помню случая, чтобы установка прошла нормально – постоянно по ходу приходится устранять глюки и находить индивидуальные решения для каждого компьютера. В принципе, для специалиста это несложно – но вот простой пользователь никогда не справится с этой задачей. Поэтому мой вам совет: если вы – обычный пользователь, простой телезритель, который просто-напросто хочет расширить возможности своего телека, то не мучьтесь, позовите специалиста – этим вы сэкономите массу времени и избавите себя от ненужной нервотрёпки!
Не так давно приобрел телевизор с функцией SMART. Долго мучился, чтоб настроить просмотр фильмов скачанных на компьютер с телевизора. Перебрал кучу сайтов, пока наткнулся на этот. Скачал Home Media Server, настроил, как описано выше в статье. С первого раза ничего не получилось. Оказывается невнимательно прочитал инструкцию по настройке. Исправил допущенные ошибки и все заработало. Так что если у кого то не получается, то скорее всего так же как и я, поторопились и что то пропустили. Будьте внимательнее.
Мы регулярно пользуемся этой функцией, муж скачивает ребенку мультики на ноутбук через шареман, а смотрим с телевизора, так как ноутбук обычно занят, на нем или я работаю, или муж. Я, честно говоря, не сразу разобралась, как это работает, так как с техникой не очень дружу, а супруг один раз объяснил, потом запсиховал, что ничего сложного тут нет. Стала искать в интернете, статью прочитала эту, вроде все понятно, зрительно информация лучше воспринимается.По инструкции сделала и все получилось 🙂
Перебрал кучу сайтов, пока наткнулся на этот. Скачал Home Media Server, настроил, как описано выше в статье. С первого раза ничего не получилось.
Я не помню случая, чтобы установка прошла нормально — постоянно по ходу приходится устранять глюки и находить индивидуальные решения для каждого компьютера.
По инструкцыи сделал и все получилось!! Спасибо большое!
Мне статья автора понравилась и сильно помогла. Тоже установил эту программу. У меня телевизор LG как раз с таким же сервером как и, в статье. Тоже никак не могли настроить телевизор. Прочитав данную статью, сделал так как там рассказано и всё стало нормально. Но не всё настроилось с первого раза. В этой статье весьма хорошо рассказано и приведены примеры, в которых показано как и что нужно делать. Здесь рассказано о таких вещах как: Подключение и просмотр медиаконтента, общая настройка HMS как DLNA сервера ,установка Home Media Server.