Where is the recycle bin on Android devices, how to find it, how to use it correctly and how to empty it, where is the recycle bin with deleted files in Android. On computers, when you delete a file, it is not completely destroyed, but is moved to the trash. If necessary, it can be removed back. In a smartphone or tablet running Android, looking for the same recycle bin as on Windows or MacOS is in most cases to no avail.
- Why are users of Android devices looking for a shopping cart?
- Is it possible to find the recycle bin on Android?
- Working with the shopping cart on Android
- How to enter the cart
- How to get files back from the recycle bin from Android devices
- How to delete files from the Android device recycle bin
- How to create a full-fledged shopping cart on Android
- Working with Google Files
- Working with the application
- Dumpster app
- Working with the application
- Working with files in the Recycle Bin
- Other features of the Dumpster cart
Why are users of Android devices looking for a shopping cart?
- To recover files that were mistakenly deleted and are needed again.
- Similar to Windows, to free up memory space occupied by deleted files.
We will try to answer this question and help solve the problems that many users have.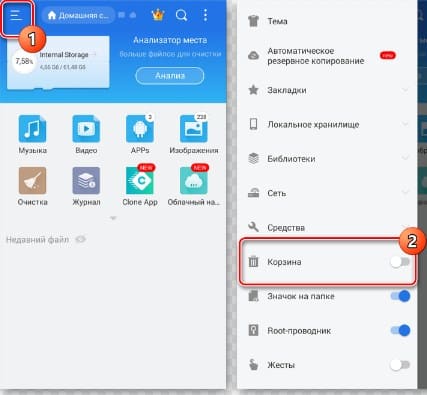
Is it possible to find the recycle bin on Android?
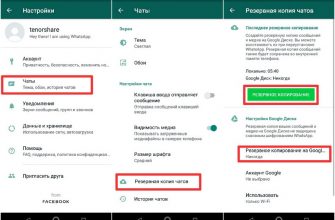
On computers, the Recycle Bin is a system folder for which 10% of memory is allocated by default. Deleted files are transferred to it in a compressed form, but sufficient for recovery. But if you try to find something similar on Android under the “Trash”, “Recovery” or “Recycler” labels, nothing will come of it. There is no recycle bin as such in Android, so you don’t have to look for it. This is due to the fact that the operating system was initially developed for smartphones and tablets that at that time did not have large amounts of built-in memory. If, like the first phone on this OS – HTC Dream, there are only 256 MB of standard flash memory on board, then allocating 10% of it is wasteful. Therefore, it was decided not to store “garbage”, which is often forgotten to be completely removed, and to save resources on this. Later, Google, seeing an increase in the amount of permanent memory of mobile devices, implemented saving of deleted files. True, this is not a full-fledged basket like on a PC. Only deleted photos and videos are stored. This is more than enough for mobile devices, since all other documents are usually processed in cloud storage.
The Android Recycle Bin has one more feature. In a similar folder on the computer, deleted files are stored until the user empties the recycle bin manually; here the period is limited to 30 days. Further information is deleted permanently.
Working with the shopping cart on Android
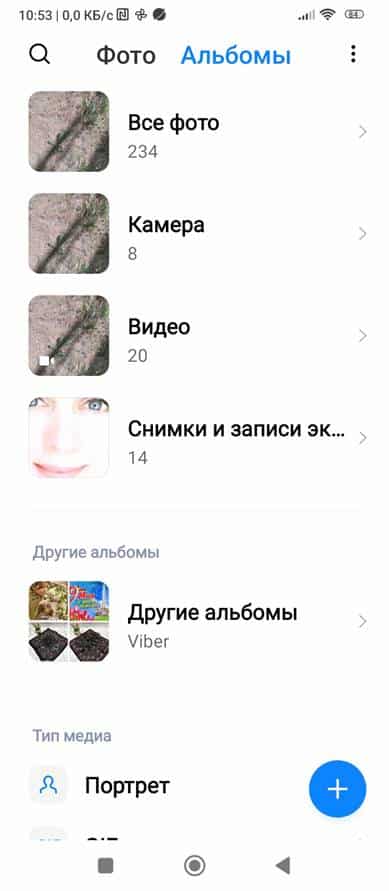
Regardless of the manufacturer (Samsung, Xiaomi and others and the software shell of the operating system), the deleted files are located in the “Gallery” folder.
Important. The software shell is like a wrapper for the operating system. Many manufacturers use it to make the product recognizable. Basically, it only changes the appearance and slightly the functionality.
It is on the desktop. If it is not there, then it is advisable to take it out. To do this, go to “Settings” then “Applications” and “All applications”. Find “Gallery”, click on the shortcut and hold it. The desktop will appear. Move the shortcut to the desired location and release it. How to empty the trash on a Samsung phone and other Android devices: https://youtu.be/qHihrzOrJjk
How to enter the cart
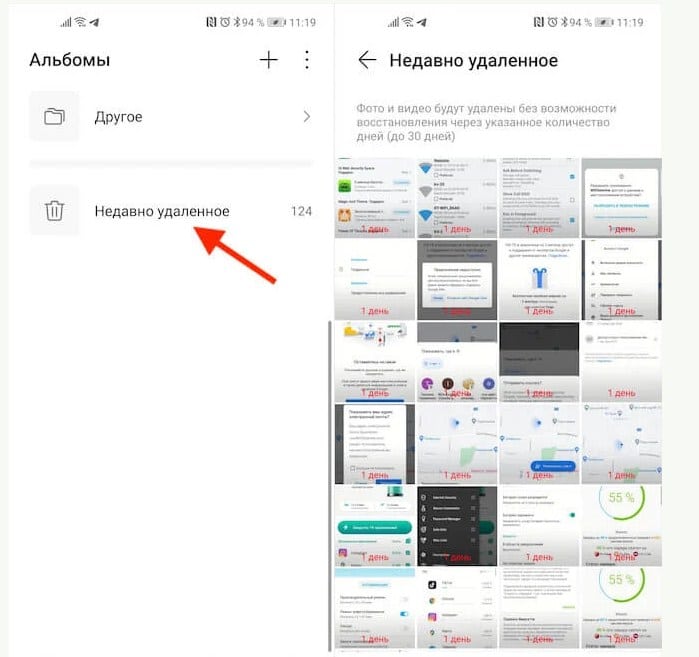
- We go to the gallery by clicking on the icon.
- Find the “Albums” tab.
- In the window that opens, look for “Deleted objects” and it will be the trash can.
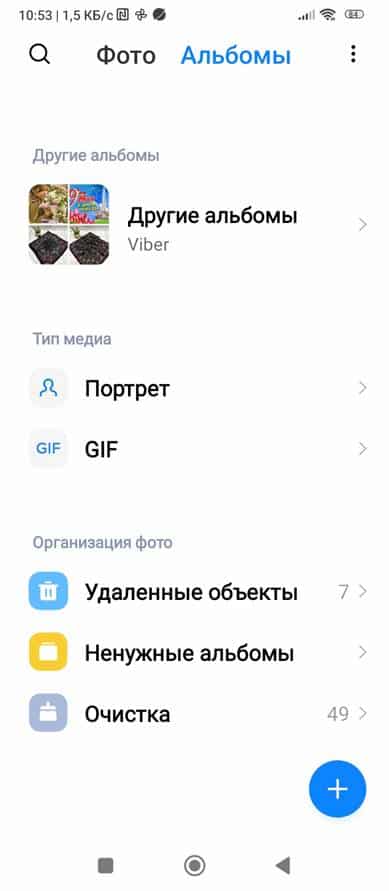
- A series of thumbnails of deleted images and videos opens before us. Video files can be identified by the triangle (Start symbol) in the image.
You cannot see the photo in full size directly from this folder, or you cannot start the video; it must be returned to the photo folder or album where the files were previously stored.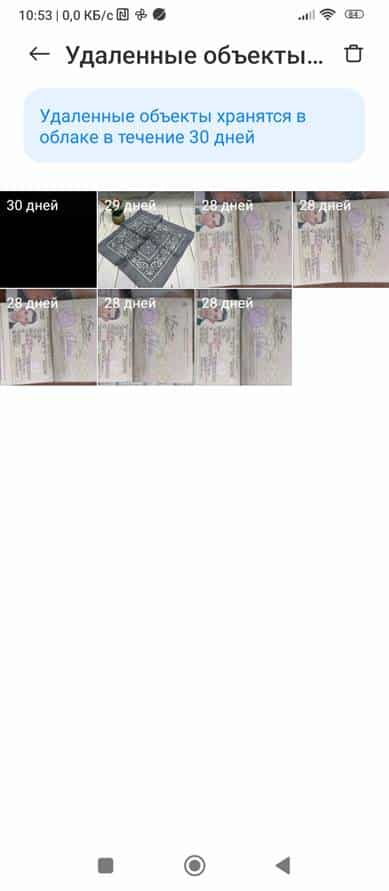
How to get files back from the recycle bin from Android devices
To return deleted files, follow these steps: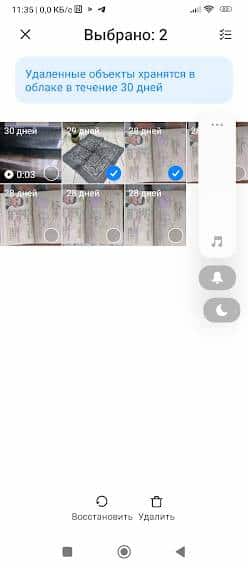
- We go to the “Gallery” and “Deleted Objects” as written earlier.
- We look through the thumbnails of the images.
- If you need to enlarge, then touch the desired photo or video, wait a little, it is scaled to fit the screen. To go back, click on the arrow in the top left.
- Select the required images. To do this, touch the lower right corner so that a check mark appears there. You can choose any quantity. An image can also be selected when viewed in full screen. To do this, check the button in the top right.
- Having selected the files to be restored, touch the icon with an arrow curled into a circle at the bottom left of the screen. The image is returned to its place in the gallery or album and disappears from the deleted files.
How to delete files from the Android device recycle bin
We repeat the steps as during recovery, but just click not on the circular arrow, but on the image of the trash can in the bottom right. Images are permanently deleted and memory space is freed.
Important. Depending on the Android shell, the symbols on the buttons and icons may be different, but the purpose is always intuitive.
How to create a full-fledged shopping cart on Android
When you still don’t have enough of a full-fledged recycle bin for files of all formats, you can create one yourself. To do this, you need to download the Google Files file manager or the Dumpster application. They are available on Google Play.
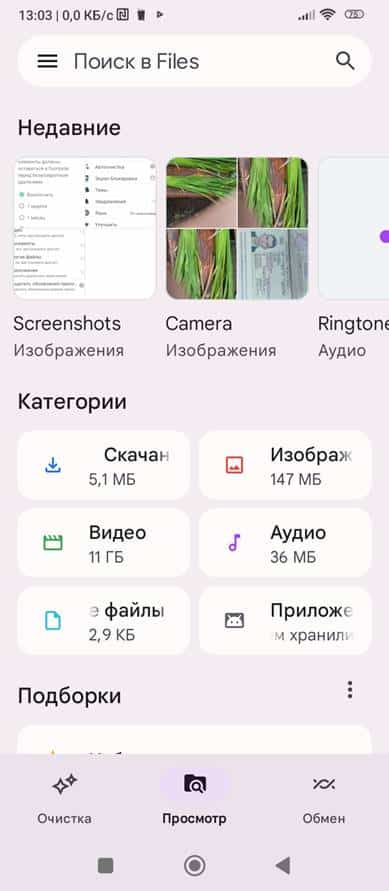
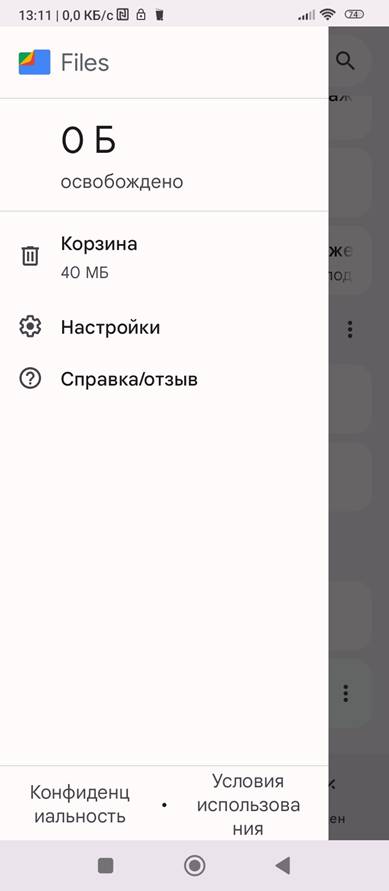
Working with Google Files
This manager is also convenient for sorting files on the device and assessing the memory status. Installation:
- Open Google Play and use the search bar to find the application.
- Download and install it. Advertising gets in the way a little, but that’s inevitable. You can install the Pro version with advanced features, but it is paid.
- After installing the application, we give permissions to access files and so on.
Working with the application
In the window that opens, you can see our files, organized into categories: downloaded files, photos, videos, documents, and so on. Having entered the category, we see the list. You can open the document.
- To delete an open file, click on the image of the trash can at the bottom right. The system asks again, and upon confirmation, moves it to the trash. This application stores deleted files for 30 days.

Files are stored for 30 days - To access the basket, go to the menu (three bars at the top left). The panel opens. On it, click on the inscription “Trash”, a list of stored files opens.
- Select the required files by checking the box.
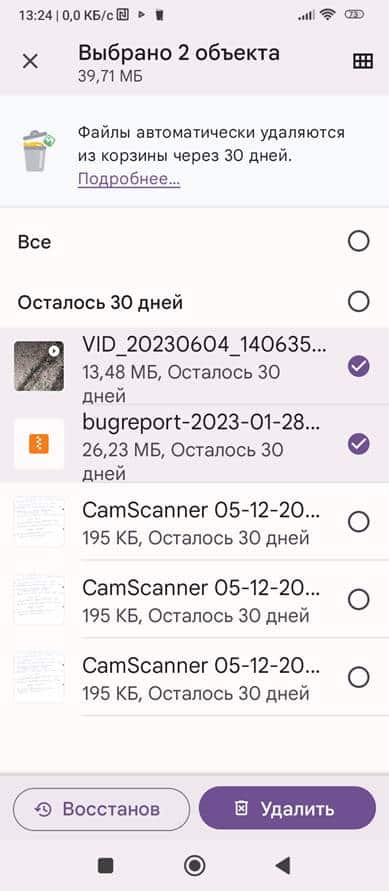
- Then click the button below “restore” or “delete”. The required action will be performed on the file.
Dumpster app
This program gives you more options for working with files.
Working with the application
After downloading and installation, the application icon will appear on the desktop. It is similar to the standard Windows Recycle Bin. It’s hard to get confused. When you first launch the program, it requires permission, so we give it. 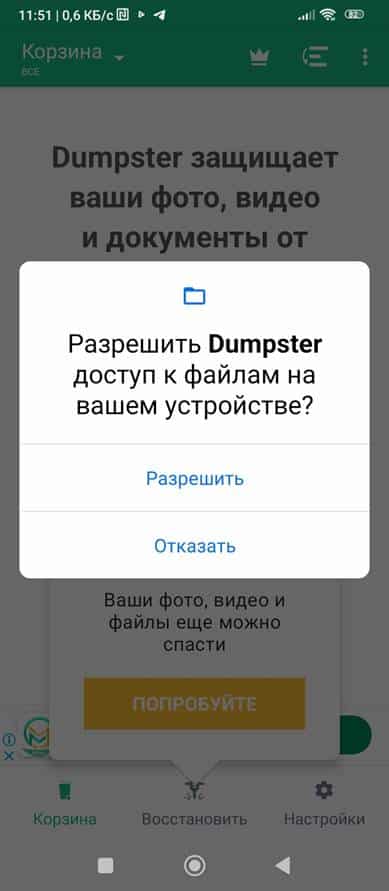 After this, a window will appear with a list of documents hidden in the trash.
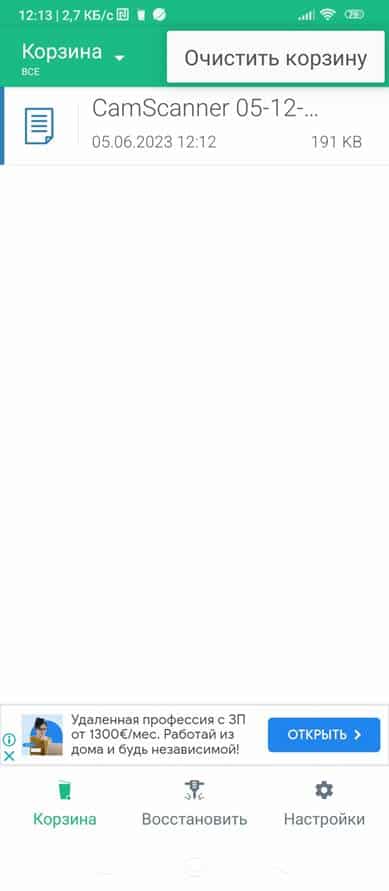
Working with files in the Recycle Bin
To view, open Dumpster, the deleted files immediately become visible to us. Then you can perform the following operations:
- Recover all files at once. To do this, click the “Restore” button at the bottom in the middle.
- You can select one file by clicking on the name.
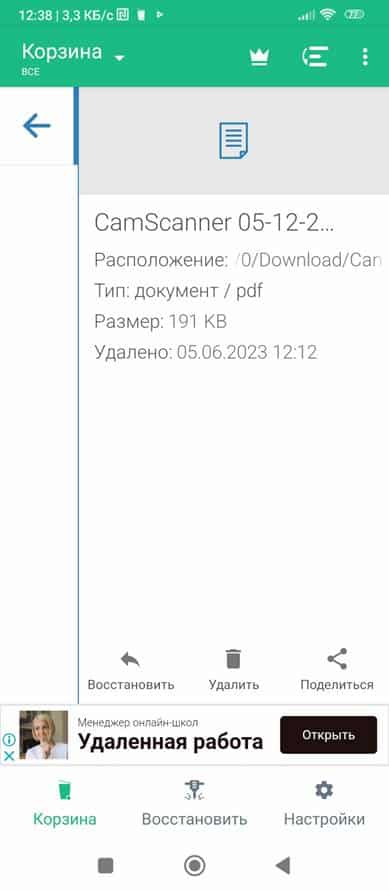
- Then, in the pop-up window, perform the action: by clicking on the button at the bottom left to restore, by clicking in the center to delete permanently and by clicking on the right to send to another application (email, Viber, telegram, etc.).
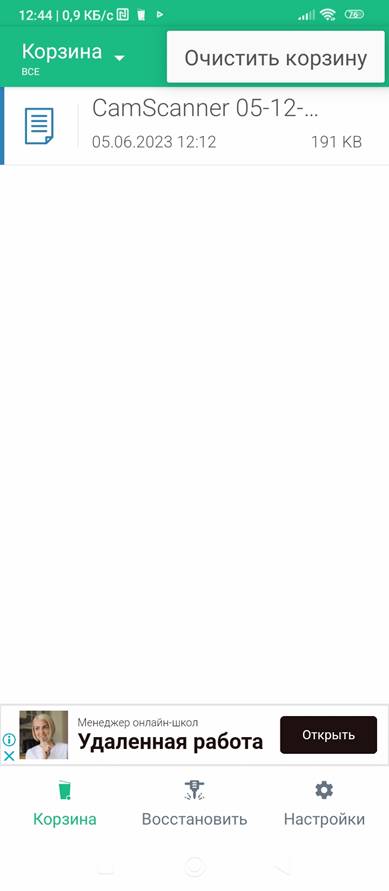
- You can empty the trash can. To do this, select the menu (three dots on the top right) and click on the message that pops up: “empty trash”.
Other features of the Dumpster cart
In addition to deleting and restoring files in the Recycle Bin, you can perform other actions. To do this, click on the “settings” icon at the bottom after the “trash” and “restore” icons. A new window will open, it allows. 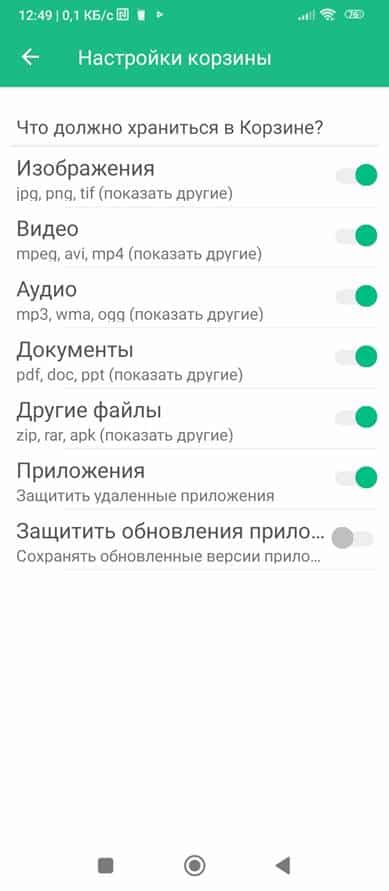 Select the type and extension of files saved in the recycle bin.
- Set up protection for them.
- Enable or disable auto emptying of the trash can and select a storage period from 1 week to 3 months.
I hope our article helped solve the problem of finding the recycle bin on devices running Android and was both educational and practically useful.