How to fix the TV on the wall, how to choose a TV mount on the wall, fasteners for plaster, foam block, brick, wood. TVs with a large diagonal are difficult to place in an apartment without losing usable space. In a small room, it is important to optimize the area, rather than buying a special cabinet for the TV. TV wall mounts come to the rescue: they allow you to place the screen on the wall or even on the ceiling. With the swivel mount, rotate it however and whenever you want.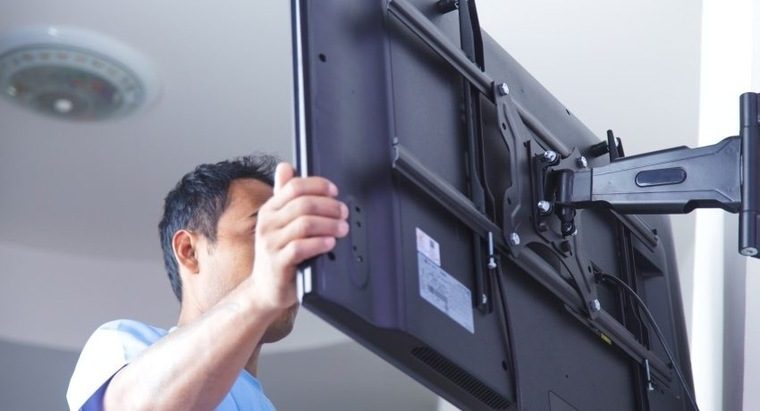
- What mount does my TV need?
- Wall brackets
- Ceiling brackets
- Preparing and fixing the TV on the wall
- We fix the bracket
- How to mount a TV on a wall without a bracket
- Features of mounting on different wall surfaces
- How to fix a TV on a plasterboard wall
- How to install a TV on a wooden wall
- How to install a TV on a foam block wall
- Top 10 TV Mounting Bracket Models on the Wall
What mount does my TV need?
To find out, just open the tips for using the TV. Three types of data are required: weight, diagonal and mount size. The latter can be measured independently if it is not specified in the manual. The list of VESA standards should indicate the type of mount available for your TV. Usually, the mounting hole pattern is indicated by a square – 400 x 400 or, for example, 75 x 75. Here is a list of VESA standards. It is desirable that the width of the screen be in the interval between the types of fastening. So the bracket will not warp and will not crawl out of the wall: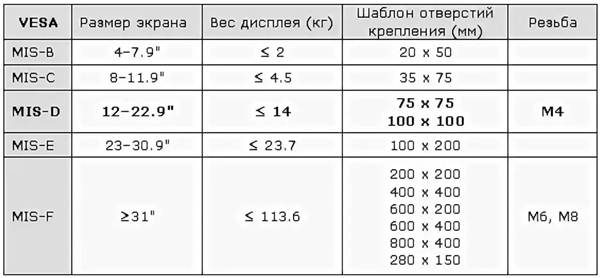 Make sure the mount does not protrude from the back/back of the TV. Many TVs have protrusions behind the mounting area, for this reason you need to be careful when installing. Let’s go through the types of fasteners in turn. It is advisable to choose the bracket so that it has a margin of safety. So you can be sure that if you accidentally touch the mount will not be damaged. Be careful with tilt-and-swivel brackets: leave them for at least half of the total weight of the Smart TV. Where can you mount your TV?
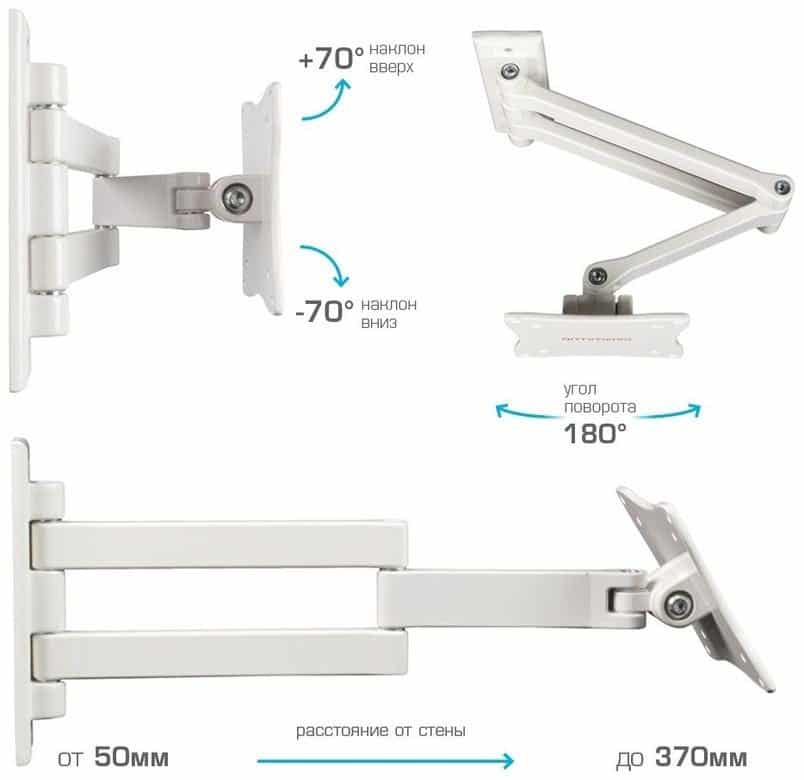
- On the wall . The easiest installation option. Tilt-and-swivel brackets will make it more convenient to sit in front of the sofa or make redevelopment. Some models can extend from the wall more than a meter.
- To the ceiling . Such fastening is popular in cafes and bars. A pragmatic solution to save space. A convenient option, despite the pretentiousness.
- On a table/stand . You can fix the monitor / TV in the workplace so that it does not take up extra space.
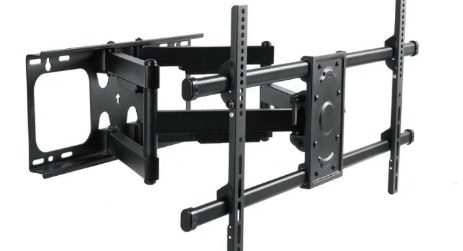
Wall brackets
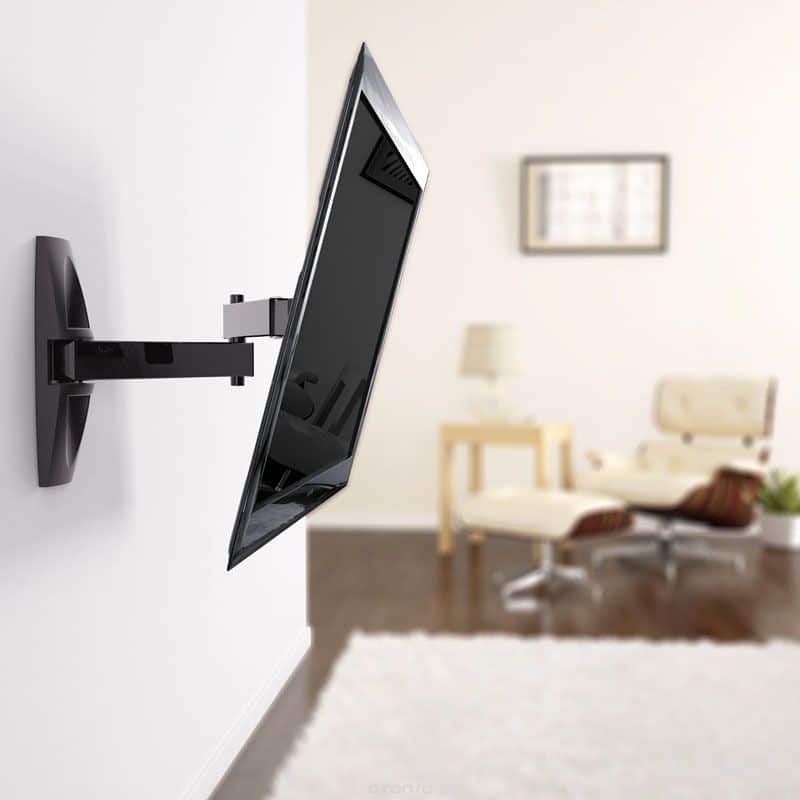
The TV must not touch the wall when installing the swivel mounts. Sometimes the bracket does not provide a free exit for the wires. Then it makes sense to choose a different configuration, or to make mounts with your own hands.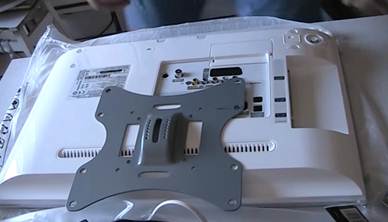 The butterfly in this picture covers most of the connectors. This is because the TV does not support this type of mount.
 Swivel wall bracket for 23 inches in the photo above.
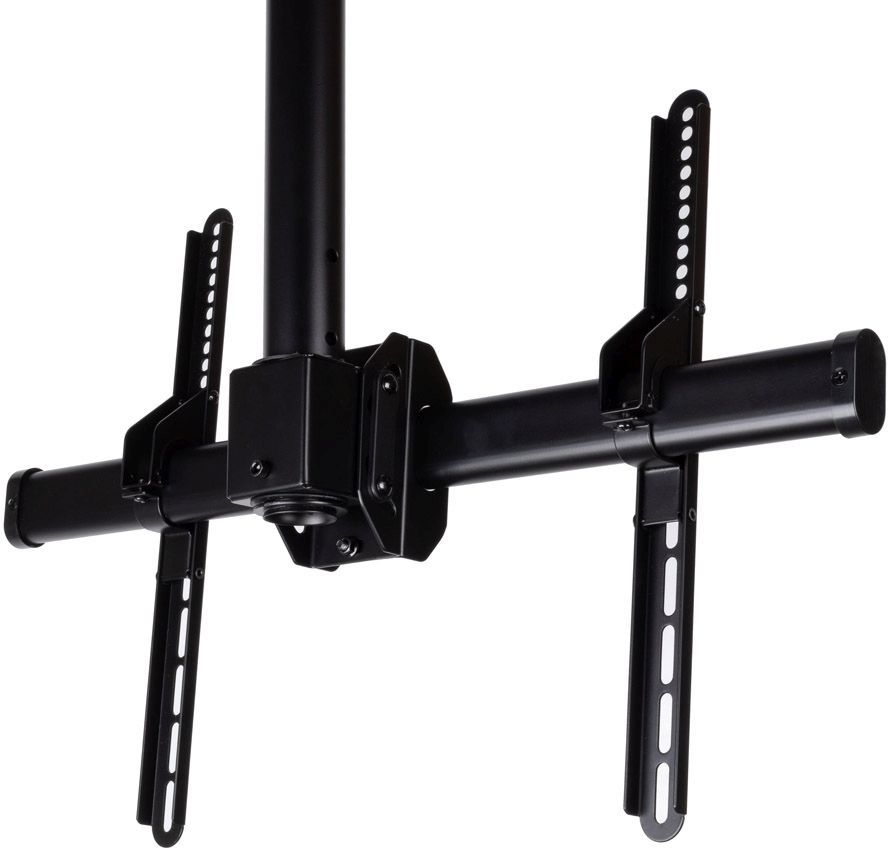
Ceiling brackets
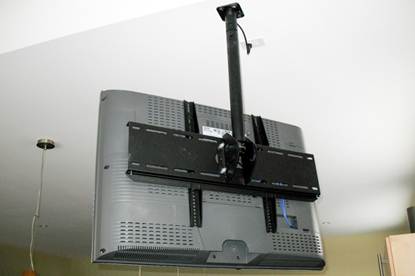
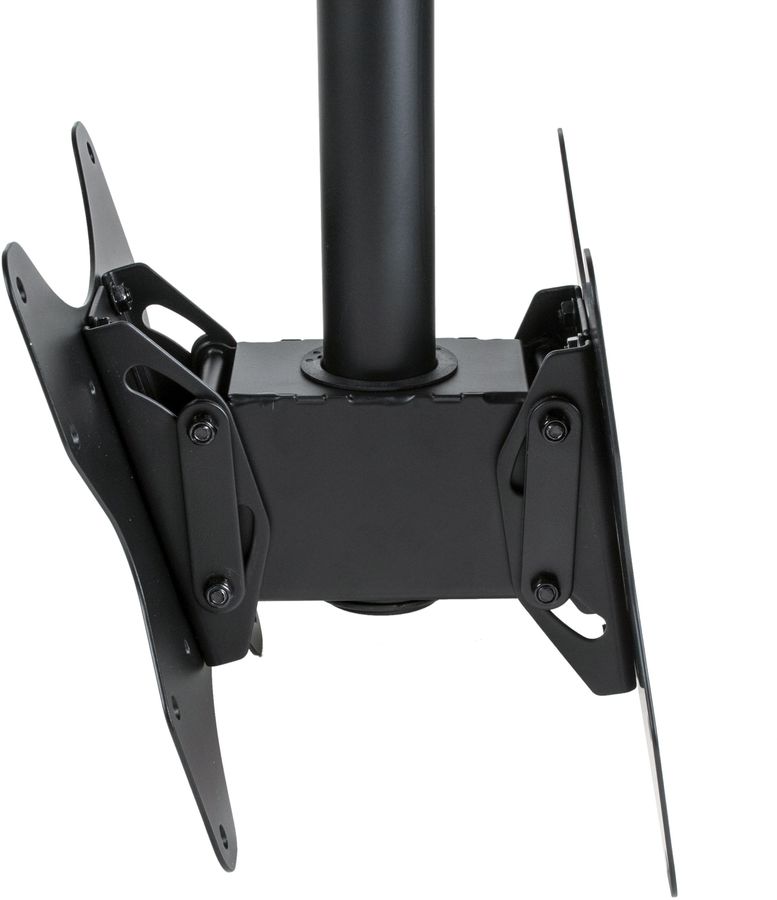
They usually consist of a hanging post, a support foot and a panel with fasteners. The panel is designed in such a way that it is impossible to fix a screen that does not fit the size. When planning the installation, it is important to know the diagonal of the screen, otherwise the TV may not fit under the ceiling. We recommend installing a large TV on a swivel bracket. So it can be folded to avoid damage. When choosing a mount, take into account the loss of clamping force of the wing pins. The multi-piece bracket must be stronger than calculated in the table above. Otherwise, after a while, the TV will fall. If the ceiling interior consists of drywall, the conventional drilling method will not work. An example of a tilted ceiling bracket that should not be overloaded with the weight of the TV: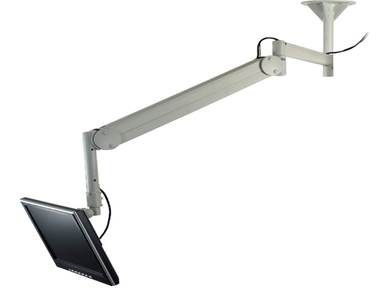 Ceiling mounts are installed using dowels for concrete with a hexagon head. You will also need a puncher and a screwdriver. Half a meter from the marking of the installation of the bracket itself, two holes are drilled for plumb lines. Try not to hit the metal structures inside the ceiling. Here’s what the ceiling mount looks like:
Preparing and fixing the TV on the wall
To mount the TV, you will need a screwdriver, a drill with a drill of the required diagonal and a construction pencil. If you have brick walls, you need a hammer drill instead of a drill.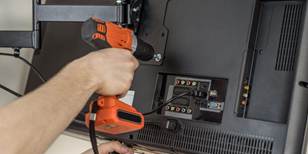 Plasterboard walls require special fixings for installation. What else is required during installation:
- package;
- a vacuum cleaner;
- roulette;
- masking tape;
- level.
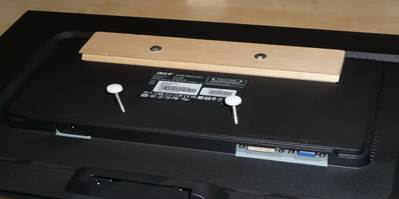
A hammer and wrenches may also come in handy. When preparing the mounting location, remember that the bottom third of the screen should be at the level of the viewer’s eyes. Make a cardboard mockup or hold the TV at the right level to gauge the level of convenience. If your TV has wires connected at the back and not on the side, you will need to purchase special washers. They will add a couple of extra centimeters and make it convenient to connect the cords.
We fix the bracket
Install the guides into the grooves of the TV. If the back of the TV is concave, you will need special barrel bushings to fix it. Simply attach the universal bracket to your TV’s VESA connectors. Don’t throw away the screws, some of them are hard to get. They can come in handy when replacing the screen.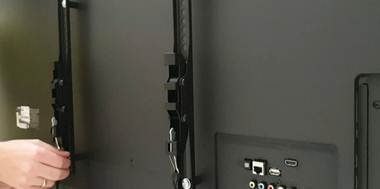 Attach the assembled structure to the wall and mark its top and bottom edges with a pencil. Apply painter’s tape to keep wallpaper from getting dirty. Mark the location of the holes. Do not use the factory level that comes with the kit: it is deprived of quality and accuracy. Set the bracket aside. Mark the desired drilling depth on the drill with masking tape, otherwise you risk damaging the wires inside the wall. To remove dust, stick a bag under the place of work, or walk with a vacuum cleaner. Once you’re done with the holes, dust them off and start placing the mount. You will either have to hammer the dowels inward with a hammer, or twist the bracket with a screwdriver. It depends on the surface material. The necessary information will be on the package. Fix the center of the structure so that it can be leveled. Next, screw in the remaining slots. Time to move on to wires. Connect HDMI, SATA and other cables before installing the TV. Take and secure the screen. Usually, you just need to insert the rails or hinge into the bracket. Ready.
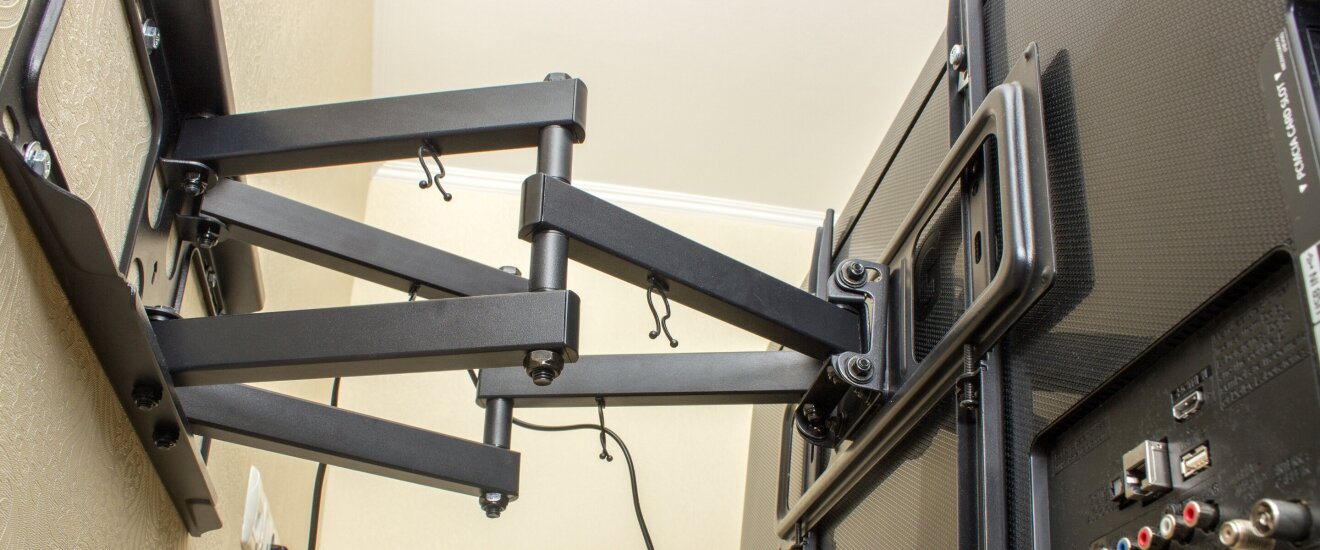 Swivel mount for TV on the wall[/ caption]
How to mount a TV on a wall without a bracket
This method is simpler, cheaper, but it will deprive you of functionality and convenience. Rotate the screen and rotate it will not work. Suitable for vehicles that do not support accessible mounts, or if the mounts interfere with operation.
Don’t overload the wall. Thin drywall surfaces will not support the weight of a plasma or wide-angle screen. It is better to hang a massive TV on the ceiling or on a brick wall.
The user manual should say whether the monitor can be installed tightly. Do not act at your own peril and risk: a homemade TV wall mount may not withstand due to the fragile back wall. If you hang the TV on such fasteners, it may crack or fall. General design scheme:
- Acquisition of a metal plate or pipe. Buying corners.
- Creating a solid frame for the screen size. Pencil marking on the wall. Drilling holes for the grooves of the rear wall.
- Connecting the frame to the corners with bolts. At this stage, the design should be reliable. Installing the structure on the back of the TV.
- Four corners are attached to the holes in the wall symmetrically to the fasteners that were previously installed on the back of the monitor.
- Selecting a suitable position for the TV. Depending on the number of holes on the corners, there may be three or more ways to install it on the wall. Next, connect the structures and you’re done.
Features of mounting on different wall surfaces
It was mentioned above that the method of mounting the TV on the wall depends on the surface material. Drywall fasteners will break if the bracket’s footprint is too small. Wooden walls do not require the complexity of installation that is needed when installing on brick or cinder blocks.
How to fix a TV on a plasterboard wall
For decorative surfaces, wood bars are required. A metal profile 2 mm thick is also suitable. They will help evenly distribute the load. A plasterboard wall will not withstand more than 30 kilograms. Take into account the weight of the bracket itself. The bracket comes with plastic dowels. Don’t use them on drywall, they will break. Take self-tapping dowels. An extravagant solution would be to install the TV inside the plasterboard. This is possible if there is a strong base inside the HP sheet or the screen weighs less than 7 kg. How to mount a TV on a plasterboard wall – how to choose fasteners and mount: https://youtu.be/peOsmU2s4iM
How to install a TV on a wooden wall
Fasteners are attached to the wooden base with ordinary self-tapping screws. This is the easiest material for installing any equipment. Instead of drilling holes, it is enough to screw the self-tapping screw into the wall. Heavy plasma TVs should not be mounted on wooden bases. Depending on the type of wood, wall thickness and type of bracket, the surface can withstand from 30 to 60 kilograms.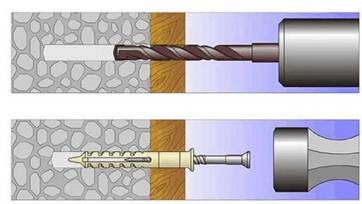
How to install a TV on a foam block wall
The foam block collapses from a heavy load, so you should not mount TVs weighing more than 60 kilograms on it. When installing, screw dowels with an elongated spacer are used. Chemical anchors are also suitable. Before installing the latter, quick-setting substances are poured into the holes.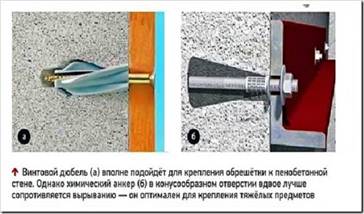
Top 10 TV Mounting Bracket Models on the Wall
There are many non-standard TV mounts on the Internet. Even if they have good ratings from users, we advise you to look at a proven alternative. Non-standard types of fasteners are created for certain installation conditions. If the product description does not say what it is suitable for, bypass it. Factory brackets, available for most TV models in the online store, are more budgetary, but are only designed for mounting in brick and similar materials. The average cost of such mounts without the functions of rotation and tilt is 600 – 2,000 rubles. Good tilt-and-turn brackets will cost 3,000 – 5,000 rubles. Professional TV mounts are more expensive, but more functional and more reliable. Such brackets will allow you to mount the TV on drywall or wood. In operation, they are more convenient than factory models. The average market price is 900 – 3,000 rubles for conventional brackets. Tilt-swivel ones are more expensive: from 1,300 for simple options, up to 10,000 for ceiling mounts with the ability to remove the TV to the ceiling. The best universal brackets on the market:
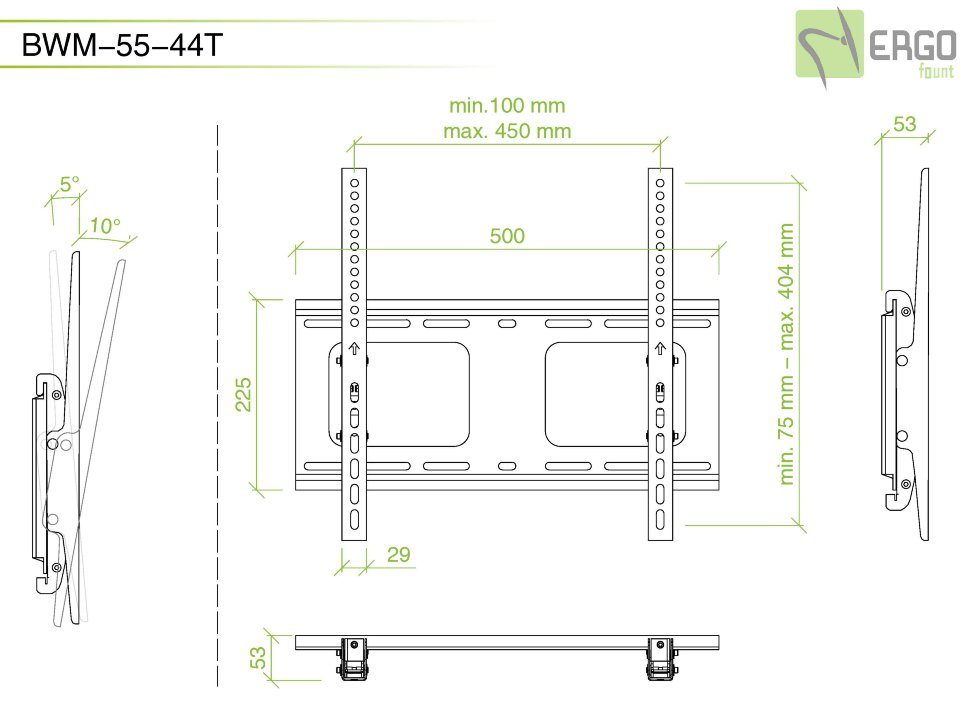
- Bracket ERGOFOUNT BWM-55-44T. Reliable bracket with tilt adjustment function. Withstands up to 80 kilograms of weight and almost does not protrude from the wall. Made from high strength steel. VESA standard: 200×200 – 400×400 mm. Cost: 4 300 rubles.
- Bracket for 23-55 “ITECH LCD543W . Withstands up to 30 kilograms of weight. This tilt-and-swivel bracket will cost only 1,200 rubles. VESA standard: 75×75 – 400×400 mm.
- DIGIS DSM-P 5546 . Fixed bracket with cable compartment. Withstands up to 35 kilograms. Routers and other equipment can be conveniently placed in the mounting panel. VESA standard: 200×200, 300×300, 400×200, 400×400, 600×400 mm. Cost: 7400 rubles.
- Bracket NB F120 . Supports screens up to 27 inches. Tilt-and-swivel arm can withstand up to 15 kilograms of weight. It costs 3,000 rubles. VESA: 75×75, 100×100.
- Bracket Arm-Media LCD-7101 . Swivel mount for 26″ TVs. Withstands up to 15 kg of weight. This tilt-swivel bracket costs 1,700 rubles. VESA: 75×75, 100×100 millimeters.
- Bracket Chief iC SP-DA2t . Withstands up to 30 kilograms. Tilt – 15 degrees when rotated 90 degrees. Bracket weight 4 kg. Designed for small screens with a diagonal of 30 inches, but very functional. It costs 4,500 rubles. VESA: 200×100, 200x200mm.
- ARM MEDIA LCD-3000 . Angle adjustment up to 45 degrees. The angle of rotation is 180 degrees. Built-in wiring. A fall protection mechanism is provided. Designed for monitors up to 90 inches and weighing up to 60 kilograms. It costs 8200 rubles. VESA: 100×100, 200×100, 200×200, 300×200, 200×300, 300×300, 200×400, 400×200, 400×300, 400×400, 600×400.
- KROMAX COBRA-4 . Designed for screens up to 75 inches and weighing 65 kg. Swivel angle: 80 degrees with a 10 degree tilt angle. It costs 3,800 rubles. VESA: 100×100, 200×100, 200×200, 300×200, 300×300, 400×200, 400×300, 400×400, 600×400
- ARM MEDIA LCD-1650 . Designed for TVs with a diagonal of 48 inches and weighing 45 kilograms. It is possible to mount on a sloping ceiling. It costs 6,000 rubles. VESA: 100×100, 200×100, 200×200.
- Bracket Kromax Dix-24 . Tilt-and-swivel bracket for 55″ TVs and weighs 35 kg. Tilts 12 degrees. It costs 1,700 rubles. VESA: 200×100, 200×200.
 How to choose the right bracket for the TV, what mount is needed to mount the TV on the wall: https://youtu.be/hfZS2NeUE_g For most models, it is easy to find a mount with the desired functionality. The quality of such brackets is usually acceptable. By removing the TV from a shelf or table, the space in the apartment will become significantly larger. With further rearrangement, the TV can simply be tilted. The probability of touching the screen suspended from the wall is small.