
Many users watch videos on personal computers or tablets, but DVD players are still in use. Modern players differ from older models in compactness, functionality and number of outputs. Manufacturers have thought of the best connection methods for each option.
- What types of connectors are there?
- HDMI
- SCART
- RCA
- S-Video
- What equipment might you need?
- DVD connection to modern TV
- Via HDMI
- Through SCART
- Via RCA
- Via S-Video
- Using a component cable
- What if the TV is old?
- How to connect old DVD to new TV?
- Connecting to a TV with a built-in player
- Functionality check and setup
- Possible difficulties and errors
What types of connectors are there?
Before connecting the player to the TV, carefully inspect the ports. The configuration and the number of connectors in modern devices are significantly different from those of the old model. HDMI, SCART, RCA and S-VIDEO ports are widely used.
HDMI
It is more expedient to use this cable model for plasma. Thanks to it, a high level of video and audio signal is provided.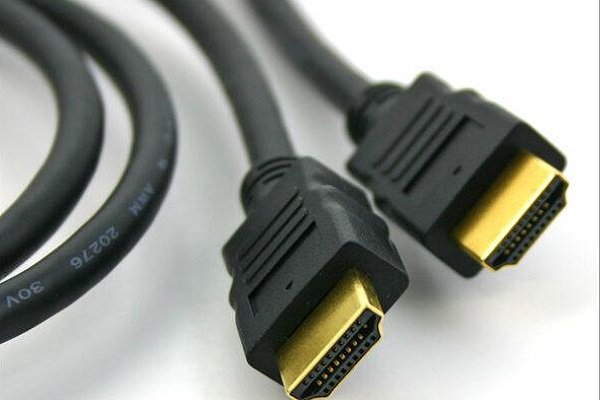 For a high-quality picture and clear sound, experts recommend using a wire called High speed with Ethernet. The cable is suitable for modern devices.
SCART
This model is rarely used for the player. To connect, you need a SCART-RCA connector (for old TVs) or SCART-HDMI (for modern TVs). Basically, these models go out of production, but you can always find an analogue.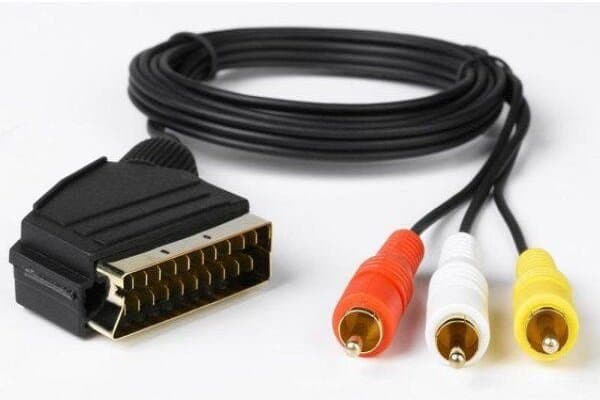
RCA
Cables of this type have been used for many years and are relevant, despite the appearance of new models. They are used to connect equipment through a “tulip”. The set of connectors is colored in 3 colors: white and red – for audio signal transmission, yellow – for video playback.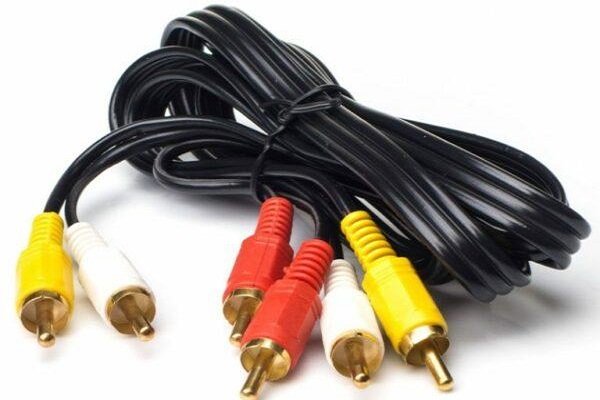
S-Video
It is recommended to choose this type if another connection is impossible. The port transmits only the image, for sound and video, purchase an adapter cable. If the video player is not equipped with a designated connector, and the TV is not equipped with a conventional antenna adapter, experts advise using S-Video-RF.
What equipment might you need?
There are situations when there are no identical outputs on LCD TV and DVD. In this case, purchase the appropriate adapters. List of additional equipment:
- SCART – RCA. Only one cord is used, the plug of which transmits sound and image at the same time.
- SCART – S-Video + 2RCA. Additional cables are mounted, since the main SCART adapter does not transmit sound separately.
The connection process is simple, but consider the nuances for each type of adapter.
DVD connection to modern TV
Select the required connection method, purchase the required adapter and follow the instructions to install the DVD player. Disconnect the TV and VCR from the mains during the connection, then evaluate the quality of the installation.
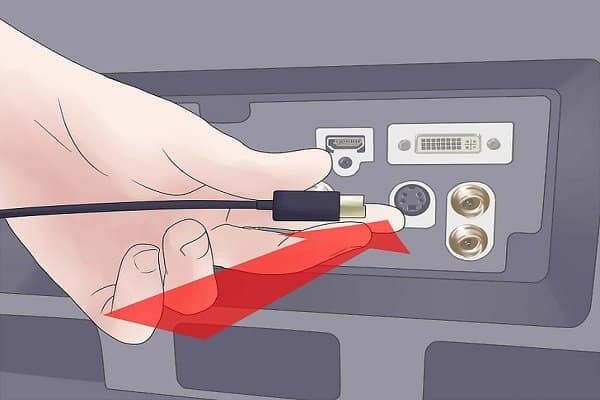
Via HDMI
Modern technology is fully equipped with an HDMI interface. It is used to connect video players to TVs LG, SONY, SAMSUNG, etc. Some models are equipped with several outputs, each of which has its own number, for example, BBK players are connected with a cable to connector number 1 or HD Mlin. The connection goes as follows:
- Insert the plug on the player into the HDMI connector (may be called HDMIOut).
- Plug the other end into the port on the TV of the same name.
- Turn on the player and TV, open the settings menu.
- Find “Signal Source”.
- Select the HDMI interface that provides the data transfer agreement.
After the performed actions, restart all devices and start viewing. In case of poor reception, carry out the setup with the disc turned on.
Through SCART
SCART is connected to the device using an RCA adapter, i.e. the cable is marked SCART-RCA. The installation process is the same as described above. Some players are equipped with multiple connectors. Connect to the interface at the port marked Ln.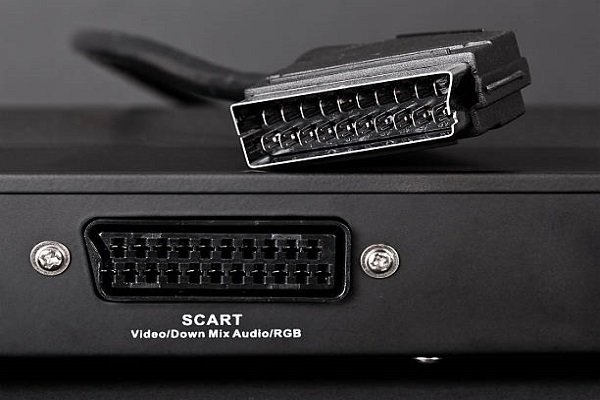
Via RCA
Tulips is the easiest way to connect. There should be no problems, since the TV sockets and plugs have their own color (for connecting video and sound). On a Supra TV, the feature is not color coding, but lettering – Video, AudioR, L (left and right channel). Installation is carried out as follows:
- Connect the cord to the appropriate ports on the player and TV.
- Select the AV button on the remote control.
After a few minutes of booting, the TV should recognize the new device. On smart models, after going to the settings, go to “RCA / AV Source Signal” and reboot the equipment to detect the VCR. If your TV is equipped with an HDMI interface, purchase an RCA to HDMI adapter.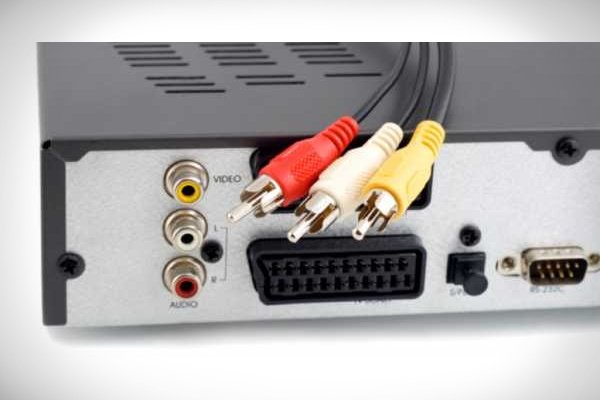
Via S-Video
This type requires an additional adapter, since the connector is connected to the antenna output. The plugs are color-coded for easy installation. Connecting a video player looks like this:
- Connect the color terminators to the DVD, observing the correct color ports. Connect the other ends to the adapter.
- Install the auxiliary cord adapter into the antenna output connector.
- Open the settings and check the box for the AV or S-Video signal.
- Install separate speaker system (s) to the 6.35 or 3.5mm ports.
 Disconnect the equipment from the network for a few minutes to reboot, then check the correctness of the incoming signal.
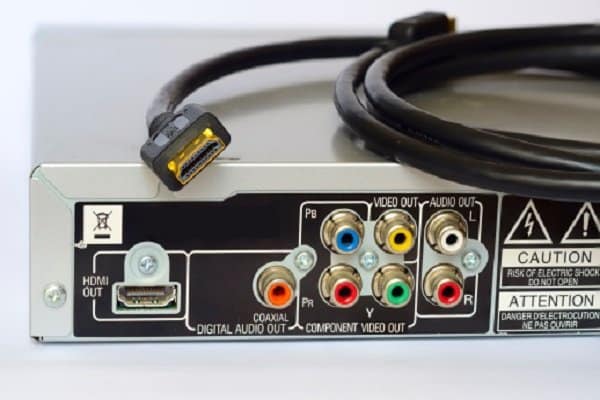
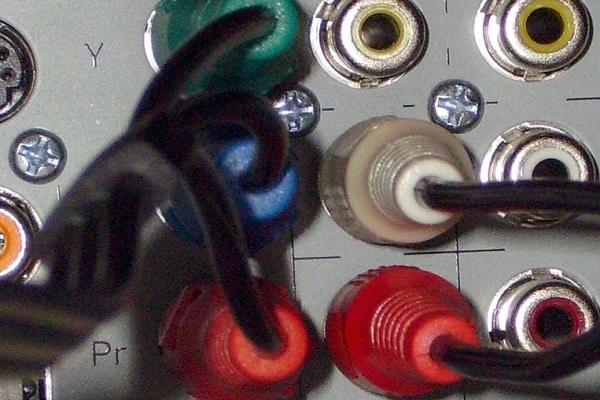
Using a component cable
The component cord is equipped with five tulips. These ports are required for image stabilization (clarity, contrast, etc.). Synchronizing TV and player is not much different from connecting using HDMI. The model is quite common, and these connectors can be seen in many new TVs. Follow these steps:
- Find video outputs (red, green, and blue) and audio outputs (red and white).
- Connect the cord to the video device according to the color.
- Perform the same procedure on the TV.
- Turn on the TV and press “Component 1” in the setup menu.
Further information on this method of DVD connection can be found in the instructions for your particular TV.
Please note that the 2 plugs are the same color (red). If playback or sound doesn’t work, swap the limit switches.
What if the TV is old?
In this case, use an RCA cable to connect the TV to a video installation, since equipment manufactured in Soviet times is equipped with only 1 connector – antenna. There are several connection options:
- Using an RF modulator. Video and audio signals from DVD are fed to the RCA port, converting the information, and then sent to the antenna output.
- Constructive TV change. In this case, install the RCA jack and plug it into the TV on the rear panel (specialist assistance is required).
- Using the audio output of the player. If the TV has only one port, connect the cable to the audio output of the player, where there are 2 connectors of different colors (use only white), and to the input on the TV.
After completing the steps, go to the menu and select the Mono or L / Mono mode. When the system starts up, play the video.
Old TVs can poorly receive a signal, since the sockets become unusable over a long period of operation. If this happens, it is more advisable to carry out repairs to replace the connectors.
How to connect old DVD to new TV?
Every old video player has RCA outputs. To connect to a modern TV, it is optimal to purchase an RCA-HDMI adapter. Basically, Sony, Dexp, Supra and Vityaz are equipped with such a connector. For example, in the same DVD and TV Samsung models, the adapters practically do not change, the factory cable may also work.
Connecting to a TV with a built-in player
Do not use cords or additional adapters to connect to a TV with a built-in video player. To operate the device, insert a disc and start playback. The device-specific instruction manual will guide you through the appropriate settings.
Additional connectors in these TVs are located on the rear panel. The Philips TV may have ports on the front.
Functionality check and setup
After working on connecting DVD to TV in the selected way, check and perform additional sound and picture settings. The process is as follows:
- Connect the equipment to the network and turn on “Start”.
- Start the video player.
- Press “Setup” on the remote control.
- Open Picture Options and follow the onscreen prompts to make the appropriate adjustments (sound, color, contrast, etc.).
Insert a disc and watch playback quality and stereo. In case of poor-quality settings, repeat the manipulations.
Possible difficulties and errors
Even an inexperienced user can handle hardware synchronization, but in some cases various problems arise. The main difficulties that often appear after installation:
- The devices do not turn on. There might be a problem with the electrical outlet, outlet, or cable. Plug in another device, and if it also doesn’t work, then it’s the power supply. Examine the cords for damage. Do not try to fix it yourself, it is better to contact a specialist.
- There is no sound or picture. Check the integrity of the audio / video cable. If a violation is found, replace it. Do not skimp on the quality of the wire, since the reception of the connection depends on it. Replace the cord and perform the setup again.
- The TV is receiving a signal with poor picture quality. Connection reliability may be an issue. The plug must not move in the socket. If the connector does not fit tightly in the hole, take the equipment to repair.
- Poor or no sound quality. It may be due to the fact that there is a third-party object in the connection contact. Periodically clean the dirt and dust.
- Defective equipment. When purchasing a device not in specialized stores, check it on site by connecting it to various devices. If the warranty period has not expired, the equipment can be handed over for free repair or replacement of parts to any service center.
- Disc friction is heard during playback. This is due to clogging of the signal “head” on the video player. If you have experience, carry out the cleaning yourself, but for a quality diagnosis, it is better to contact a specialist.
- The adapter overheats during DVD operation. Damage to the cord (mainly at bends) is a problem. In this case, purchase a new wire, as a malfunction may result in a fire or short circuit in the wiring.
Make sure that the wire connecting the connectors is not stretched or pinched. This can lead to a breakdown or poor signal transmission in the near future. Connecting a DVD player to a TV is available for everyone. If all hardware and cables are in good working order, the installation process takes less than 10 minutes. The main thing is to strictly adhere to the connection recommendations specified in the instructions for your devices.


